Fatality File: Lockout – Tagout

INCIDENT

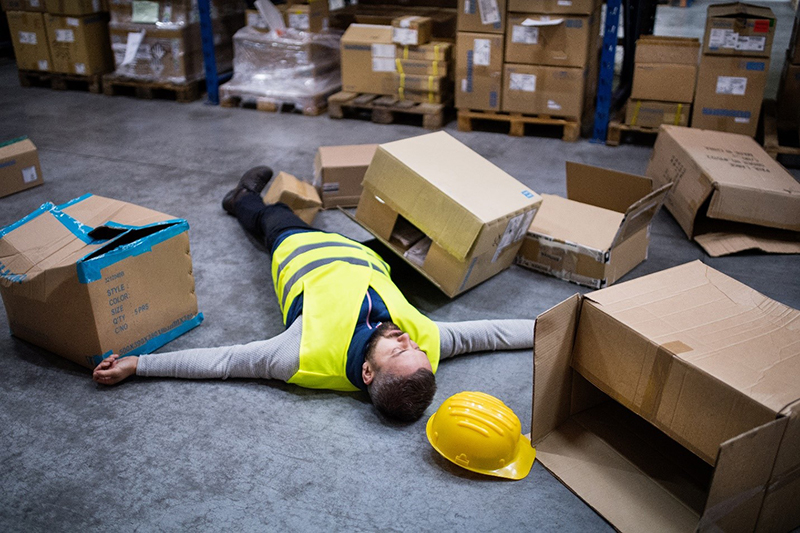
Jose Melena, 62, worked at Bumble Bee’s plant in Santa Fe. He entered a 35-foot-long oven the morning of October 11, 2012. A coworker, mistakenly thinking Melena was using the restroom, loaded the oven with 12,000 pounds of tuna and turned on the oven. Another worker turned off the oven about two hours later. When it was opened, Melena was found inside.

The industrial oven was dangerously outdated. Bumble Bee replaced all of their ovens after the accident, costing about $3 million.

They also paid $1.5 million to Melena’s family. Another $1.5 million added up in fines, penalties, court costs, and miscellaneous expenses.

All together, this accident cost Bumble Bee approximately $6 million and Jose Melena’s life. Adherence to lockout tagout procedures would have made this all avoidable.

NEED TO KNOW

Employees servicing or maintaining machines or equipment may be exposed to serious physical harm or death if hazardous energy is not properly controlled. Craft workers, machine operators, and laborers are among the 3 million workers who service equipment and face the greatest risk.

The four-page general industry standard (29 CFR 1910.147), published in September 1989, was designed to prevent the accidental start-up of machines or other equipment during maintenance and servicing. Under the rule, hazardous energy sources must be “isolated and rendered inoperative” before work can begin. Hazardous energy sources include electrical, mechanical, hydraulic, pneumatic, chemical and thermal.

Lockout / Tagout / is series of safety procedures designed to prevent accidents causing serious injuries including fatalities to employees on the unexpected startup of the equipment or energy while servicing.

Anyone who operates, cleans, services, adjusts, and repairs machinery or equipment should be aware of the hazards associated with that machinery. Failure to lock out or tag power sources on equipment can result in electrocutions, amputations, and other serious-sometimes fatal-accidents.

Some of the causes of accidents:

  • The machine or piece of equipment was not completely shut off before a maintenance or repair operation. Not only must the machine be turned off but also the power source that goes to it.
  • The machine was turned on accidentally, either out of carelessness or because the person who turned it on did not realize that another worker was there and could get hurt.
  • The machine was not working correctly but was not fixed, turned off, locked or tagged, and someone who did not know about the problem used it.
  • Moving equipment was not blocked.
  • Safety procedures were inadequate or had not been properly explained.

BUSINESS/ REGULATIONS

The OSHA standard for The Control of Hazardous Energy (Lockout/Tagout), Title 29 Code of Federal Regulations (CFR) Part 1910.147, addresses the practices and procedures necessary to disable machinery or equipment, thereby preventing the release of hazardous energy while employees perform servicing and maintenance activities. The standard outlines measures for controlling hazardous energies—electrical, mechanical, hydraulic, pneumatic, chemical, thermal, and other energy sources. In addition, 29 CFR 1910.333 sets forth requirements to protect employees working on electric circuits and equipment. This section requires workers to use safe work practices, including lockout and tagging procedures. These provisions apply when employees are exposed to electrical hazards while working on, near, or with conductors or systems that use electric energy.

OSHA requires an annual audit of authorized personnel by an observer who will ensure that each associate follows the lockout/tagout procedure correctly, including putting locks in the right places, testing the machine for active energy sources and warning others to stay away from the equipment.

OSHA also requires annual audits of written lockout procedures to identify changes in the machinery that may have rendered any documented procedure obsolete and to ensure regular refreshes of LOTO processes.

STATITICS

Lockout/Tagout (LOTO) was one of OSHA’s top ten cited violations for 2017. Given that it’s estimated LOTO prevents 120 deaths and over 50,000 worker injuries each year, this is a critical part of every EHS program and should be leveraged to its fullest potential. Workers injured on the job from exposure to hazardous energy lose an average of 24 days for recuperation.

In FY2016, the Occupational Safety and Health Administration received reports of 868 amputations caused by workplace incidents nationwide. Each and every one of these life-altering accidents was preventable

Lockout/tagout is an important safety measure to ensure that equipment does not become activated during repair or maintenance procedures. Here are seven statistics relating to lockout/tagout.

  1. Lockout/tagout procedures apply in these four circumstances: When workers are servicing or maintaining equipment and unexpected startup of a machine or the release of stored energy could occur; when during normal production, workers must remove or bypass a guard or safety device; when during normal production, workers place any parts of their bodies into the danger zone or the machine’s point of operation; and during all set-up activities. (National Institute for Occupational Safety and Health (NIOSH))
  2. Up to 10 percent of industrial incidents are believed to be related to failure to properly lock out equipment. (Occupational Safety and Health Administration (OSHA)
  3. Lockout/tagout protects workers from serious or fatal physical hazards, including these six examples: shock/electrocution; amputations; pinching injuries; crushing injuries; cuts; and burns.
  4. Seven forms of hazardous energy found in workplaces include: electrical; thermal; chemical; hydraulic; pneumatic; mechanical; and gravitational.
  5. Six important lockout/tagout procedures include notifying all affected workers; machine shutdown and hazardous energy isolation; application of lockout/tagout; verification of isolation; lockout/tagout interruption for testing or repositioning; and release from lockout/tagout. (Health & Safety Ontario)
  6. Three examples of energy-isolating devices are valves, circuit breakers and disconnect switches. During lockout, the main power source for the machinery or equipment must be disconnected and locked out at all times. (WorkSafeBC)

PREVENTION

Responsibilities of Employers

The lockout/tagout standard establishes the employer’s responsibility to protect employees from hazardous energy sources on machines and equipment during service and maintenance.

This is generally done by affixing the appropriate lockout or tagout devices to energy-isolating devices and by deenergizing machines and equipment.

Employees need to be trained

The training must cover at least three areas:

  • aspects of the employer’s energy control program;
  • elements of the energy control procedure relevant to the employee’s duties or assignment; and
  • the various requirements of the OSHA standards related to lockout/tagout.

How Do Employers Protect Workers?

  • Develop, implement, and enforce an energy control program.
  • Use lockout devices for equipment that can be locked out. Tagout devices may be used in lieu of lockout devices only if the tagout program provides employee protection equivalent to that provided through a lockout program.
  • Ensure that new or overhauled equipment is capable of being locked out.
  • Develop, implement, and enforce an effective tagout program if machines or equipment are not capable of being locked out.
  • Develop, document, implement, and enforce energy control procedures.
  • Use only lockout/tagout devices authorized for the particular equipment or machinery and ensure that they are durable, standardized, and substantial.
  • Ensure that lockout/tagout devices identify the individual users.
  • Establish a policy that permits only the employee who applied a lockout/tagout device to remove it.
  • Inspect energy control procedures at least annually.
  • Provide effective training as mandated for all employees covered by the standard.
  • Comply with the additional energy control provisions in OSHA standards when machines or equipment must be tested or repositioned, when outside contractors work at the site, in group lockout situations, and during shift or personnel changes.

Six Tips to Improve Your Lockout/Tagout 

  1. Choose the Right Devices

Industrial machines, circuit breakers, plugs, switches, push buttons, and valves are just some of the items that often require lockout devices. There are two considerations that will help: necessity (knowing exactly what you need) and organization (using standardized devices and tools to help keep your devices organized).

First, determine exactly what you need. Create a list of all machines or electrical components that may need lockout devices.

Second, standardize and organize your lockout devices. Lockout Stations are one effective way to store and organize necessary devices.

  1. Thoroughly Document Procedures

Lockout procedures need to be formally documented. This will keep workers and management on the same page and help to eliminate any potential confusion. Formal documentation is required by OSHA but, given the differences in workplaces and machines, not every procedure will be the same.

Procedures should thoroughly detail the steps needed to shut down and isolate hazardous energy. The procedures also should describe how to safely place and remove all relevant lockout/tagout devices.

Procedures should be posted near the relevant machine. Machine-specific photographs detailing each step are highly recommended.

  1. Clearly Mark All Isolation Points

All energy control points should be clearly and permanently marked with standardized tags or labels.

Tags and labels should be easily visible. It is also very important to make sure all energy isolation points are consistent with the machine-specific procedures.

  1. Develop a Rigorous Training Program

Effective training is an indispensable part of a successful lockout program.

First, it is important for each worker to know exactly what his role is. Tasks should be clearly defined and clearly assigned to the appropriate worker. There are three types of workers involved in lockout operation: authorized, affected, or other. An authorized employee is directly involved in locking out equipment or machinery. An affected employee means any employee whose work is affected by a lockout. Usually, this means an employee who is working on locked out equipment. An employee is classified as other if he or she does not work on the machine receiving maintenance or repair but still works in the same area.

Each worker needs to know what type of employee he is, and strong communication needs to be developed among all workers. Authorized employees must clearly alert all affected employees when a lockout device is placed or removed. In order to prevent unsafe removal of devices, only authorized employees can remove devices that they have placed. Lockout padlocks have room for workers to clearly write their names in permanent ink, which underscores the strong need for clear assignments and individual responsibility.

As with procedures and isolation points, Documentation is an important component of training. Recording exactly what types of training have occurred is helpful on several levels. First, it helps management make sure that all workers have been trained, as well as trained in the right tasks. Any gap in training can be easily found and corrected. Second, it documents when training took place. If you know when your last training session took place, it is easier to plan when the next one should take place. Last, looking at documentation of lockout training can help one see one’s program from a new, more objective perspective. Suggestions can then be taken into account and improvements can be made.

OSHA requires that lockout/tagout training occur at least annually. Yearly training should be seen as a bare minimum rather than an ideal. In many cases, it would be helpful to revisit training exercises more frequently than yearly in order to ensure that critical repairs and maintenance are still being done safely. Also, repeat training helps workforces keep a “safety first” mentality.

  1. Evaluate

Careful evaluation is an invaluable tool for improvement. Evaluation is necessary to make sure that the training exercises, procedures, and devices are working properly.

Inspections need to occur at least annually and should be performed by an Authorized Employee who is not involved in the procedure being inspected. Any and all deviations must be corrected and all roles must be thoroughly reviewed.

The date of inspection, procedures, the machines and equipment involved, and the names of all workers involved in the inspection must be recorded.

  1. Evolve

A good lockout program should always be able to evolve; OSHA may introduce more requirements or more stringent guidelines.




Flash Fire

INCIDENT

On Tuesday, June 8, 2010, at approximately 9:25 p.m., a 38-year old service truck operator was killed while fueling a highwall rock drill. The victim notified the drill operator by CB radio that he was driving down to fuel the two drills operating on the highwall bench. The operator moved his drill into position to be fueled and idled down the drill engine. The victim backed the service truck perpendicular to the operator’s side of the drill and was observed by the drill operator stepping over the back of the truck onto the drill while holding the fuel hose and nozzle. The drill operator looked away from the victim and felt what he described as a concussion/explosion. The operator exited the drill cab and observed that the drill was on fire and the victim was lying on the ground engulfed in flames. The drill operator called for help and other mine personnel responded to help extinguish the fire on the victim. The victim was transported to the mine entrance gate where medical personnel arrived shortly thereafter. The victim was transported by helicopter to a nearby hospital and died shortly after arrival to hospital.

NEED TO KNOW

Flash fires

A flash fire is a release of flammable vapor (or liquid that vaporizes) that premixes with air and expands, eventually igniting. Once ignition occurs, the burning velocity travels from the point of ignition toward the release point, potentially igniting the source as well. Since this ignites the entire volume of the vapor mixture, the volume of the flame is large and the majority of damage is due to flame impingement (American Institute of Chemical Engineers, Center for Chemical Process Safety. 2003). Large-scale flash fires are particularly dangerous as they can cover a large area and, once ignited, occur quickly and have the potentially to ignite the flammable release source. When premixed flammable mixtures are confined to smaller scales, flash fires may become more violent, and even escalate to an explosion.

Eight Things to Know About Flash Fires

  1. Flash fires are short and intense.

A flash fire is a rapidly moving flame front that spreads through a diffuse fuel. When a flash fire occurs, it is generally of a short duration and fuel limited.

  1. Flash fires have various causes.

Fire is a complex chemical chain reaction that requires three components to occur: a thermal source, or heat, oxygen and fuel. Once the fuel and air are in the correct mixture, ignition can occur from various heat sources, such as welding, tool sparks, running engines, etc.

  1. Flash fires are different from fuel-fed fires.

Flash fires are fuel-limited, have a typical momentary duration of only a few seconds, and self-extinguish. On the other hand, fuel-fed fires last much longer and will burn as long as there is a fuel source present.

Fuel-fed fires require primary protective apparel, such as turnout gear, which is heavier in construction. Secondary apparel, or daily wear Flame Resistant, can help minimize burn injuries from flash fires and is available in comfortable, breathable constructions that allow wearers to work comfortably throughout their day.

Those who work on gas lines in trenches, where it is harder to escape flames, should consider primary FR protection, while those who work around flash fire hazards can be protected with secondary FR daily apparel, which is available in a variety of comfortable fabrics, including denim.

  1. Flash fire injury can be increased by non-flame-resistant clothing.

In the event of a momentary flash fire, everyday non-flame-resistant work clothes can act as fuel and ignite and will continue to burn even after the source of ignition has been removed. This is where the saying “Stop, Drop, and Roll” comes into play because a person’s non-FR clothing will remain on fire until they put the clothing fire out. A clothing fire can continue to burn well after the brief flash fire event is over, resulting in more extensive burn injuries on skin clothed with non-FR fabric.

  1. Flash fire injury can be reduced by flame resistant clothing.

FR apparel provides key roles in protecting oil and gas workers:

  • It self-extinguishes to mitigate burn injuries when the source of ignition is removed.
  • It provides insulation to reduce probability of a second-degree burn.

Unlike standard, non-FR clothing, FR apparel is uniquely engineered to interrupt one or more of the fundamental steps required for flames to propagate.

Developing a thorough, researched PPE program with trusted flame-resistant fabric for everyday wear is critical to protect yourself, and your team members, against potential injuries from unexpected flash fires.

  1. Not all FR clothing is suited to protect against flash fires.

The National Fire Protection Association (NFPA) created guidelines and standards to aid the industry. NFPA 2112 is the industry standard on flame resistant garments for protection of industrial personnel against flash fire, providing clear testing guidelines.

One requirement of NFPA 2112 is for flash fire testing to be conducted at three seconds with a pass/fail criterion of 50 percent total body burn under the testing protocols of ASTM F1930 (Standard Test Method for Evaluation of Flame-Resistant Clothing for Protection Against Flash Fire Simulations Using an Instrumented Manikin).

It’s important to reference standards appropriate to NFPA 2112 and flash fire hazards look for the appropriate certification for flash fire hazards in selecting the most effective PPE to minimize burn injury.

  1. Not all FR apparel provides the same protection.

Fabric is the single most important aspect of a garment when it comes to FR protection. There is a vast range of FR fabric available; however, each FR fabric performs differently.

Unfortunately, FR qualities are not visible, so you must verify the performance of your FR apparel. For oil and gas workers exposed to flash fire hazard, having a daily workwear garment certified to NFPA 2112 is a necessary starting point. However, since all fabrics with less than 50 percent burn can be certified, it is important to know the actual body burn percentage of the ASTM F1930 test. Fabrics can be certified with 50 percent total body burn or 10 percent, and these differences should be understood.

  1. Proper maintenance is key to FR apparel performance.

Care and maintenance not only extend the life of FR apparel—it is essential to allowing the garment to protect oneself to its fullest capability in the event of a flash fire. Keep FR apparel well maintained, patched with the correct FR fabric when needed, and as clean as possible, because flammable contaminants can compromise its performance.

BUSINESS / REGULATIONS

Providing the right type of PPE clothing to workers is the responsibility of employers, particularly when working in hazardous environments with a higher probability of flame and heat incidents. Even though a 100% protection cannot be guaranteed, standardized FR clothing with effective performance quality can definitely provide a strong protective layer to workers from flame and flash fire. Some of the burns, in fact, are not because of the original physical hazard but due to the consequence of burning clothes. A dramatic reduction in the severity of burn injuries is witnessed when FR clothing is involved, which could very well draw the line between life and death. Despite the fact that flash fires are usually rare, it’s still crucial that both workers and employers need to be prepared in case an incident does occur.

A lot can go wrong under flash fire incidents if proper protective gear is not provided. When a worker is exposed to fire, he is not only exposed to the fire but also exposed to the heat produced from the burning fabric. Hence the protective clothing needs to be designed out of high-quality flame retardant fabric and heat resistant fabric so that it offers maximum protection to the workers.

The core purpose of the flame-retardant fabric is to limit the exposure of flame and heat and stop burning when the source of flame is removed from the textile. This offers an adequate layer of protection to workers by reducing the probability of injuries when exposed to flash fire. FR clothing creates a wall between the flash fire and workers’ body and limits the energy transmission to the skin which ultimately increases the survival chances of the workers.

To consider the protection level of the protective fabric against flash fires, the fabric is tested in a conditioned lab according to protective standards such as NFPA 2112, EN ISO 11611 and EN ISO 11612. In addition to performing the flame test, FR clothing needs to be tested against its thermal protection it offers to wearers during flash fire incidents. The energy which is needed to cause a second-degree burn is termed as thermal protective performance. Protective clothing having higher thermal performance will be offering more protection to wearers during flash fire incidents.

The latest released standards ensure that workers in potentially harmful industries will be provided with protective fire-retardant clothing with the purpose of minimizing burn injuries and increases survival rates. It is significant to forecast the expected threats of flash fire which can be done through analyzing the workplace and to evaluate FRC (flame retardant clothing) against exposure levels. It is important to evaluate the FRC requirements to avoid any uncertain incidents. However, with an effective FRC system in place, the expected burn injury percentage in most cases can be minimized. The reduction in the body area affected by burn injury would mean that the victim will have a higher survival rate.

STATISITICS

Details of the Corpus Christi Flash Fire

Construction Accident Statistics

The following information was provided by the Occupational Safety and Health Administration (OSHA):

  • 4,836 workers were killedon the job in 2015. This average to more than 93 deaths a week or more than 13 deaths every day.
  • Of the 4,379 worker fatalities that occurred in private industry, 937 were associated with construction.
  • The leading causes of construction-related deaths are:
  • Falls
  • Struck by object
  • Electrocutions
  • Caught-In/Between

A presentation on the causes of fatal fires and explosions in construction including the trades involved and the trend.

Background

  • NIOSH’s National Traumatic Occupational Fatality (NTOF) database reported 220 deaths due to fire and 354 deaths due to explosion in construction, an average of 36 fire and explosion deaths per year.
  • The rates were 0.2 fire deaths and 0.3 explosion deaths per 100,000 construction workers.
  • For all construction, there was an average of 1,071 deaths annually, with an average annual rate of 15.3 deaths per 100,000 workers.

Methods

  • Used Census of Fatal Occupational Injuries (CFOI) from Bureau of Labor Statistics
  • Deaths were classified into the following categories:
  • Chemical explosions
  • Fires
  • Pressurized container explosions
  • Arc flashes/blasts.

Results

  • A total of 361 fire or explosion deaths involving 313 incidents were identified in the construction industry, an average of 30 per year.
  • 32 multiple-death incidents involved 80 deaths (22% of total)

Location of Incidents

  • 167 incidents (53%) occurred in industrial places, including:
  • 59% of chemical explosions
  • 66% of pressurized container explosions
  • 53 incidents (17%) occurred in homes
  • 28 incidents (9%) occurred in public buildings

Worker Activity at Time of Death

  • Repair and maintenance activities accounted for 48% of pressurized container explosion deaths and 23% of all deaths.
  • Welding accounted for 24% of chemical explosion deaths and 15% of all deaths.
  • Other activities resulting in deaths included:
  • Driving/operating/riding on vehicles (10%)
  • Constructing/installing (10%)
  • Painting/ finishing (7%)

RECOMMENDATIONS

Here are recommendations that you should keep in mind anytime you are refueling a vehicle or piece of equipment.

  • NO SMOKING! The burning cigarette can ignite flammable vapors that are emitted from the liquid fuel, causing a flash fire or explosion to occur. Also make certain there are no other potential sources of ignition, such as open flames or spark-producing equipment operating in the area, as they too can ignite a fire or explosion;
  • Only use safety cans or other approved portable fuel containers, such as those marked as D.O.T. approved for transporting and transferring fuels, to refuel vehicles and equipment. Unapproved containers can easily leak, spill fuel, or even rupture, leading to a potentially dangerous situation;
  • Always kill the engine of the vehicle or equipment before you refuel. Also, be certain to let portable equipment such as lawn mowers, generators, chain saws, blowers, trimmers, or anything else with a fuel-powered engine cool down before you add fuel to the tank. Spilling liquid fuel on a hot motor instantly creates a cloud of highly flammable vapor, which can easily catch fire or explode;
  • Before dispensing fuel into your car or truck, be sure to touch a metal part away from the fuel tank on your vehicle or equipment with your bare hand. This helps dissipate any static build-up on your body created when you slid out of your vehicle. Also, touch the gas dispenser nozzle or hose to the fill tube on the gas tank before you start to add fuel to the tank, and keep it in contact throughout the entire refueling process. This step helps prevent hazardous static electricity from building up and causing a spark in the vapor area as you refuel;
  • Never dispense fuel into a can or other portable container while it is sitting in your vehicle truck or truck bed. Doing so allows hazardous static electricity to build up. Instead, sit the container on the ground and then add the fuel;

PREVENTION

The fatality report noted that proper engineering and administrative controls were not in place with that resulted in a fatality.

The incident occurred because the work practices/procedures in use at the time of the accident were not adequate to fully protect the service truck operator. There was no provision for equipment shutoff/cool down prior to fueling, the operator was required to be in close proximity to potential ignition sources, the fueling system was susceptible to accidental discharge, and there was no provision for actions to be taken in the event of an accidental fuel discharge.

Other controls like proper P.P.E would have protected the employee. It would have saved his life.

It makes sense that FR clothing should be worn by oil employees who handle fuel.

MORE PREVENTION

When receiving fuel from the delivery truck

  • Do not allow smoking, flames, sparks or other sources of ignition near the fuel storage and handling areas. Gas vapours are heavier than air and will drift downward from the source. It is the vapour, not the liquid, which burns.
  • Follow safety recommendations of your fuel supplier during fuel delivery. Report fuel spills according to environmental and health and safety regulations.
  • Use absorbent materials to clean up and prevent the spill from spreading.
  • Position the fuel delivery truck so that it does not interfere with the movement of other vehicles.
  • Make sure that fuels are delivered into the correct tank.
  • Check the levels in the tank to determine quantity needed before receiving commercial delivery.
  • Check the area around the vents of the receiving tanks for possible ignition sources.
  • Observe the vents during delivery for proper operation. Stop delivery if fuel is being ejected.
  • Have the driver stay near the truck flow valve while the fuel is flowing into the storage tank in case of the need for emergency shut-off.
  • Reinstall the fill and gauge caps.
  • Mark gauge and fill caps clearly to indicate the fuel type.
  • Open caps only during filling and gauging to minimize the release of fuel vapours.
  • If a fire starts, do not remove the hoses or nozzles. Leave the area immediately. Alert others to do the same. Call the fire department.

Gasoline Vapors are Flammable, are Heavier than Air, and can Travel Long Distances to an Ignition Source

  • Never siphon gasoline by mouth. It is harmful and may cause death if swallowed. If ingested, do not induce vomiting. Get medical help immediately.
  • Do not smoke.
  • Avoid prolonged or repeated skin contact with fuel. Wash skin thoroughly with soap and water in case of contact.
  • Avoid breathing in vapours or mists.
  • Remove any clothing that is wet with fuel. Allow fuel to evaporate completely outdoors before washing. Thoroughly clean clothing before reuse.
  • Never use gasoline as a cleaning agent.

Re-Fueling Protocol

  • Refer to the vehicles operating manual for special instructions.
  • Identify and know how to operate emergency fuel cut offs.
  • Know the location of, and how to operate fire extinguishers.
  • Always shut off an engine while fueling.
  • Remove twists and small loops in the fuel delivery hose. These kinks can cause the hose to fail or catch on bumpers as vehicles move around the pump islands.
  • Insert delivery hose nozzle firmly into the fill pipe of the vehicle. Maintain contact with the tank until the delivery is complete to reduce possibility of static electricity sparking.
  • Avoid spills by not over-filling the tank.
  • Reinstall the cap on the fill pipe when delivery is complete. Hang the hose in place on the pump.
  • Fill motorcycles slowly to prevent fuel from spilling and making contact with the hot engine.
  • Do not use the gas cap or other objects to hold the fuel delivery nozzle open.


Hand and Power Tools

INCIDENT

Manitoba addressed a case of a worker for Arne’s Welding Ltd. who was injured while operating a horizontal band saw in June 2017. While making angled cuts, a piece of metal fell into the cutting area and the worker tried to push it away with a brush.

The blade of the saw caught the worker’s glove and pulled his hand in, resulting in a serious injury, the province said.

The employer pleaded guilty to “failing to ensure that a machine or tool was used or operated in accordance with the manufacturer’s specifications,” the release stated, and was ordered to pay $25,000 in fines and penalties, plus $5,000 to the public education fund.

NEED TO KNOW

Hand and power tool injuries send more than 400,000 workers to the emergency room and cause hundreds of deaths every year. The are a broad range of hand and power tools that are involved in this saga.

What’s the Danger?

Using hand and power tools exposes you to hazards like:

  • Flying objects
  • Harmful dusts
  • Gases and fumes
  • Unhealthy ergonomic practices, such as working in awkward postures.
  • Slips, trips and falls

These hazards regularly cause eye and facial injuries, cuts, bruises, burns, amputations, and back injuries.

Cuts and other hand injuries to the hands are one of the most frequent and common injuries workers face. Hand injuries, including amputations, can keep workers away from the job for several days and can cost employers big money. These injuries are preventable and available.


BUSINESS / REGULATION

Employers and employees in the 26 states and territories with OSHA-approved state safety and health plans should check with their state agency. Their state may be enforcing standards and other procedures that, while “at least as effective as” federal standards, are not always identical to the federal requirements.

Tools are such a common part of our lives that it is difficult to remember that they may pose hazards. Tragically, a serious incident can occur before steps are taken to identify and avoid or eliminate tool-related hazards.

Employees who use hand and power tools and are exposed to the hazards of falling, flying, abrasive, and splashing objects, or to harmful dusts, fumes, mists, vapors, or gases must be provided with the appropriate personal protective equipment. All electrical connections for these tools must be suitable for the type of tool and the working conditions (wet, dusty, flammable vapors). When a temporary power source is used for construction a ground-fault circuit interrupter should be used.

Employees should be trained in the proper use of all tools. Workers should be able to recognize the hazards associated with the different types of tools and the safety precautions necessary.

STATISTICS

  1. Surveys estimate that work tools and power tools cause an average of nearly 400,000 visits to the emergency room each year. Of those injured, more than 200 die.
  2. A National Safety Council study reports that the cost of just one disabling hand or finger injury varies from $540 to $26,000 per patient. With a serious upward extremity trauma averaging $730,000 per incident.
  3. According to a recent Occupational Safety and Health Administration (OSHA) study, 70.9% of hand and arm injuries could have been prevented with personal protective equipment (PPE), specifically safety gloves.
  4. 110,000 lost-time hand injuries annually.
  5. Hand injuries send more than one million workers to the emergency room each year.
  6. 70 percent of workers who experienced hand injuries were not wearing gloves. The remaining 30 percent of injured workers did wear gloves, but the gloves were inadequate, damaged or the wrong type for the type of hazard present.

WORKERS OPERATING HAND AND POWER TOOLS FACE A WIDE RANGE OF POTENTIAL HAZARDS

  1. Nail guns are powerful, easy to operate, and boost productivity for nailing tasks. They are also responsible for an estimated 37,000 emergency room visits each year – 68% of these involve workers and 32% involve consumers. Severe nail gun injuries have led to construction worker deaths. Fortunately, these injuries can be prevented, and more and more contractors are making changes to improve nail gun safety. Research shows that risk of injury is twice as high using “contact” trigger nail guns compared to “sequential” trigger nail guns.
  2. Over 32,000 chainsaw injuries happen each year. A lot of these injuries occur when users fail to wear the correct protective gear. According to Anita Gambill at Stihl, one of the world’s leading chain-saw manufacturers, “Chain-saw chaps cost about as much money as one stitch in the emergency room. Unfortunately, if you have an accident with a chain saw, you’re never going to need just one stitch.” The truth is worse than you think. According to the Centers for Disease Control and Prevention, the average chain-saw injury requires 110 stitches.
  3. A recent study by the American Journal of Preventative Medicine found that between 1990 and 2005, ladders sent 2.1 million people to the hospital. Ninety-seven percent of those accidents happened in “non-occupational settings”–in other words, your backyard. These numbers translate into an average of 140,000 injuries a year, or one every 3 minutes and 45 seconds–that’s more than twice as many as a table saw. The study goes on to say that the most common injuries are likely to be fractures to the legs and feet.
  4. Circular saws have faster blades than table saws, with an outer edge spinning at about 120 mph, and they can cause some serious damage if used incorrectly or recklessly. A study in Australia’s Hazard Magazine found that of all reported saw injuries, circular saws make up the largest group at 30 percent. Of the recorded injuries, 56 percent involve DIYers, 99 percent of whom are male, with 68 percent of those blokes in the 20-to-39 age range.
  5. Table saw accidents account for about 67,000 recorded injuries every year. While lacerations are the most common injury, around 4,000 accidents with table saws involve amputations because of direct contact with the rotating blade. The medical costs for treating table saw injuries have been estimated at more than $2.1 BILLION EVERY YEAR. The National Electronic Injury Surveillance System says, of the 720,000 injuries in Canada associated with woodworking each year, 42 percent happened at the table saw. Five percent of these patients required hospitalization.
  6. Every time you start your mower, you are dealing with a dangerous and potentially deadly piece of equipment. U.S. Consumer Product Safety Commission statistics are shocking: Each year, 800 children are run over by riding mowers or small tractors and more than 600 of those incidents result in amputation; 75 people are killed, and 20,000 injured; one in five deaths involves a child. For children under age 10, major limb loss is most commonly caused by lawn mowers. In Canada, 1161 patients with 1451 injuries were presented between 14 and 16 hospitals across Canada, between 1990 and 2006. Especially shocking is that a total of 48 percent of the patients were 15 years old and younger. This is a high number considering that children should not even be in the yard when it is being mowed.
  7. Compared to chain saws, drills seem downright friendly, yet they put 5,800 people a year in the ER. In one particularly horrible incident, a 25-year-old man fell from a ladder while using a drill to install lights for a New Year’s Day celebration. The spinning bit entered through his jaw and skull bones and tore up an artery. He died after inhaling blood.

Workers operating hand and power tools face a wide range of potential hazards throughout the course of any given day. Without the proper training and maintenance, they are at risk of injuries resulting from lacerations, flying objects, harmful dusts, electrical accidents and more.

RECOMMENDATIONS

The following are five recommendations to enhance work place safety in the use of power tools.

Conducting a protocol of the following 5 steps will enhance workplace safety in the use of Hand and Power Tools.

Step 1: Tool Assessment

Take stock of the types of tasks, jobs, and operations that require the use of hand or power tools. Are these available and in good working condition? Are workers using the right tools for the work they are performing? Do they need a different tool? Would a power tool lessen the repetitiveness or force needed to do the job?

Step 2: Hazard Assessment

Conduct a hazard assessment wherever hand or power tools are used. Each hazard assessment will identify hazards, recommend controls, and provide guidance on appropriate personal protective equipment (PPE) selections when a hazard can’t be eliminated.

Step 3: Hazard Controls

Remove or eliminate the hazard whenever possible. Ensure power tools are fitted with guards and safety switches. Provide PPE to protect against flying objects, dust, or and enforce its use. Use caution with gloves and prohibit their use when using powered equipment if there’s a chance the glove could get caught.

Step 4: Establish Inspection Procedures

All tools should be inspected before use. Check hand tools for cracks dings and chips. Don’t use damaged tools. Generally, hand tools cannot be repaired and should be thrown away. Power tools should only be repaired by someone trained and qualified to make repairs.

Step 5: Establish Maintenance and Safe Storage Requirements

Tools must be kept clean, sharp, and well-maintained to be used safely and effectively.  Set up areas where tools will be protected from the elements and damage from other tools and equipment.


Other steps:

  • Clean tools after use.
  • Clean metal surfaces with an approved solution and scrape away any soil and dirt.
  • Completely dry the tool with a towel or rag before it is placed in storage.
  • Don’t place tools directly on the ground for storage.
  • Place small hand and power tools on shelving. Store short-handled tools in a plastic bin or box.
  • Tie together long-handled tools in a bin or hand them on the wall.
  • Power tools should have all surfaces cleaned and completely dry before storage.

Step: 6 Training

  • Ensure employees have been trained and fully understand operations and maintenance procedures and safe tool use.
  • Provide employees with the right PPE and train them how to use and care for it.
  • Educate workers on the dangers of loose or baggy clothing, long hair, and jewelry.

PREVENTION

  1. Stay alert!Using tools when you are tired makes an accident or injury more likely. Never use tools while under the influence of medications, drugs or alcohol. Doing so puts you and others in danger.
  2. Always wear required PPE.

Hardhats, safety glasses, ear plugs and safety shoes are required for most tool work.

  1. Secure your work. Use clamps or a vise to prevent accidental slipping. Clamps and vises also leave both of your hands free to operate and control the tool.
  2. Put up signs and barriers to keep others away from your work area.

This measure protects both them and you.

  1. Practice good housekeeping.To reduce the risk of slips, trips, and falls, keep floors clean and dry and equipment and cords out of walkways and aisles.
  2. Use the correct tool for the job.

Incorrect use can lead to tools slipping and breaking and cause accidents and injuries.

  1. Don’t take shortcuts.You don’t save time by taking a shortcut if you are sidelined by injury.
  2. Watch for electrical hazards.Metal hand tools that come in contact
    with live electrical wires can shock and kill you. Electric power tools should NEVER be used in or around water.
  3. Follow ergonomic work practices.Stretching, taking rest breaks and alternating tasks can help prevent repetitive motion injuries such as carpal tunnel syndrome.
  4. Inspect. Maintain. Store. Always inspect your tools before each use. Defective tools, like hammers with mushroomed heads and power tools with missing guards are dangerous. Keep your tools clean, sharp and well maintained, and store them properly for maximum safe and effective use.

Five basic safety rules can help prevent hazards associated with the use of hand and power tools:

  • Keep all tools in good condition with regular maintenance.
  • Use the right tool for the job.
  • Examine each tool for damage before use and do not use damaged tools.
  • Operate tools according to the manufacturers’ instructions.
  • Provide and use properly the right personal protective equipment.

Employees and employers should work together to establish safe working procedures. If a hazardous situation is encountered, it should be brought immediately to the attention of the proper individual for hazard abatement.


Incident Investigations Fatality File

INCIDENT

It was an overcast, chilly, Saturday morning in May 2014 when a young worker in Kentucky lost his life in an industrial incident. An investigation into his death hopefully will save the lives of workers in the future.

On that morning – May 17, 2014, at 9 a.m. – a 21-year-old foreman and two coworkers were instructed to clean a Rapidmix 400 C industrial continuous mixing plant in preparation for a job the following week. The mixing plant, which had not been used or cleaned for several months, was located in the company’s lot next to the maintenance shop.

Once the foreman and two employees had cleared much of the dried, stuck-on concrete from the vein feeder, the foreman started the mixer section to remove the remaining debris, creating a cloud of dust. The foreman instructed the two employees to leave the area so they would not breathe in dust particles. He then stepped onto the mixer’s metal doors, intending to exit from the opposite side of the mixer.

Four doors covering the mixing section

The two pairs of doors that covered the opening of the mixer each measured 31½ by 53 inches. Each pair of doors was hinged in the center with two, 2-inch tall hinges. Each door opened and closed on the outer edge of the mixer unit, controlled by one interlock switch for the set of doors on the left and one interlock switch for the set of doors on the right.

Mixing Shafts

As the foreman shifted his weight onto one of the metal doors, the door collapsed into the mixer, along with the victim. By the time one of the employees hit the emergency stop switch, the young foreman was chest high in the 14-foot-long mixing shafts with 6-inch by 8-inch paddles; the shafts rotated at 110 RPM. A 911 call was placed, but the young foreman was pronounced dead at the scene.

Mixer Was in Need of Repair

The Kentucky Fatality Assessment and Control Evaluation (FACE) Program, federally funded to study occupational fatalities, investigated the case.

14 and 15, 2013, a service inspection was conducted on the mixing machine by a manufacturer’s service technician. During the inspection, the service technician made several recommendations for repair:

  • The mixer safety switch needed to be replaced;
  • One of the interlocks for the doors was missing and needed to be replaced since the doors could be opened while the auger was running;
  • The outloading conveyor motor disconnect had broken off the frame and needed to be replaced; and
  • The doors had broken hinges that needed to be repaired.

Broken door hinge on the metal door, covering the mixing section

On Nov. 27, 2013, the company ordered the suggested parts for repair. However, at the time of the incident, the interlock on the door still was missing, and the door hinges still were broken.

As a result of this tragic incident and the investigation, Kentucky FACE made the following recommendations for the prevention of future similar incidents:

  • Employers should develop and implement written procedures for maintaining a Rapidmix 400 C continuous mixing plant to include pre-inspection, cleaning the mixing plant inside and out immediately after each use, making prompt repairs to broken parts such as door hinges and promptly replacing missing or damaged parts such as interlocks for the doors covering the mixing section.
  • Employers should train employees on hazard recognition for all aspects of a job involving equipment such as the Rapidmix 400 C continuous mixing plant, including instructions not to walk or stand on the doors covering the auger section while operating the mixing plant.
  • Employers should provide documented refresher training at least annually or prior to the mixing plant’s first use each year.
  • Manufacturers should consider installing a switch so that the equipment doors cannot be opened during operation.

The loss of this young foreman’s life was a tragedy for both the employer and the young man’s family. Kentucky FACE uses the facts gathered from investigations to formulate and disseminate injury prevention strategies, with the hope of preventing future, similar incidents.

NEED TO KNOW

The following are facts that should be enough to make very employer stop and consider their

environments and workplace incident investigations techniques:

  • According to the Bureau of Labor Statistics multiple workers die every day in American workplaces.
  • 4 million serious injuries occur annually, not to mention all the sickness and disease cases resulting from stress and toxins.

Is there a difference between the term “accident” and “incident” in the context of the workplace? The term

“accident” has been used often in the past referring to an unplanned, unwanted event. Some people

suggest that “accident” was a random event that could not have been prevented!!! OSHA suggest that

nearly all worksite fatalities, injuries, illness are preventable.

The term “incident” is the appropriate term when referring to these events.

Incident reporting of all injuries including close calls is critical to the integrity of the workplace.

  • It is impossible to create improved processes that protect workers if management is not aware of what kinds of problems are occurring in the workplace that may cause injury or property damage.
  • The workplace is even at greater risk for a more serious incident to occur in the future if a minor incident or near miss is ignored or not reported.
  • Failure for incident reporting will negate a process in which situations can be corrected to prevent similar incidents from occurring in the future.
  • Employee participation in workplace safety improvement strategies will not be encouraged if incidents are not reported.

BUSINESS/ REGULATIONS

Investigation Procedure / Policy – Occupational Health and Safety Act, Section 8.1(1)

Every employer with 20 or more employees regularly employed in the Province shall establish a written health and safety program, in consultation with the committee or the health and safety representative, that includes provisions with respect to….

  • (e) a system for the prompt investigation of hazardous occurrences to determine their causes and the actions needed to prevent recurrences;
  • (f) a record management system that includes reports of employee training, accident statistics, work procedures and health and safety inspections, maintenance, follow-up and investigations;

STATISTICS

The Injuries, Illnesses, and Fatalities (IIF) program produces a wide range of information about workplace injuries and illnesses. These data are collected and reported annually through the Survey of Occupational Injuries and Illnesses (SOII) and the Census of Fatal Occupational Injuries (CFOI).

The latest numbers show.

Nonfatal Injuries and Illness, Private Industry for 2018.

Total recordable cases.

2,834,500

Cases involving days away from work:

900,400

Median days away from work:

8

Cases involving sprains, strains, tears:

308,630

Cases involving injuries to the back:

142,230

Cases involving falls, slips, trips:

240,160

Total fatal injuries (all sectors):

5,250

Roadway incidents (all sectors):

1,276

Falls, slips, trips (all sectors):

791

Homicides (all sectors):

453

A total of 5,250 workers died from a work-related injury in the U.S. in 2018, up 2 percent from the 2017 total of 5,147. The fatal injury rate was unchanged in 2018 at 3.5 per 100,000 full-time equivalent workers.

Employer-reported injury and illness rate unchanged in 2018 at 2.8 cases per 100 workers

The rate of nonfatal occupational injuries and illnesses among private industry employees was unchanged for the first time since 2012 at 2.8 cases per 100 full-time equivalent workers in 2018. Workers in private industry incurred 2.8 million injuries or illnesses in 2018.

RECOMMENDATIONS

At this stage of the investigation most of the facts about what happened and how it happened should be known. This data gathering has taken considerable effort to accomplish but it represents only the first half of the objective. Now comes the key question – why did it happen?

Keep an open mind to all possibilities and look for all pertinent facts. There may still be gaps in your understanding of the sequence of events that resulted in the incident. You may need to re-interview some witnesses or look for other data to fill these gaps in your knowledge.

When your analysis is complete, write down a step-by-step account of what happened (the team’s conclusions) working back from the moment of the incident, listing all possible causes at each step. This is not extra work: it is a draft for part of the final report. Each conclusion should be checked to see if:

  • it is supported by evidence
  • the evidence is direct (physical or documentary) or based on eyewitness accounts, or
  • the evidence is based on assumption.

This list serves as a final check on discrepancies that should be explained.

The most important final step is to come up with a set of well-considered Recommendations designed to prevent recurrences of similar incidents. Recommendations should:

  • be specific
  • be constructive
  • identify root causes
  • identify contributing factors

Resist the temptation to make Only General Recommendations to save time and effort.

For example, you have determined that a blind corner contributed to an incident. Rather than just Recommending “eliminate blind corners” it would be better to suggest:

  • install mirrors at the northwest corner of building X (specific to this incident)
  • install mirrors at blind corners where required throughout the worksite (general)

Never make Recommendations about disciplining a person or persons who may have been at fault. This action would not only be counter to the real purpose of the investigation, but it would jeopardize the chances for a free flow of information in future investigations.

In the unlikely event that you have not been able to determine the causes of an incident with complete certainty, you probably still have uncovered weaknesses within the process, or management system. It is appropriate that Recommendations be made to correct these deficiencies.

The Written Report

The prepared draft of the sequence of events can now be used to describe what happened. Remember that readers of your report do not have the intimate knowledge of the incident that you have so include all relevant details, including photographs and diagrams. Identify clearly where evidence is based on certain facts, witness accounts, or on the team’s assumptions.

If doubt exists about any particular part of the event, say so. The reasons for your conclusions should be stated and followed by your recommendations. Do not include extra material that is not required for a full understanding of the incident and its causes such as photographs that are not relevant and parts of the investigation that led you nowhere. The measure of a good report is quality, not quantity.

Always communicate your findings and recommendations with workers, supervisors and management. Present your information ‘in context’ so everyone understands how the incident occurred and the actions needed to put in place to prevent it from happening again.

Some organizations may use pre-determined forms or checklists. However, use these documents with caution as they may be limiting in some cases. Always provide all of the information needed to help others understand the causes of the event, and why the recommendations are important.

Recommendations Should Not:

  1. Propose any punitive actions.
  2. Propose briefing unit personnel on the accident. Such briefings are basic management responsibility and a normal function of safety managers and supervisors at all organizational levels.
  3. Recommend that a new policy, regulation, or standard operating procedure is needed when established guidelines exist but are not followed.

PREVENTION

There are obviously situations in which workers must disturb an injury or fatality scene, including these:

  • You are trying to save a worker’s life or relieve someone’s suffering following an incident.
  • You are trying to prevent serious damage or loss of property following an incident.
  • You are attempting to maintain access to essential services such as water, gas or electricity.

Otherwise, you should not be entering the scene unless you have authority to do so or the investigator has concluded his or her examination of the area and given permission for workers to regain access. Tampering with an accident/incident scene to make it look as though conditions were compliant with safety regulations is extremely risky, not to mention foolish. Safety investigators can interview witnesses, including victims who survive their injuries and quickly determine that you aren’t telling the truth. A lie can snowball and if you continue the deception you can be caught under a legal avalanche. Don’t become part of any cover-up if a coworker asks you to lie for him or her. You’ve got nothing to gain and everything to lose, including your job and possibly, your freedom.

If you are first on the scene of a workplace accident, help the injured person and call for emergency medical help if required. As soon as possible, contact your supervisor and report the incident. If you witnessed what happened, write down the details of what you saw and heard. Your observations will help investigators determine what happened and how to prevent a similar incident in future.

One of the biggest challenges when you are investigating an incident is sorting out the irrelevant information from the relevant information. More specifically – determine what is relevant to what happened, how it happened, and especially why it happened.

One way to do this is by using a systematic approach to investigate all incidents that focuses on finding the root causes. Doing so, means you can implement relevant and meaningful corrective actions.

You can use this 4-step approach to guide you. It can also be used as a training tool for members of your investigation team.

Step 1 – Preserve and Document the Scene

After you have verified the scene is safe and victims are being care for, the first step in the investigation is to secure the incident site to prevent evidence from being moved, altered, or tampered with.

  • If evidence goes missing or is messed with – you are going to miss out on important clues on what caused the event.
  • Use cones, tape, or barriers to physically block off the scene.
  • You can use photos or videos to preserve and document the scene.

Document the incident facts:

  • Date and time of incident
  • Investigator
  • Name/s of the injured
  • Injury description
  • Date, time, and location of incident

Step 2 – Collect Information

Collecting information of events leading up to the incident, the incident itself, and other important information is necessary to establish a timeline, identify victims and witnesses, and begin to uncover the initial and root causes of the incident.

One of the primary ways to gather information is to interview witnesses and the victim/s. The sooner a witness or victim is interviewed, the more accurate and candid his/her statement will be.

Set the interviewee at ease:

  1. Clearly state the purpose of the investigation and interview – to learn how to prevent future incidents and notto blame any one person.
  2. Interview witnesses separately – as least initially. A witness might say more if they aren’t in the same room as their supervisor, co-worker, or the victim. The same is true for when you interview the victim.
  3. Let employee know they have a right to have employee representative (e.g., labor representative) present, if available/appropriate.
  4. Conduct interviews in a quiet space, although in some cases, it might make sense to interview someone at the scene of the incident. It might help them explain something better, jog their memory, or help you both put questions and responses in context.

Now you’re ready to begin the interview.

  1. Ask the individual to recount their version of what happened and don’t interrupt them.
  2. Take notes and/or record the responses; interviewee must give permission prior to being recorded.
  3. Have paper and pen/pencil available for interviewee.
  4. Ask clarifying questions to fill in missing information; repeat back to the interviewees the information obtained; and correct any inconsistencies.
  5. Ask the individual what they think could have prevented the incident.

In addition to interviews, other sources of helpful information include:

  • Equipment manuals
  • Industry guidance documents
  • Company policies and records
  • Maintenance schedules, records and logs
  • Training records (including communication to employees)
  • Audit and follow‐up reports
  • Enforcement policies and records
  • Previous corrective action recommendations

Step 3 – Determine the Root Causes

The root causes are the underlying reasons why the incident occurred. Root causes generally reflect management, design, planning, organizational and/or operational failings (e.g., employees were not trained adequately; a damaged guard had not been repaired).

If you truly want to prevent a repeat of an incident, you must go beyond the easy surface causes – “worker was careless” or “employee didn’t follow the SOP.” Focusing on the easy causes is a lazy way out and it won’t get you the answers you need to put meaningful corrective actions in place.

Remember: Investigations are not effective if they are focused on finding who to blame because they will stop at the initial incident and stop short of discovering the root causes.

Step 4 – Implement Corrective Actions

Your investigation isn’t done until all the underlying causes of the incident have been identified and corrective actions are in place.

Some of the corrective actions will be quick and easy fixes; others may take more time and planning. Some may be specific and address a root cause directly and others may be sweeping improvements to the safety program in general.

Regardless, it is important that you communicate the corrective actions throughout the workplace. Employees pay attention to what management pays attention to and what management ignores. If you ignore incidents or don’t follow through on corrective actions your employees will get the message loud and clear.  Employee safety isn’t valued.

So, take time to develop appropriate corrective actions and manage them through to completion.


Patient Lift

INCIDENT

Tove Schuster raced to help a fellow nurse lift a patient at Crozer-Chester Medical Center near Philadelphia in March 2010.

While working the overnight shift, she heard an all-too-common cry: “Please, I need help. My patient has fallen on the floor.”

The patient was a woman who weighed more than 300 pounds. So, Schuster did what nursing schools and hospitals across the country teach: She gathered a few colleagues, and they lifted the patient as a team.

“I had her legs — a corner of one of the legs, anyway,” says Schuster, who was 43 years old at the time. “And as we swung her up onto the bed, I felt something pop. And I went ‘ooo.’ ”

She finished the shift in pain and drove straight home to bed.

But after Schuster woke up late that afternoon, her husband, Matt, heard her shouting. He says he ran to the bedroom and found her crawling across the floor. “I thought it was a joke at first,” he says. “And she says, ‘I can’t walk.’ ”


NEED TO KNOW

Patient handling is the top cause of injury among care workers. Care workers who move people are at significant risk of sprains and strain injuries. Physically dependent people need to be assessed, taking into account the task being performed and the space in which the work will take place. Controlling the risk involves providing appropriate mechanical equipment, and training workers on safe work procedures and use of equipment.


BUSINESS / REGULATIONS

Schuster had injured her back moving the patient, which the hospital acknowledged. And today, X-rays of her back show how a surgeon repaired a damaged disk in her spine using a metal cage and four long, sharp screws.

“I can finally walk and sit again without being in excruciating pain,” Schuster says. “But the career I had as a floor nurse is over.”

It’s no secret that America’s healthcare workers are in danger of injuries sustained from improperly lifting and moving the patients they tend to every day in U.S. hospitals. And if workers can’t safely move patients, it places the patients at risk as well.

Despite this, says OSHA, hospitals still are not employing enough assistive devices to help move patients, and that’s a major reason why healthcare workers have one of the highest rates of occupational musculoskeletal injuries in the U.S. A recent study found that such devices can help cut down on these injuries and improve patient care at the same time.

The problem has gotten so bad that OSHA was forced to create an entire website devoted to lifting injuries in hospitals and to solutions that facilities can employ, including training tips and advice. However, OSHA still does not have any published mandate or standards related to reducing patient-handling injuries, just a recommendation that hospitals take steps to reduce them.


STATISTICS

One major source of injury to healthcare workers is musculoskeletal disorders (MSDs). In 2017, nursing assistants had the second highest number of cases of MSDs. There were 18,090 days away from work cases, which equates to an incidence rate (IR) of 166.3 per 10,000 workers, more than five times the average for all industries. This compares to the all-worker days-away from work rate of 30.5 per 10,000 workers.

The consequences of work-related musculoskeletal injuries among nurses are substantial. Along with higher employer costs due to medical expenses, disability compensation, and litigation, nurse injuries also are costly in terms of chronic pain and functional disability, absenteeism, and turnover. As many as 20% of nurses who leave direct patient care positions do so because of risks associated with the work. Direct and indirect costs associated with only back injuries in the healthcare industry are estimated to be $20 billion annually. In addition, healthcare employees, who experience pain and fatigue, may be less productive, less attentive, more susceptible to further injury, and may be more likely to affect the health and safety of others.

In 2011, U.S. hospitals recorded 253,700 work-related injuries and illnesses, a rate of 6.8 work-related injuries and illnesses for every 100 full-time employees. This is almost twice the rate for private industry as a whole.

The National Institute for Occupational Safety and Health reports that there are 75 lifting-related injuries for every 10,000 full-time hospital workers, and 107 injuries for every 10,000 workers at nursing homes and residential facilities. Hospital rates are nearly twice the national average for all industries, and nursing home rates are nearly three times as high.

According to surveys by the Department of Labor’s Bureau of Labor Statistics (BLS), there are more than 35,000 back and other injuries among nursing employees every year, severe enough that they have to miss work.

Nursing assistants and orderlies each suffer roughly three times the rate of back and other musculoskeletal injuries as construction laborers.

In terms of sheer number of these injuries, BLS data show that nursing assistants are injured more than any other occupation, followed by warehouse workers, truckers, stock clerks and registered nurses.


PREVENTION

An ounce of prevention yields more than a pound of cure.

Transfer, Reposition and Lifting Services

Industries where patient handling tasks are performed include:

  • Long-Term Care (includes facilities that provide skilled or non-skilled nursing care);
  • Acute Care – (includes hospitals, out-patient surgical centers, and clinics);
  • Home Healthcare workers; and
  • Others – such as physical therapists, radiologists, sonographers, etc.

Some examples of areas of a facility that may be identified as high-risk include: bathing rooms, extended care wings, and diagnostic units (e.g., radiology, emergency department, spinal unit, orthopedics department).

It is clear the healthcare industry must rely on technology to make patient handling and movement safe. Patient transfer and lifting devices are key components of an effective program to control the risk of injury to patients and staff associated with lifting, transferring, repositioning or movement of patients. Essential elements of such a program include management commitment to implement a safe patient handling program and to provide workers with appropriate measures to avoid manual handling; worker participation in the assessment and implementation processes and the evaluation and selection of patient handling devices; a thorough hazard assessment that addresses high risk units or areas; investment in equipment; care planning for patient handling and movement; training for staff; and program review and evaluation processes. The education and training of healthcare employees should be geared towards assessment of hazards in the healthcare work setting, selection and use of the appropriate patient lifting equipment and devices, and review of research-based practices of safe patient handling.

The use of assistive patient handling equipment and devices is beneficial not only for healthcare staff, but also for patients. Explaining planned lifting procedures to patients prior to lifting and enlisting their cooperation and engagement can increase patient safety and comfort, and enhance their sense of dignity.


How to Clean For Coronavirus

Here’s a quick PowerPoint on “How to Clean For Coronavirus” to help you deal with some of the issues related to COVID-19.

PowerPoint

List of Cleaning Products


What is Social Distancing

Here’s a quick PowerPoint on “What is Social Distancing” to help you deal with some of the issues related to COVID-19.


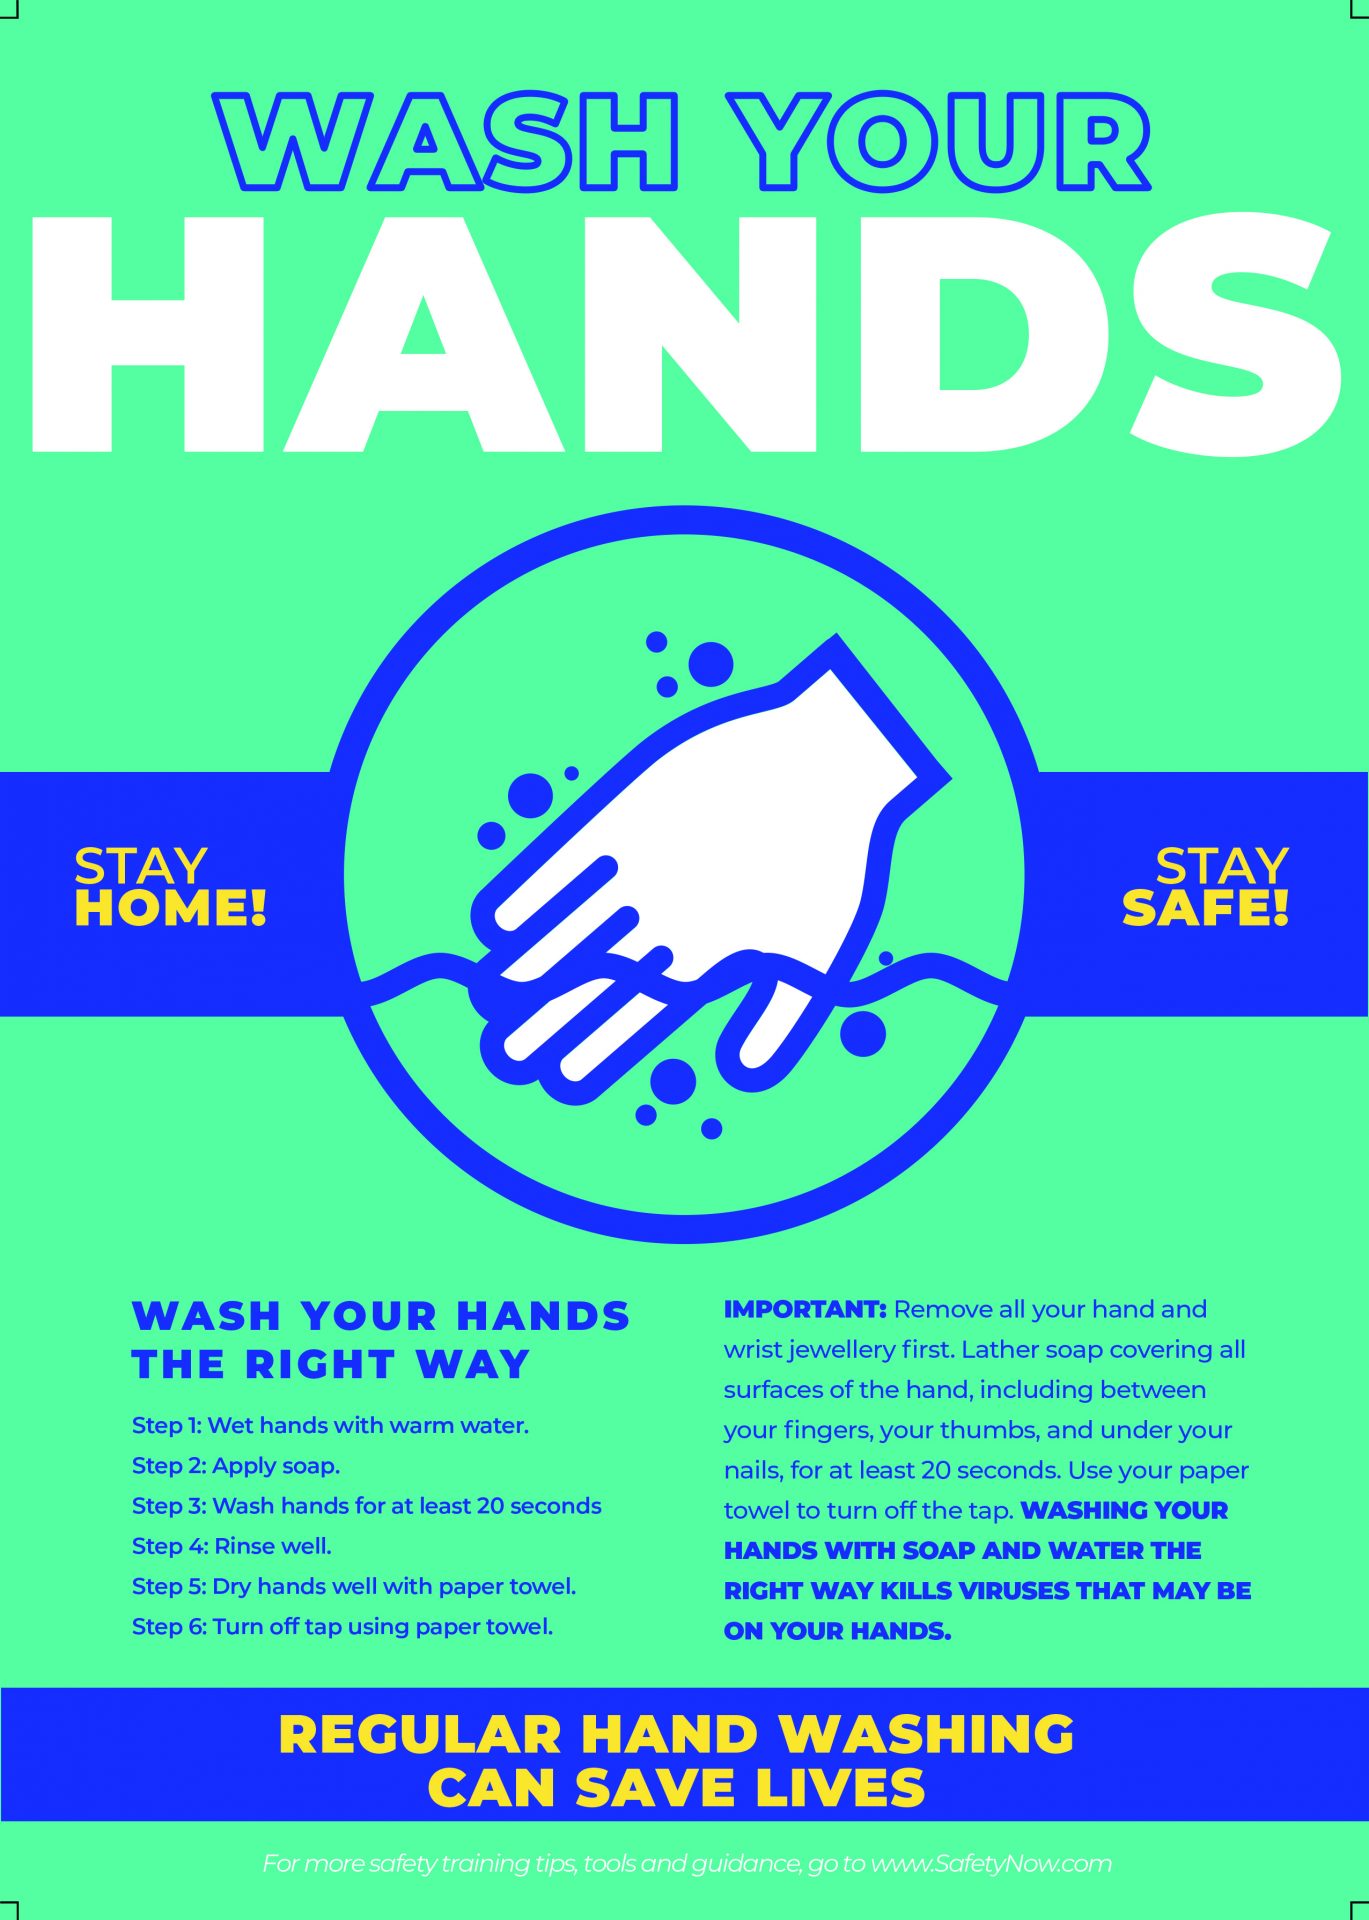
How to Wash Your Hands to Avoid COVID-19

Here’s a quick PowerPoint on how to wash your hands effectively, to help you deal with some of the issues related to COVID-19.

PowerPoint

Poster


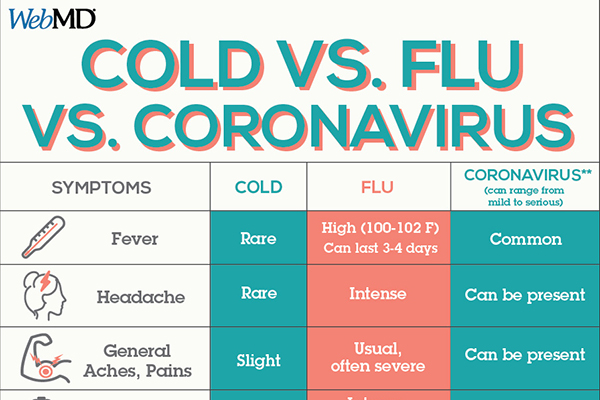
What Is and Isn’t Coronavirus

Here’s a quick PowerPoint on separating the symptoms of the flu, a cold, and COVID-19, to help you deal with some of the issues related to COVID-19.


COVID-19 and You

Here’s a quick PowerPoint to help you deal with some of the issues related to COVID-19.

PowerPoint


Dealing With Coronavirus Anxiety

Here’s a quick PowerPoint on “Dealing with Coronavirus Anxiety” to help you deal with some of the issues related to COVID-19.


What control measures need to be in place to prevent hearing damage from excessive noise in the workplace?

QUESTION

What control measures need to be in place to prevent hearing damage from excessive noise in the workplace?

  1. Install sound-proofing materials, post signage to worn excessive noise, job rotation.
  2. Use the right hearing protection, wear all hearing protection provided by employers, know the “Safe Noise Threshold”.
  3. Get Audiometric Testing, regular maintenance, and install sound – dampening material.
  4. Enclose a noisy process or equipment, regular maintenance, job rotation, install sound – proofing or sound dampening materials.

ANSWER

  1. Enclose a noisy process or equipment, regular maintenance, job rotation, install sound – proofing or sound dampening materials.

WHY IS IT RIGHT

Any reduction in the normal ability to hear is referred to as a loss of hearing. A hearing loss can be either temporary or permanent.

Other prime causes of permanent hearing loss are age, traumatic injuries (such as from explosions or gunfire), and infection. Noise, however, is the major identifiable cause of hearing loss.

Causes a host of health problems, with painless symptoms that progress unnoticed until it is too late. Even more disturbing is that the ears become accustomed to noise and the brain accepts it as normal, after a short while. Do not be fooled though, noise-induced hearing loss cannot be reversed!

Loss of hearing from high noise makes it hard to hear warnings and directions and this can lead to accidents. Though most employers make great effort to protect workers from noise hazards, sometimes, the problem is not what is done but how it is done.

Some workplaces might not understand what level of noise is harmful and this creates room for error while implementing controls. But safety regulations require employers to protect workers from excessive noise; this means, having a program that regulates noise exposure through noise level assessments, hearing protection, employee training and hearing tests. Without this program and its annual reviews, control measures are useless and may even become hazardous.

Most damage due to noise is gradual and over time. Because of this, many people ignore or do not realize that their hearing is being damaged. It becomes noticeable to an individual when it is harder to understand someone talking or needing to turn the TV volume up.

Damage can also occur from a single loud impulse noise such as a gunshot or explosion. These types of noises can rupture the eardrum or damage the bones in the middle ear. This kind of NIHL can be immediate and permanent. Loud noise exposure can also cause tinnitus—a ringing, buzzing, or roaring in the ears or head. Tinnitus may subside over time, but can sometimes continue constantly or occasionally throughout a person’s life. Hearing loss and tinnitus can occur in one or both ears. Sometimes temporary hearing loss can subside however the event that caused it can still cause long term damage to your hearing.

How the Ear is damaged from Noise

Hearing depends on a series of events that change sound waves in the air into electrical signals. Our auditory nerve then carries these signals to the brain through a complex series of steps. To breakdown the process simply- the sound waves travel through the ear and eventually move hair cells up and down in the ear that cause channels to open up. This allows chemicals to rush into a cell that creates an electrical signal that translates the sound into something we can understand.

Most noise-induced hearing loss is caused by the damage and eventual death of these hair cells. Unlike bird and amphibian hair cells, human hair cells don’t grow back. They are gone for good.

Noise Exposure Hazards

Over time, exposure to noise can cause the following problems:

  • Noise-induced hearing loss (NIHL)
  • Tinnitus (ringing in the ears)
  • High blood pressure
  • Fatigue.

WHY IS EVERYTHING ELSE WRONG
The best way to prevent hearing damage is by avoiding exposure to excessive noise. Noisy jobs should be identified, and control measures put in place.

Control measures might include:

  • Installing sound-dampening or sound-proofing materials.
  • Enclosing a noisy process or equipment.
  • Regular maintenance.
  • Job rotation – to lessen exposure time.
  • Putting up signage to warn workers hearing protection is required.

Workers can prevent hearing loss by:

  • Staying informed and watching for warning signs, such as ringing or humming in your ears and temporary loss of hearing when you leave work.
  • Wearing and maintaining all hearing protection provided by your employer.
  • Using the right hearing protection for the job, task, or area.
  • Participating in your employer’s audiometric program and understanding the results of your hearing tests.
  • Asking questions about noise levels, hearing protection, and other noise and hearing related issues, as soon as you have a concern.

Hearing Protection Devices

Hearing protection devices (HPDs) should only be provided when engineering and administrative controls to reduce noise at the source or along the path cannot be implemented or while such controls are being put in place. HPDs are barriers that reduce the amount of noise reaching the sensitive inner ear. Fit, comfort, and sound reduction or “attenuation” are important considerations in choosing HPDs. The types of HPDs used most commonly are earplugs or earmuffs. Earplugs attenuate noise by plugging the ear canal. Earmuffs cover the external part of the ear, providing an “acoustical seal”.

Effectiveness

The effectiveness of HPDs depend on the amount of time they are worn. What is not obvious to most wearers is that the effectiveness of HPDs can be reduced by as much as 95% or more if the protectors are not worn for as little as three or four minutes in noisy environments. It is therefore important to wear HPDs during the entire period of exposure in order to achieve the maximum protection available.

Comfort

Comfort is an important consideration in selection. An HPD that isn’t comfortable will simply not be worn or will be worn improperly. With earplugs, several factors affect comfort. Since some plugs are relatively non-porous, they can often create a pressure buildup within the ear and cause discomfort. Dirty plugs may irritate the ear canal. Because of the shape of an individual’s ear canals, certain plugs may not fit properly. Earmuffs should be made of materials that do not absorb sweat and that are easy to maintain and clean. The earmuff cup should be adjustable to conform to various head sizes and shapes. Headband tension and earcup pressure should be adjusted so that they are effective without being uncomfortable. Weight may also be a factor.

Work Environment/Procedures

HPD selection is sometimes dictated by the constraints of the work area or work procedures. For example, large volume earmuffs may not be practical in confined work situations with little head room or clearance. In that case, flat-cup muffs or earplugs may be more practical. Where work is necessary near electrical hazards, it may be desirable to use non-conductive suspension type muffs. The choice of protector may also be affected by the nature of work, as in welding where certain types of earmuffs may interfere with the welder’s helmet. The attenuation of the muff-type hearing protector may be considerably reduced when worn with spectacle-type safety glasses. (The head configuration of the wearer and the type of glasses worn will determine the reduction in attenuation.)

Where safety glasses must be worn, cable-type temples should be used in order to allow the smallest possible opening between the seal of the protector and the head. Otherwise earplugs should be worn, provided they are adequate.

Consideration should be given to hearing protectors that can be attached to hard hats where exposures to noise may be high but intermittent and where hard hats must be worn at all times. Periodic adjustments may be necessary because movement of the hard hat may break the seal of the HPD.

Consideration should also be given to work involving oils, grease, and other products that may soil hands. Ear infections may occur when earplugs are inserted by dirty hands.

Overprotection

Workers wearing HPDs that provide too much attenuation may feel isolated from their surroundings. Sounds may be heard as muffled. Speech or warning sounds may be unrecognizable. Overprotection can lead workers to resist wearing HPDs. Protectors should be chosen to provide sufficient, but not excessive, attenuation.

Where communication is critical and hearing protection is required, communication headsets can be considered. These devices provide protection against harmful levels of noise, yet allow for important communication to be heard.

Fit, Care, and Use

An employer who provides a worker with an HPD must provide adequate training and instruction to the worker in the care and use of the device.


Quiz: PPE – General

QUESTION

What must be done in conducting a workplace survey to find risks and hazards to set controls and choose appropriate PPE?

  1. Eliminate the hazard, engineering models, introduce experts in PPE design, talk to employees.
  2. Examine materials, inspect the site, administrative controls, observe employees.
  3. Inspect the site, observe employees, utilize existing procedures/protocols in workplace, examine materials.
  4. Inspect the site, examine materials, observe employees, talk to employees.

ANSWER

  1. Inspect the site, examine materials, observe employees, talk to employees.

WHY IS IT RIGHT

Creating a PPE Program

There are steps and processes you must conduct to successfully follow applicable regulations, establishing a PPE program that is cost-effective and reduces risk of injury.

To develop your PPE program, managers, supervisors and employees should work together to conduct the following processes:

1. Surveying the Workplace:

Conducting a workplace safety survey is an exercise in finding risks and hazards, allowing you to set controls and choose appropriate PPE.

Your team of managers, supervisors and workers must:

  • Inspect the site – Look for physical dangers across your work site, such as exposed wires and obstructed paths or areas. If the site is indoors, ensure you have fire extinguishers around the facility and clearly-marked emergency exits. If the site is outdoors, ensure there is signage to alert pedestrians of danger.
  • Examine materials– List materials that employees interact with or are exposed to, helping you pinpoint threats and how to mitigate them. For example, chemicals may call for the use of respirators.
  • Observe employees – Take time to see how employees work, ensuring they aren’t doing anything that could lead to injury. For example, using improper technique when handling tools.
  • Talk to employees – Ask them questions to see how safe they feel on a daily basis. Note specific concerns and pose follow-up questions to determine exactly why they feel at risk.

Based on the survey’s results and insights, you’ll be able to complete the next steps in creating a PPE program.

2. Select Appropriate Controls:

Introduce a pre-contact or point-of-contact control for each hazard you identify.

The goal of a pre-contact control is to stop workers from reaching the hazard, and vice-versa.

This can involve eliminating the hazard in question. You can do this by, for example, replacing old machinery or finding an alternative way to complete a task. You can also contain the hazard with machine guards or through isolation methods. Alerting employees of danger by introducing new signage is another obligation.

The goal of a point-of-contact control is to prevent or mitigate damage from the hazard when a worker makes contact with it.

Because point-of-contact controls don’t eliminate the hazard, you should only introduce them when pre-contact controls aren’t adequate. Or, you simply desire an additional safety measure.

PPE is the standard point-of-contact control.

3. Select Appropriate PPE:

The PPE that you select must protect against the workplace risks and hazards you identified, acting as either a last resort, back-up measure or temporary policy to prevent injuries.

Let’s say you identified the possibility of debris falling onto workers.

Wearing hardhats can act as a last resort of protection if you can’t prevent debris from falling. If you’ve implemented an effective control measure or are doing so, wearing hardhats can act as a back-up or temporary measure.

4. Fitting:

Keep in mind, the effectiveness of most equipment partially depends on how it fits the worker. For example, if leg protectors are too long, they can hinder wearer mobility. And if protective boots are too small, workers may forgo wearing them.

This is why you must take each worker’s measurements, cross-referencing numbers with the sizing charts you can receive from PPE manufacturers.

5. Training:

Training is a crucial part in formalizing any PPE program. Workers and their supervisors must learn how to protect themselves and use their new equipment.

Tailored to the specific risks and equipment, training must cover:

  • What PPE is for – Employees shouldn’t just see PPE as manager-mandated accessories. Or else, they may not understand the point of using them. Explain the specific function that each piece serves, indicating the workplace hazards it protects against.
  • How and when to wear PPE – It’s usually not enough to talk about using PPE. Instead, demonstrate how to use each piece in different scenarios. Then, get workers to put pieces on, allowing them to see how they should fit.
  • How to spot problems – To prevent workers from using ineffective PPE, tell them how to spot deficiencies. For example, helmets with cracks have to be fixed or replaced.

Whether you run training sessions for groups or individuals, make sure new and veteran employees are up-to-date on your worksite’s policies and equipment.

6. Program Audits:

Many work sites run annual audits of their PPE and general safety programs, but you may wish to review especially dangerous or important aspects more frequently.

Typically, audits involve inspecting PPE and monitoring workers to make sure they’re following procedures. You should also review procedures themselves, spotting opportunities to introduce hazard controls or provide additional equipment.

To analyze your program’s effectiveness, measure safety-related figures. You can do this by tracking near-accidents, injuries and the severity of these injuries.

How to Select PPE

Three Questions to Consider:

1. How long should each piece of PPE last?

Due to variation among equipment types and how heavily they’re used across work sites, there isn’t a consistent answer to this question.

First, look into the manufacturer’s warranty and other information sources. Many manufacturers will offer a warranty period of at least one year, covering any sort of product failure.

Their products may also include information tags, detailing life expectancy. For example, most hard hats come with these tags, stating the product lasts between three and five years.

Second, talk to colleagues who have used the kind of PPE you need. Word-of-mouth can lead you towards trusted brands, helping you find equipment designed to be effective for long periods.

Remember that the longevity of PPE plays a key role in your purchasing decision, ensuring you don’t have to buy equipment at a faster-than-expected rate.

2. When do you know it should be replaced?

Take these factors and scenarios into account when deciding if it’s time to replace a piece of PPE:

  • Manufacturer’s Information – Generally, manufacturers provide information about how to identify a piece of PPE’s “end of life.” This is typically based on a specific date or maximum service time.
  • Damage – When certain pieces of PPE are involved in accidents, they need to be replaced. For example, if a safety helmet’s shell receives an irreparable scratch, you should replace it.
  • Inspection – If a piece of PPE does not pass inspection, which will be discussed later in this guide, you must replace it.

3. How do you know if a specific piece properly fits?

To ensure employees can comfortably wear equipment, run fitting sessions and use information from PPE manufacturers.

Schedule timeslots for each worker who will wear PPE, taking their measurements and keeping a file with this information. Note any factors that may influence sizing. For example, if an employee wears prescription glasses, protective eyewear should fit over them.

Cross-reference your data with sizing charts, which your manufacturer of choice should provide.
Doing so will allow you to buy or distribute PPE that properly fits workers, effectively mitigating relevant risks.

WHY IS EVERYTHING ELSE WRONG

There are different types of PPE available depending on the type of job or the type of hazards. PPE offers protection against injury or illness resulting from contact with physical, chemical, radiological. Mechanical, and electrical hazards. The use of PPE is the last line of protection and indicates that the hazards cannot be controlled through engineering, design, or administrative controls.

Common Personal Protection Equipment

  • eye and face protection
  • foot and leg protection
  • head protection
  • hearing protection
  • arm and hand protection
  • protective clothing

OSHA does not mandate specific PPE for specific circumstances but OSHA does require that:

  • employees identify hazards that require PPE
  • select the appropriate safety equipment; and
  • train workers on their proper use.

Causes of PPE Failures

  • Inadequate assessment by the employer – Failure of the employer to properly assess hazards can lead to workplace injuries, ranging from head trauma to chemical exposures.
  • Poorly fitted PPE – in order for PPE to work properly, it should fit properly, It is particularly important when working with hazards such as heat, respiratory irritants, and chemicals.
  • Improper PPE usage – Eye protection can be aggravating and gloves can limit dexterity. Workers often find respiratory protective equipment uncomfortable and fell that it interferes with vision and communication. However, it is important to understand that the proper usage of PPE is essential for worker safety and well-being.
  • Insufficient worker training – employers often fail to provide detailed training to workers on the proper use of PPE. The training should include:
    1. How to inspect PPE
    2. When to use PPE
    3. How to wear and adjust PPE
    4. Limitations of PPE
    5. How to remove, maintain, and store PPE safely
    6. Identifying and replacing damaged and worn PPE

Precautions in the use PPE

PPE programs are often plagued by the belief that once a piece of equipment is put on, the worker is totally protected. This is a false sense of security. Basic safety principles, such as housekeeping and engineering controls, must not be ignored.

PPE is designed to meet criteria which is only an approximation of real working conditions. PPE should not be used when hazards are greater than those for which that specific piece of equipment is designed. When it comes to the evaluation of potential hazards, uncertainties need to be taken into account. Unfortunately, PPE design criteria cannot cover all eventualities.

Wearing PPE should not in itself create a greater danger. For example, gloves prevent skin damage while working with moving equipment, but can create an entanglement hazard when working with a drill press or metal lathe.

Most regulatory agencies require that PPE not be used unless the employer has taken all the necessary measures in terms of engineering controls, work practices, administrative controls, and hygiene to control the hazard.

Finally, vigilance, diligence and adherence to these PPE precepts will lead to firstly, were safety and security for employees and secondly to a higher bottom line of the business.

Everything else is wrong.


What are the Three Major Overhead Hazards?

QUESTION

What are the three major overhead hazards?

  1. Overloading, fall protection, dropped from above.
  2. Mechanical failure, electrical hazards, conduct risk assessment.
  3. Electrical hazards, overloading, dropped from above.
  4. Objects dropped from above, slings and attachments not secured properly, overloading.

ANSWER

  1. Electrical hazards, overloading, dropped from above.

WHY IS IT RIGHT

The focus for all objects at heights should always be on preventing objects from falling rather than a catching object, or on limiting the damage after they fall.

Fewer than 25% of construction workers think that all accidents are preventable. What is clearer that workers often view themselves as victims of accidents and not as the cause of accidents?

Expect workers at height to wear a fall protection harness and be tied off because we’re trying to prevent people from falling.

But we need to stop things from falling in the same way we have worked diligently towards preventing people from falling.

To determine what kind of force an object falling from a certain height generates, calculations can be done around the physics of gravity. For example, an eight-pound wrench dropped 200 feet would hit with a force of 2,833 pounds per square inch – the equivalent of a small car hitting a one-square-inch area.

Most organizations have deployed a fall protection program for workers but have not deployed a drop prevention program for tools and equipment. Expanding a fall protection program to include tools and equipment is far easier for companies and employees than creating a new program for drop prevention.

The difference between a fall protection program for humans and fall protection program for tools is only a matter of perspective: The first saves you; the second saves others.

While the most obvious person at risk when objects are dropped is the one underneath, the worker using the tool also can be at risk, as his knee-jerk reaction may be to catch or go after the falling object, which could cause him/her to lose balance and fall.

People are not designed to work at height. That’s why they wear a fall protection harness. Tools are not designed for use at height either. That’s why we also need to provide a fall protection harness and connection point for tools – so they easily can be tied off.

A harness for a person acts as the primary component of a personal fall protection system. However, for tools, we typically rely on secondary, passive systems, such as debris nets. We rarely deploy a primary system for tools and equipment.

Countless companies in the manufacturing and construction industries rely on overhead cranes to lift and transport materials. When installed and used properly, these systems make operations easier and safer. But, overhead crane accidents cause severe injuries and fatalities every year. Preventing these disasters requires workers to recognize certain hazards that occur during operation and follow safety procedures to avoid them.

There are multiple hazards that can arise regarding cranes in general. Many accidents involve large lift systems like tower cranes and mobile cranes. But hazards do exist with all types of cranes—including overhead cranes—and in all facets of crane operation. (Overhead cranes are defined by OSHA 1910.179(a)(8) as a crane with a movable bridge carrying a movable or fixed hoisting mechanism, and traveling on an overhead fixed runway structure.)

Analysis of overhead crane accidents reveals three common safety hazards that every company using overhead lift systems should be aware of to keep their workers safe. It’s important to be familiar with these hazards and learn to recognize them in the workplace in order to avoid them. The three most common hazards involving overhead cranes include electrical hazards, overloading, and materials falling/slipping from overhead hoists.

Overhead Hazards

One of the most dangerous overhead hazards is also one of the most common: electrical wiring and power lines. If a ladder, pipe, or other object that can conduct electricity comes in contact with an energized power line (or even an improperly grounded light fixture), electric shock, serious burns, and fires can result.

OSHA’s most recent list of the top ten most frequently cited violations, three of the ten (and two of the top three) have something in common: they involve injuries related to overhead work. Specifically, the #1 violation involves fall protection, #3 relates to scaffolding, and #7 involves ladders.

With overhead work, reference is to work that takes place above other workers and work that’s being performed with arms raised above a worker’s head.

Work being done above others.

In the best possible scenario, work would never take place in situations where someone else is working below. However, the reality is that it can happen on a worksite, whether deliberately or unknowingly.

Anytime someone is working above someone else, there is the possibility that objects may be dropped. That object may be a tool, something that is being worked on, or even debris. If the object falls on a vehicle or piece of equipment, it may cause significant damage. But if it falls on another worker, serious injury may be the result.

A simple approach is to say that those who are working above others should be careful with how they handle tools and equipment, so they’re less likely to drop anything. However, nobody intends to drop objects. That’s why we refer to those situations as accidents. It’s also why workers should take specific steps to reduce the potential for those accidents, and to limit the possible damage.

The first step is to ensure that people who are working below are aware of the work that’s happening above them and are taking adequate precautions. For example, the area beneath the work can be marked off with caution tape, barricades, and signs that alert workers to the potential for falling objects.

If a task that’s being performed overhead will take only a short time, the worker who is performing that task or that worker’s supervisor should personally inform those who will be working below so that they have a heightened sense of awareness.

Instead of carrying tools and materials up a ladder or in one’s pockets, it’s usually safer to place them in buckets or other containers attached to a lift line or winch. Make sure the items being raised are balanced properly and secured in such a way that they’re not likely to tip over or slip out on the journey.

While working, make sure that materials and tools are kept away from the edges of scaffolding or other raised surfaces, so they’re less likely to fall if bumped or dislodged. If prolonged work is being performed on a raised surface, toe boards, screens, or similar protection will reduce the chances of objects being knocked off. Tools or materials that are no longer needed should not be stored on the raised surface.

Falling objects don’t always fall from scaffolds or ladders. Poorly stacked materials such as pallets or boxes can easily tumble down if bumped. Items that are loaded improperly on a lift truck or other equipment can also fall. The best prevention is to follow proper stacking procedures and to avoid stacking beyond safe heights. In addition, anytime there is a potential for falling objects, even from a fairly low height, hardhats are a must.

Objects can also fall when they slip out of the hands of a worker carrying them, or when someone doesn’t realize how heavy the object may be and fails to lift it properly. That type of fall does not involve a great distance, but can easily cause severe injury to feet and toes. The same thing can happen if a worker props a component or piece of equipment against the wall, but doesn’t secure it. Another worker bumps into the object, and it falls on his feet. This type of injury underscores the value of safety shoes.

WHY IS EVERYTHING ELSE WRONG

OVERHEAD CRANE SAFETY—THREE MAJOR HAZARDS AND PREVENTATIVE MEASURES

The three most common hazards involving overhead cranes include electrical hazards, overloading, and materials falling/slipping from overhead hoists.

Countless companies in the manufacturing and construction industries rely on overhead cranes to lift and transport materials. When installed and used properly, these systems make operations easier and safer. But, overhead crane accidents cause severe injuries and fatalities every year. Preventing these disasters requires workers to recognize certain hazards that occur during operation and follow safety procedures to avoid them.

There are multiple hazards that can arise regarding cranes in general. Many accidents involve large lift systems like tower cranes and mobile cranes. But hazards do exist with all types of cranes—including overhead cranes—and in all facets of crane operation. (Overhead cranes are defined by OSHA 1910.179(a)(8) as a crane with a movable bridge carrying a movable or fixed hoisting mechanism, and traveling on an overhead fixed runway structure.)

Analysis of overhead crane accidents reveals three common safety hazards that every company using overhead lift systems should be aware of to keep their workers safe. It’s important to be familiar with these hazards and learn to recognize them in the workplace in order to avoid them. The three most common hazards involving overhead cranes include electrical hazards, overloading, and materials falling/slipping from overhead hoists.

The following analysis of each hazard provides a description, potential risks, reasons why accidents occur, preventative measures to avoid them, and applicable OSHA requirements. One commonality that all three hazards share is the qualifications of crane operators. It is the responsibility of the crane owner and job supervisor to ensure that crane operators are competent and qualified to do the job.

ELECTRICAL HAZARDS

According to OSHA, nearly 50 percent of overhead crane accidents are the result of machinery coming into contact with a power source during operation. Power line contact is literally defined as the inadvertent contact of any metal part of a crane with a high-voltage power line. Power line contact most often occurs when the crane is moving materials nearby or under energized power lines and the hoist line or boom touches one of them. Usually, the person who is electrocuted is touching the crane when it comes into contact with the power line. But, the danger is not just limited to the operator. It extends to all personnel in the vicinity.

A single contact with power lines can result in multiple deaths and injuries. Each year nearly 200 people die from power line contact and about three times as many are seriously injured. Most victims are guiding the load at the time of contact, but risks extend to everyone present at a job site.

Power line contacts most often occur because safety planning isn’t considered and preventative measures haven’t been taken to avoid hazards. Planning is one of the biggest accident deterrents available. To start, it’s important to establish who is in charge of prejob safety planning before any cranes arrive at a worksite. Furthermore, cranes should be kept away from unsafe working areas; OSHA and ANSI both outline safe distances operators must maintain from a power source when working at a job site. Areas that are considered hazardous are referred to as danger zones, and crane operators should be clearly notified of all potential danger zones. The area within a 10-foot radius of a power line is considered an unsafe work area—or danger zone—and it must be clearly marked on the ground by insulated barriers, fences, tape, etc. This will help create visual clues for workers to ensure that the crane is always positioned so that the boom and hoist line can’t intrude in the danger zone.

OSHA also regulates that overhead crane operators use precautions when working near power lines—even outside of the 10-foot radius. This means, operators should consider all power lines as energized until the electric company tells him or her otherwise. Operators should also maintain a safe speed when operating near power lines. Crane booms or truck-mounted trolleys using an electrical remote control system for loading and unloading can also be very dangerous. If the boom contacts a power line, the operator holding the control box is usually electrocuted instantly. This type of equipment should never be used near power lines. A non-conductive, pneumatic or radio remote control system is a much safer choice when working near power lines.

Overall, it’s important for operators and workers to receive the appropriate training to avoid danger zones where electrocution can occur. Operators should have workers observing nearby to assist them whenever it is difficult to visually maintain the necessary clearance. Be sure that any ladders, tools, and systems are non-conductive, and ask the electric company to de-energize and ground power lines or install insulation whenever people are working near them.

OVERLOADING

According to OSHA, 80 percent of all crane upsets and structural failures can be attributed to exceeding the crane’s operational capacity. When a crane is overloaded, it is subject to structural stresses that may cause irreversible damage. Swinging or sudden dropping of the load, using defective components, hoisting a load beyond capacity, dragging a load and side-loading a boom can all cause overloading.

OSHA estimates that one crane upset occurs for every 10,000 hours of crane use. Nearly 80 percent of these upsets can be attributed to predictable human error when the operator inadvertently exceeds the crane’s lifting capacity. Overloading most often occurs when poorly trained personnel are allowed to operate cranes. Oftentimes, operators mistakenly believe they are able to rely on their instinct or experience to determine whether a load is too heavy. It’s crucial that any crane operator know the weight of a load and the capacity of the crane. Using technologies such as load-measuring systems for training and planning can greatly reduce the hazard of overloading and operator incompetency.

OSHA requires workers to provide formal training for all crane operators, but operator certification is only required for operators using equipment with a maximum manufacturer-rated capacity greater than 2,000 pounds. Employees who are not qualified are only permitted to operate equipment as operators-in-training with a certified trainer. Formal training should ensure a working knowledge of crane load charts, and on-the-job training is a great preventative measure if the trainer is qualified.

Overall, most crane safety programs outline competent personnel requirements, and it’s a good idea to become familiar with them. Cranes have become more sophisticated, with the ability to lift heavier loads further and faster than ever before. Today’s operator must be well trained and have a clear understanding of load dynamics, lifting capacities at various configurations, and the conditions under which such lifting capacities are valid.

MATERIALS FALLING

Falling materials is a major concern at any work place or job site using overhead cranes. Visual impairment, two-blocking, slipping, mechanical failure, or operator incompetency can all result in serious injuries or fatalities. If materials are not properly secured, for instance, the load can slip and land on workers in the vicinity or cause major damage to property. For larger or mobile cranes, undesired movement of material can pinch or crush workers involved in the rigging process.

Statistics show that nearly 20 people died in 2012 as a result of accidents with overhead hoists. That’s because the loads being lifted by overhead hoists tend to be fairly heavy and cause serious damage if dropped. Slings and attachments that aren’t secured properly can be a major safety hazard, and when objects begin to slip, they will eventually crash to the floor below.

One way to reduce the risk of falling materials is to perform regular maintenance of hoists. Load testing maintenance ensures that you know how many pounds the hoist can handle, and it helps to maintain good working condition. Maintenance should always be treated seriously when it comes to heavy machinery. If a moving part on an overhead crane wears out or breaks the hoist, it can cause serious damage. Performing regular maintenance ensures the hoist and overhead crane remain in good working order and that all operations run smoothly.

Aside from maintenance, improper securing of the load or the slings that carry the load is one of the leading causes of accidents with overhead hoists and cranes. If the load or sling holding the load isn’t properly secured, the objects can slip out, tip, and eventually crash to the ground below. Mechanical failure can also cause machinery to malfunction unexpectedly and drop a heavy load. To reduce the risk, OSHA mandates that operators make daily crane inspections. When mechanical problems do arise, operators should use the lockout/tagout procedure to prevent accidental startup or movement of the crane until the problem has been repaired.

Employees working around overhead cranes should always wear proper head, foot, hand, and eye protection. The crane operator and any workers below should also be aware of his/her surroundings and never walk under a lift. A crane operator must always lower a load to the ground before leaving the lift or during idle times. When moving items, he or she should never raise the load higher than required for clearance.

When operating a hoist, properly trained employees in the vicinity should understand that they are working in a dangerous area. Installing “Hoist Danger” signs around the work area will help to alert employees that a hoist is operating over their heads. Workers should be trained to stay clear of the hoist, and they should never walk beneath loads suspended in the air. Likewise, suspended loads should never be moved over employees and personnel should never be lifted or transported on a hoist.

Careful operation of the hoist is another important safety factor to consider whenever overhead cranes are used. The person responsible for managing the hoist should be well trained and qualified. Moving the crane too quickly and jerking the hoist when it’s bearing a heavy load can be hazardous to the crane operator and workers nearby. Changing or reversing direction should be done slowly and carefully. Reversing direction can cause heavy loads to spill, and swinging the load is very risky. Operators and controllers must maintain 100 percent focus on the task at hand to avoid potentially dangerous situations.

DROPPED OBJETCS FROM ABOVE

The third largest cause of death in the workplace, behind transportation incidents and workplace violence, is contact with objects and equipment, the majority of which are being struck by a falling object.

There are more than 52,260 recorded incidents of people being struck by falling objects in the last recording period, according to OSHA. This number likely is much lower than the actual number, of course, but this would mean that, on average, nearly 143 objects strike people every day – including Saturdays and Sundays – in the United States alone.

Dropped Objects Prevention – Best Practices and Solutions

  1. Expand fall protection programs to include tools and equipment.
  2. Provide a competent person to manage the expanded program.
  3. Raise awareness of drop hazard identification and mitigation techniques within the workforce.
  4. Require risk assessments before performing work with drop hazards.
  5. Consider regularly scheduled “hazard hunts” to drive awareness of drop hazards.
  6. Consider using tethered tools. These tools either have built-in connection points placed by the manufacturer or can be retrofitted with connection points. Next, the tools are connected to a lanyard. This solution not only applies to small hand tools, but also can be used for tools and small pieces of equipment that weigh up to 80 pounds, such as rivet busters, portable generators, etc. Tethered tools mostly are used by larger construction companies and are not in wide use yet. But this may change, as younger workers tend to be more concerned with safety than veterans.
  7. Consider using energy-absorbing lanyards, which will reduce the force associated with the dropped tool. Tools either can be connected to a worker through a tool belt, harness or wristband, or anchored to a fixed structure.
  8. Tools that weigh more than five pounds should never be tied-off to a person. If a heavy object gets loose, the weight and force could dislocate a wrist or shoulder or even pull a worker over a ledge or scaffolding.
  9. If a worker has a tool attached to him and needs to pass it off to a colleague, that colleague can connect to the tool before the passing worker disconnects from it, ensuring the tool is 100 percent tied off and never has the opportunity to become a drop hazard.
  10. Employees should be properly trained on how to use tethered tools. They must be taught how to attach a connection point to the tools, use the lanyards properly and respect the weight rating of the lanyards.
  11. As a best practice, workers at height should only bring up the tools they need to do their job.
  12. Hoist up items and then transfer them over with different lanyards to the workers themselves or to static anchor points. This can be done in a bucket, which can then house the extra tools. But many popular plastic buckets present other safety concerns, as they frequently fall over, spilling their contents.
  13. There are many buckets, bags and pouches available on the market with closure systems to dramatically reduce the likelihood of items falling out. Some even close automatically when turned upside down.
  14. A secondary solution to dropped objects are toe boards. Toe boards should be capable of withstanding a force of at least 50 pounds in any downward or outward motion.
  15. Debris nets are another secondary solution and provides a way to catch dropped objects. Green netting that goes over buildings when they are being refaced in areas where there are a lot of pedestrians is the most recognized form, but there also is netting that is put up within the construction project, such as directly under work being done, to help stop objects from falling on workers below. However, nets can’t be the only solution, as objects often don’t fall straight down or are small enough to go right through the debris netting.

Preventive Procedures is necessary

OSHA can use the General Duty clause to cite companies when dropped objects have caused injuries or are a hazard, but OSHA rarely cites a company for dropped objects under the General Duty clause. The clause says there must be a hazard; the hazard must be recognized; the hazard causes or is likely to cause injury or death; and the hazard must be correctable.


COVID-19 Masks, Signs and Symptoms Infographic


The Race to Stop COVID-19


Stop the Spread of Germs at Work


Business Continuity Plans and COVID-19: How to Prepare

As of today, the World Health Organization confirmed the total number of global COVID-19, or coronavirus, cases surpassed 189,000. (March 17th, 2020)

Estimates as to when the outbreak will subside are uncertain at best, and a vaccine is likely months off. Meanwhile, the economic toll continues to mount. Whether it’s canceled business travel, disrupted supply chains, or social distancing, the situation is forcing organizations of every size and description to dust off their emergency response and business continuity playbooks.

Besides encouraging employees to work from home and stocking up on office hand sanitizer, what is an executive to do? In this post, we take a look at some sound tactics that will help keep your people safe and your doors open.

In this report, we take a look at some sound tactics that will help keep your people safe and your doors open.

The Special Report also includes:

  • Business Continuity Plans and COVID-19: How to Prepare
  • COVID 19: Pandemic Preparedness for Business
  • Business Pandemic Influenza Planning Checklist
  • Model Short-Term Telecommuting Agreement
  • Memo: Temporary Suspension of Nonessential Business Travel
  • Social Distancing to Avoid the Spread of COVID-19: What Should Your Business be Doing?

We can help you navigate this current safety risk… and help you with other OHS needs too.


Preparing for the Spread of COVID-19


Quiz: Pre-Job Briefings

QUESTION

When are Pre-Job Briefings required?

  1. Assignments change, new personnel come on board, change in the facility or work area.
  2. Work activities resume after inactivity, change in work scope research, and development, new personnel come on board.
  3. A change in work scope, research and development, assignments change or new personnel are involved, work activities are resumed after an extended period of inactivity.
  4. Work activities are resumed after a period of inactivity, assignments change, change in facility or work area.

ANSWER

  1. A change in work scope, research and development, assignments change or new personnel are involved, work activities are resumed after an extended period of inactivity.

WHY IS IT RIGHT

What is a pre-job brief?

A Pre-Job Brief is a formal discussion among all individuals involved in performing a task. The level of detail covered in the brief may vary depending on the complexity of the job. Typically, the person in charge of the job will lead the discussion and many times a checklist will be used to ensure that key safety aspects get covered. A pre-job brief normally covers the work activity in a step-by-step detail. Job hazards are identified and a plan is put in place to avoid or mitigate them. When the brief is complete, the workers understand the safety issues and their specific role in the work process.

Job Briefings and Best Practices: The “269” Standard

The “269” standard requires that before each job, the person in charge conducts a job briefing with all workers that covers, at a minimum:

  • Hazards associated with the work
  • Procedures to be used
  • Any special precautions
  • Control of energy sources
  • Personal protective equipment (PPE) required

WHY IS EVERYTHING ELSE WRONG

Purpose of the Pre-Job Brief

The purpose of the pre-Job briefing is to ensure that the supervisor and workers understand the scope of the work to be performed by discussing the tasks involved. This will provide an understanding of the hazards and related safety, security, environmental controls, and stimulate critical thinking and discussion. As the leader, the supervisor should clearly define personnel roles and responsibilities, precautions, limitations, stop/pause work procedures, critical steps and contingencies. Together, the supervisor and workers evaluate the work and resources. To meet the purpose, workers need to understand what is expected to be accomplished and what is to be avoided. The effectiveness depends on the preparation of the supervisor and the conduct of the briefing.

Pre-job briefs are required for all moderate and high hazard/complex work activities. Pre-job briefs should be conducted preferably right before work starts, and as frequently as necessary when:

  • Assignments have changed or new personnel are involved which may be an individual, specific pre-job briefing,
  • A change in work scope, research and development boundary/limits, and/or in facility or work area conditions has occurred that may affect safety, security, or the environment, or
  • Work activities are resumed after an extended period of inactivity.

Dialogue – The Key

The answer is rolled up in the “How” to accomplish the goals of Pre-Job Briefings.

Make this last meeting a dialogue among the participants — not just a monologue delivered by the supervisor. Intelligent, open conversation among team members will disclose assumptions, error traps and misunderstandings that could lead to an accident.

Plan your pre-job briefing around the following four questions, which are summarized in the SAFE acronym:

  • What are the critical steps of the work to be performed?
  • How could a mistake be made at each critical step?
  • What is the worst thing that could go wrong?
  • What safety measures or barriers are in place to prevent it?

Step outside the proverbial box

Ask workers who have special knowledge — the safety lead, engineers, electricians, riggers, for example — to review facets of the work related to their specialty. If possible, include a walk down of the jobsite to identify systems and hazards. Consider possible hazards from other work being done in the area, and take necessary precautions. If weather conditions such as thunderstorms or high winds could pose hazards, review appropriate responses and contingency plans.

Involve all team members in the dialogue by asking questions related to their respective roles in the work scope, including emergency response actions, PPE requirements and the limitations of their PPE. Minds tend to wander during these discussions and this will help keep their attention trained on you.

If inexperienced workers are assigned, or contractors new to the jobsite are involved, spend extra time on relevant areas of concern such as job hazards, work-area configuration and emergency responses.

Expectations from a Pre–Job Briefings

1. Discussion of hazards associated with the job

  • Be reminded where hazard management plans are kept on the site.
  • Supervisor completes a briefing checklist.
  • Be told the Minimum Approach Distances (MAD) for unprotected parts of the body.
  • Discuss “Extended Reach”.
  • The presence of any hazardous substances highlighted, especially in power generation facilities.
  • Other dangers, such as:
    • high air pressure;
    • high water pressure;
    • pressurized chemical injection systems;
    • steam pressure;
    • heat.

2. Review of hazard management plans

  • What is to be done and in what sequence.
  • How it is to be done and by whom.
  • Possible hazards and how they are to be addressed.
  • The status of energy sources.
  • Personal protective equipment requirements.
  • All changes in procedure and scope of the work.

3. How to deal with significant changes

  • Different kinds of tasks on the same shift.
  • New personnel or spectators.
  • Changing weather.
  • Significant delays (e.g., interrupting work for a trouble call, then resuming).
  • Changing scope of work.
  • Unexpected complications, hazards, malfunctions, or distractions.

4. To be brief or not to be

  • Short briefings are needed for:
  • daily updates;
  • routine work;
  • employees’ training and experience are adequate to recognize and avoid hazards.
  • Extensive briefings are needed for:
  • complicated or hazardous work;
  • employees who might not have the experience to recognize and avoid hazards.

5. Remember these meetings are for you and your safety

  • Get involved in the briefing, don’t just listen.
  • Make suggestions about how to stay safe.
  • Raise health and safety concerns.

Steer clear of common briefing errors

Avoid pitfalls that can weaken your presentation and lose your audience:

  • Conducting the meeting as a monologue rather than a dialogue
  • Using generalities rather than specifics to discuss the work task.
  • Omitting discussion of error traps and possible consequences.
  • Failure to tailor standard safety measures to specific demands of the task.
  • Failure to insist on all participants’ attendance of the briefing.
  • Covering a lengthy generic checklist rather than focusing on critical steps.
  • Conducting the briefing in a noisy, distracting location.

Don’t just read from text, one must lead it

Ask questions, don’t just tell them

Never tell them something they can tell you. Always ask open ended questions. This keeps them involved. Don’t tell them what to do with poor statements like this:

  • You need your hard hat and glasses for this job.
  • I want everyone to work safely today.
  • Let’s get the line grounded.


Quiz: Respiratory

QUESTION

What is the hierarchy of hazard controls measures in relation to respiratory PPE?

  1. Respiratory prevention program, air purifying respirator (APR), Elimination substitution.
  2. Supplied air respirators, engineering controls, respiratory prevention program.
  3. Administrative/work practice controls PPE, air purifying respirators (APR), respiratory prevention program.
  4. Elimination/substitution, Engineering controls, Administrative/work practice controls, PPE.

ANSWER

  1. Elimination/substitution, Engineering controls, Administrative/work practice controls, PPE.

WHY IS IT RIGHT

Respiratory hazards are invisible and can have severe impact on the health and safety of a worker. A respiratory hazard can be a particulate, gas or vapor, and include airborne contaminants, biological contaminants, dusts, mists, fumes, and gases, or oxygen-deficient atmospheres. Some respiratory health problems have long-term consequences and dramatically reduce quality of living due to difficulty-breathing.

Personal Protective Equipment (PPE), such as respirators, are equipment worn by workers to minimize exposure to the occupational hazards of chemical, biological and other airborne substances. A hazard cannot be eliminated by the PPE, but the risk of injury can be reduced.

When it comes to respiratory hazards, elimination/substitution means phasing out the contaminant or substituting a non-hazardous material for the contaminant causing the concern. Examples of engineering controls include the isolation or dilution of the contaminant through the use of a fume hood or ventilation.

Administrative and work practice controls could encompass rotating multiple workers through a job where contaminates are present to reduce individual exposure levels.

WHY IS EVERYTHING ELSE WRONG

A respirator only becomes an option if the preceding control methods are infeasible or if they fail to reduce exposures to acceptable levels. Respirators also could be used in the interim while the other control measures are being implemented.

Respiratory Prevention Program

After a safety manager has done his/her due diligence in working through the hierarchy of controls, and it’s determined that Respiratory Protection is going to be part of their exposure control plan, the employer will need to implement a Respiratory Protection Program as defined by OSHA in 29 CFR 1910.134(A).The Respiratory Protection Program is a written collection of work-site specific procedures and policies that cover all the requirements of OSHA’s respiratory protection standard. It’s essentially a blueprint for ensuring the health and safety of all employees using respiratory protection.

Administrator

One requirement of the respiratory protection program is that the employer designates an administrator to run the program and evaluate its effectiveness. “An individual is qualified to be a program administrator if he or she has appropriate training or experience in accord with the program’s level of complexity,” according to OSHA’s Small Entity Compliance Guide for the Respiratory Protection Standard.

Training

The employer must determine, based upon the hazards present and the type of respiratory protection equipment being used, the knowledge and potential training requirements for their program’s administrator.

Program Procedures

In addition to requiring a written document and having an assigned administrator, a respiratory protection program must be specific to the workplace and include procedures on the following:

  • Selecting respirators.
  • Medical evaluations of employees required to wear respirators.
  • Fit testing.
  • Routine and emergency respirator use.
  • Schedules for cleaning, disinfecting, storing, inspecting, repairing, discarding and maintaining respirators.
  • Ensuring adequate air quality for supplied-air respirators.
  • Training in respiratory hazards.
  • Training in proper use and maintenance of respirators.
  • Program evaluation.
  • Ensuring that employees who voluntarily wear respirators (excluding filtering facepieces, which OSHA defines as a negative pressure, particulate respirator with a filter as an integral part of the facepiece or with the entire facepiece composed of the filtering medium. Sometimes referred to as a dust mask. Comply with the medical evaluation and cleaning, storing and maintenance requirements of the standard.
  • Updating the written program as necessary to account for changes in the workplace affecting respirator use.
  • Providing equipment, training and medical evaluations at no cost to employees.

Application and Contaminants

Along with a foundational knowledge of what OSHA requires for respirator use in the workplace, employers and safety professionals must add an understanding of both the application being performed and the contaminant(s) present to the pre-selection equation. Consideration of the application or task where the respirator protection is needed is important because certain applications will limit the respiratory protection options available.

Functionability

Respirators work in one of two ways.

  1. The first and most commonly used form of respirator uses activated carbon and or mechanical filters to remove the contaminant(s) present from the worker’s breathing air. This style of respirator commonly is referred to as an air-purifying respirator (APR).
  2. The second style protects by supplying clean, respirable air to the worker from another source. This category of respirators is known as supplied air respirators (SARs).

Applicability / Contaminates

For respirator applications in which the worker could be exposed to unknown contaminants or unknown concentrations of contaminants, APRs are not an option. APRs also are not an option in applications where the worker could encounter oxygen deficient. OSHA defines this as oxygen levels of less than 19.5 percent. For these, employers must use either a self-contained breathing apparatus (SCBA) or a pressure-demand SAR with an emergency egress (escape) supply of auxiliary breathing air.

Also, certain applications like abrasive blasting negate the use of APRs. For abrasive blasting, OSHA requires the use of a SAR. Specifically, a SAR that’s appropriate for entry into and escape from atmospheres not immediately dangerous to life or health (IDLH) with appropriate protection for the wearer’s head and neck.4

When APRs are an option, a thorough understanding of the application equally is as important. If a task requiring particulate protection includes exposure to oil aerosols, then an oil-resistant (R-series) or oil-proof (P-series) mechanical filtering element will be needed, rather than a non-oil-resistant (N-series) filter.

For contaminants that allow the use of APRs, employers must know the airborne concentration of the contaminant to which the worker will be exposed in order to validate whether an APR will offer a sufficient level of protection. APRs have established maximum use limitations. If an APR is an option, when qualitatively fit tested, it can only be used up to 10 times OSHA’s permissible exposure limit (PEL) but is never to exceed the established IDLH concentration for the contaminant.

Just as there are applications that’ll prevent the use of APRs, there are specific contaminants that do the same. Contaminants such as ethylene oxide and methylene chloride, in concentrations above OSHA’s established exposure limits, require SARs for OSHA compliance. Other contaminants like methyl alcohol and carbon monoxide require SARs when exposure limits are exceeded due to the ineffectiveness of APR filter media.

Exposure and Monitoring – Failure

Failure to conduct exposure monitoring will prevent the determination of airborne levels of a contaminant.

How is this applicable to the discussion?

Specifically for vapors and gases, this can be done in most instances using passive dosimeter badges that are worn for a work shift and then sent to a laboratory for analysis. Measuring for particulate contaminates is a bit more complicated. Employers will need to attach properly-calibrated, continuous-flow sampling pumps with appropriate filter media to workers in the area of exposure. Again, this filter media is sent off to a laboratory for analysis.

Finally, failure to know where to turn for help to ensure the safety of the respirator uses will diminish any benefits and advantages of a respiratory prevention program.


Cold vs. Flu vs. Coronavirus


Newsletter – March 2020

  • Safety At Home – Preventing Injuries Away from the Job;
  • Home Safety Checklist;
  • More than Spring Cleaning – The Importance of Housekeeping;
  • Safety Attitude: How to Get Workers to Develop One;
  • Top 10 Attributes of the Great Safety Leader;
  • By the Numbers: PPE Eye Protection
  • Safety Talks on Hot Work, Eye/Face Protection, Confined Spaces, and Working alone;
  • and more…


By the Numbers Combustible Dust

DID YOU KNOW?

Combustible dust explosions can cause employee injuries, deaths and destruction of entire buildings. Combustible dust is one of the biggest hazards confronting a wide variety of industries. Because it is mostly unseen or otherwise sensed, it is easily unrecognized for the damage and injury it can cause.

  • From the 2018 CDID incident reporting, wood processing, food processing and agricultural activities account for almost 60% of the dust-related fire and explosion incidents. Automotive manufacturing, metal working, power generation and mining contributed an additional 17%. The remaining 24% of incidents occurred in other industries, including pulp and paper, education, coatings, oil and gas, textiles and recycling.
  • Very frequently, materials involved in wood-product incidents were specified as sawdust or wood dust, and materials involved in food processing or agriculture were specified as grain dust. In cases were specific materials were named, pine chips, cellulose, corn, pecan, cocoa, flour, cereal, barley and spices were implicated in dust incidents. Although not broken out in the data, coal dust accounted for almost 7% of the total incidents. In cases involving metal dusts, aluminum, titanium, magnesium and iron were cited most often.
  • This suggests that explosions tend to be more severe in terms of injuries and lives lost than facility fires. However, the trend for facility damages shows the reverse. Out of the eleven incidents with reported losses of $1 million and above, eight were from fires and three were from explosions. This highlights the importance of both fire and explosion prevention in facility safety measures.
  • In terms of materials involved, the number of fires, explosions, injuries and fatalities for the two most common categories are as follows: Wood products were involved in 33 fires, five explosions, 10 injuries and 0 fatalities, while food products were involved in 24 fires, 12 explosions, 14 injuries and eight fatalities.
  • Although both categories are responsible for a similar total number of incidents, fires appear to be more prevalent in wood processing facilities and explosions tend to be more common in food processing and agriculture. In cross-referencing these data with the equipment data provided earlier, these differences may be due to more frequent use of dust-collection systems in wood-dust-handling facilities and more frequent use of silos and conveyors for food production.
  • As a result of the higher number of explosions, food products have a larger number of high-severity incidents in terms of injuries and fatalities. In terms of facility damage, industry activities involving wood products resulted in more incidents that generated $1 million or more in losses. Six of these incidents involved wood dust, sawdust, wood pellets and wood shavings. Five of these were fires and one was an explosion. This again demonstrates that both fire and explosion hazards need to be addressed in industries handling combustible dust.
  • Global data from the first half of 2018 indicated that 89% of the fatalities from dust incidents occurred due to explosions. With regard to injuries, 70% occurred from explosions, while 30% were the result of fires. The total breakdown of injuries and fatalities from fires and explosions is as follows: Explosions caused 28 injuries and eight fatalities, while fires caused 12 Injuries and one fatality.

The 2018 mid-year incident report was released in August 2018. In addition to global fire and explosion incidents, the Occupational Safety and Health Administration (OSHA; Washington, D.C.; www.osha.gov) citations, upcoming events, and new technology and products were also featured. In the first six months of 2018, 75 fires, 14 explosions, nine injuries and one fatality were reported in North America. One of these explosions occurred in Canada and 13 within the U.S. Internationally, 14 fires, 12 explosions, 31 injuries, and eight fatalities were recorded.

The first incident report was released in 2016 and covered combustible dust explosions within North America. In 2016, 31 explosions were reported in the U.S. and two were reported in Canada. These incidents caused a reported total of 22 injuries and three fatalities in 2016.

In 2017 mid-year and year-end incident reports were released. The year-end report covered both combustible dust fires and explosions around the world. In North America, 132 fires, 32 explosions, 61 injuries, and six fatalities were recorded. Four of the explosions were reported in Canada, while the other 28 were in the U.S. Internationally, 37 fires, 36 explosions, 102 injuries and seven fatalities were recorded.

KEEP IN MIND

The National Fire Protection Agency (NFPA) defines combustible dust as “any finely divided solid material that is 420 microns or smaller in diameter and presents a fire or explosion hazard when dispersed and ignited in air.” Any combustible material can burn rapidly when in a finely divided form. If such a dust is suspended in air in the right concentration, under certain conditions, it can become explosible. Left uncontrolled, dusts may migrate from the point of production/release, increasing the portion of the facility subjected to combustible dust fire and explosion hazards. Even materials that do not burn in larger pieces, given the proper conditions, can be explosible in dust form.

Any combustible material can burn rapidly when in a finely divided form. Combustible dusts can come from: sugar, spice, starch, and flour; grain, feed, and tobacco; plastics and rubber; wood, paper, and pulp; pesticides, pharmaceuticals, dyes, and coal, and metals.

If such a dust is suspended in air in the right concentration, under certain conditions, it has the potential to explode.

These conditions are known as the “Dust Pentagon”

  1. Fuel to burn
  2. Oxygen?
  3. Ignition source (heat, spark, etc.)
  4. Dispersion, or suspension of dust particles in the right concentration in the air, and
  5. Confinement of the dust cloud. Confinement means the dust is in an enclosed or limited space. This restriction allows pressure to build up, increasing the likelihood of an explosion.

EXPLOSION-EXPLAINED

Not all dust is combustible but if there is a material “that will burn in air” as a solid, then it will also burn if it is in a finer, dust, form. Combustible dust sources include most solid organic materials such as sugar, flour, grain, and wood; many metals; and some non-metallic inorganic materials.

The potential for a dust explosion depends on many factors, including the dust particle’s size, shape, and moisture content. Your employer should assess any dust-producing activity to determine if it’s combustible. ​​​​​​​​ If it is, processes must be in place to remove or minimize the amount of dust present.

Combustible dust will only ignite if the conditions allow it, sometimes known as the ‘fire triangle’. This means there must be: combustible dust, of the right size and amount; a heat source, and oxygen to make the dust catch fire.

The build-up of even a small amount of dust on surfaces such as rafters, roofs, suspended ceilings, ducts, and window sills can cause serious damage if an explosion occurs.

Canada does not have one set of legislation to manage the risks from combustible dust. Even though many areas have similar legislation, workers moving around different regions, need to know the rules for each region.

Many combustible dusts, such as flour and metal dust, may seem unlikely to cause an explosion or fire, but they can. It is vital workers know the risks and follow all measures in place to control dust and ignitions sources.

The saying, “If it ain’t broke, don’t fix it” isn’t a wise model to follow in the workplace safety world. Chilling examples of the danger in that type of thinking can be found in any industry where combustible dust accumulates.

Do not think that just because your workplace has never experienced a dust explosion, you don’t need to worry about letting dust accumulate. It can take years for materials such as sugar, flour, feed, grain, wood, metal, textile and other types of dust to accumulate to levels where they can suddenly explode, with devastating consequences for workers.

These types of explosions and fires are far from rare in Canada and the United States. For example, British Columbia experienced two fatal wood dust explosions at sawmills within a short span in 2012. Two workers were killed in each of those incidents, and more than 40 others were injured in both blasts.

In the United States, 281 combustible dust incidents killed 119 workers and injured 718 others between 1980 and 2005, according to the US Chemical Safety and Hazard Investigation Board (CSB).

Poor housekeeping practices, in which various types of dust are not cleaned up and left to accumulate, are a major cause of dust explosions.

These six conditions set the stage for an explosion:

  1. Dust must be suspended in air.
  2. Dust particles must be small.
  3. Dust concentrations must be within the “exposable range.”
  4. There must be enough oxygen or other oxidizing agent available.
  5. There must be an ignition source having enough energy to generate flame.
  6. The dust cloud must be in a closed or partially enclosed space to create pressure effects.

If dusts are created by processes in your workplace, good housekeeping is extremely important in controlling dust buildup.

Here are six housekeeping dos and don’ts related to combustible dusts, with the information provided by senior process safety engineer David E. Kaelin Sr.

DO:

  • Use water to clean areas where dust may fall, whenever possible.
  • Perform regular cleaning on horizontal surfaces, floors and walls, including equipment, ducts, pipes, hoods, ledges, beams, stair rails, and above suspended ceilings and other concealed surfaces.
  • Clean floors and work areas at least once per week.
  • Use a vacuum cleaner that is listed for use in Class II hazardous locations, or a fixed-pipe system with a remotely located exhauster and dust collector.

DON’T:

  • Allow dust layers to accumulate to hazardous levels. The National Fire Protection Association (NFPA) defines hazardous surface dust accumulations as being as little as 1/32 of an inch.
  • Use compressed air or steam to blow down surfaces unless there is no other practical alternative. If compressed air or steam must be used, it is vital to apply it under low pressure to avoid disbursing clouds of dust to other areas.

Catastrophic Secondary Explosions

An initial (primary) explosion in processing equipment or in an area where fugitive dust has accumulated may dislodge more accumulated dust into the air, or damage a containment system (such as a duct, vessel, or collector). As a result, if ignited, the additional dust dispersed into the air may cause one or more secondary explosions. These can be far more destructive than a primary explosion due to the increased quantity and concentration of dispersed combustible dust. Many deaths in past accidents, as well as other damage, have been caused by secondary explosions.

Industries at Risk

Combustible dust explosion hazards exist in a variety of industries, including: agriculture, chemicals, food (e.g., candy, sugar, spice, starch, flour, feed), grain, fertilizer, tobacco, plastics, wood, forest, paper, pulp, rubber, furniture, textiles, pesticides, pharmaceuticals, tire and rubber manufacturing, dyes, coal, metal processing (e.g., aluminum, chromium, iron, magnesium, and zinc), recycling operations, and fossil fuel power generation (coal).


Picture This: Unsafe Work Practices

Look at the image below of a workplace injury. There’s a man unconscious and an array of debris around him. Notably, there is a hard hat, but it has been knocked from his head. What happened here was a lack of safety concern in the workplace. As this man was walking down the warehouse, another employee was overstocking a short shelf above, a regular practice at the facility to use storage space efficiently. As the employee squished the last box in, the stack gave way and collided into the man below, knocking him to the ground, unconscious.

If practices were regularly reviewed in this facility for maximum safety, then this accident could have been prevented.