Properly Conducted Accident Investigations

WHAT’S AT STAKE?

The term “accident” was often used when referring to an unplanned, unwanted event. To many, “accident” suggests an event that was random, and could not have been prevented. Since nearly all worksite fatalities, injuries, and illnesses are preventable, OSHA suggests using the term “incident” investigation.

Investigating a worksite incident- a fatality, injury, illness, or close call- provides employers and workers the opportunity to identify hazards in their operations and shortcomings in their safety and health programs. Most importantly, it enables employers and workers to identify and implement the corrective actions necessary to prevent future incidents.

WHAT’S THE DANGER?

ROOT CAUSES

In conducting an incident investigation, the team must look beyond the immediate causes of an incident. It is far too easy, and often misleading, to conclude that carelessness or failure to follow a procedure alone was the cause of an incident. To do so fails to discover the underlying or root causes of the incident, and therefore fails to identify the systemic changes and measures needed to prevent future incidents. When a shortcoming is identified, it is important to ask why it existed and why it was not previously addressed.

Incident investigations that focus on identifying and correcting root causes, not on finding fault or blame, also improve workplace morale and increase productivity, by demonstrating an employer’s commitment to a safe and healthful workplace.

SHARED RESPONSIBILITY

Incident investigations are often conducted by a supervisor, but to be most effective, these investigations should include managers and employees working together, since each bring different knowledge, understanding and perspectives to the investigation.

INVESTIGATION OBJECTIVES

Incidents may result from one of the following categories, or, from a combination of a few.

Task: A task-related root cause involves the actual work the employee was doing.

Example: A construction worker building a house jumps from one level to another instead of climbing down a ladder and sprains his ankle.

Material: A material-related accident is caused when equipment or materials are faulty or dangerous.

Example: A shelf collapses and heavy objects fall onto a worker, crushing her foot.

Environment: The physical work environment and changes to it could also cause an accident.

Example: A workspace is poorly lit, causing a worker to trip over an electrical cord she couldn’t see. As a result, she sprains her ankle.

Personnel: Sometimes an accident’s root cause comes from the employee’s education, experience, or physical or mental condition.

Example: An employee is tasked with lifting objects that are too heavy for them, resulting in a serious back strain.

Management: Management systems and styles may lead to workplace accidents.

Example: An employee’s manager does not inform him that employees must wear eye protection when entering a certain area. When the employee enters this area alone later, metal shavings fly into his eye, causing permanent blindness.

HOW TO PROTECT YOURSELF

STEPS TO CONDUCT EFFECTIVE INCIDENT INVESTIGATIONS

The point of the investigation should never be to assign blame, but rather to uncover the factors that led to accident so you can take corrective action to prevent it from happening again.

When a workplace incident occurs, gather a knowledgeable team to conduct the accident investigation. Your health and safety committee, as well as employees who have experience in the work the injured party was performing, should be part of the investigation. If possible, include the employee’s supervisor. Here are the steps:

1. Administer First Aid

Employee safety should be your number-one priority, so always start by administering first aid. You can address smaller injuries like scrapes or splinters in the workplace with a first aid kit. For more serious accidents, call 911 to get the employee the medical attention they need.

The only exception to this is if administering first aid would put you or the injured person in danger.

2. Secure the Scene

Next, secure the scene of the accident. Clear other employees from the area and rope it off. If possible, remove sources of immediate danger (e.g. put out a fire or turn off a machine). Try to keep the scene as intact as possible to ensure an accurate investigation. While providing medical care and removing imminent hazards may disturb the scene, minimize their effects when you can.

If the employee is killed or critically injured on the job, file a report with the Occupational Safety and Health Administration (OSHA), your union (if applicable), your workplace’s health and safety committee and the local police as soon as possible.

3. Collect Evidence

Perform this step as soon as you can after the incident. The less time that passes before you start the accident investigation, the easier it is to observe the scene’s conditions as they were at the time of the accident.

Collect physical evidence that may help you uncover the accident’s root cause. Record the scene visually using video or still photos. Study the conditions and environment. Finally, take copious notes so you don’t forget any details. Remember that fact-finding, not fault-finding, is your goal.

4. Conduct Interviews

In addition to collecting evidence, you should also identify witnesses. Interviewing witnesses provides insight into the accident that may not be apparent during your physical investigation. While you also need to interview the injured employee, they may feel too shaken up to provide accurate information right away.

5. Identify the Root Cause

The primary goal of every workplace accident investigation is to find the Root Cause. If you know what led to the accident, you can prevent it from happening again. Keep in mind that the accident may have multiple causes.

Root Causes must be:

  • specific underlying causes
  • reasonably identified (don’t take up too much time to identify)
  • under management’s control
  • able to have effective recommendations generated to prevent them from recurring

6. Prepare an Investigation Report

During the accident investigation you’ve collected evidence, interviewed involved parties and analyzed that information to find the incident’s root cause. Now you have to communicate it all to management.

If the thought of creating a final report fills you with dread, use case management software with one-click reporting capabilities.

7. Recommend and Implement a Corrective and Preventive Action (CAPA) Plan

Your final accident investigation report should include recommendations to prevent future incidents. Develop a Corrective and Preventive Action (CAPA) plan for management to implement that will mitigate risk. Your plan should consider the accident’s root cause and include concrete steps to take that will address it.

Corrective actions are immediate fixes to the accident’s causes. These could include replacing a faulty piece of equipment, giving the employee better training or changing their work tasks.

On the other hand, preventive actions avert similar accidents in the future. Examples might be reviewing and changing your health and safety procedures, scheduling more regular equipment inspections or making PPE mandatory.

8. Follow Up

Even the strongest CAPA plan won’t prevent workplace accidents if it isn’t enforced. Follow up with the recommendations after a few weeks, then a few months to ensure they’re being implemented. If the changes don’t seem to be making a difference, consider revising the CAPA plan and its timeline to maximize results.

FINAL WORD

Your business has just experienced an incident resulting in an unintentional injury to a worker. Reacting quickly to the incident with a prescribed procedure and actions can demonstrate your company’s commitment to safety and ensure the proper information is collected to fulfill an incident investigation’s ultimate purpose – to prevent future incidents.


Near Miss Booklets

WHAT’S AT STAKE?

A near-miss is defined by OSHA as an unplanned event that does not result in injury, illness, or damage – but had the potential to do so.

Near miss reporting is a safe work procedure that aims to eliminate potential incidents by ensuring that close-calls or near accidents are proactively reported to facilitate swift actions that prevent its reoccurrence. Near miss reporting systems reinforces an organization’s safety culture – promoting active participation in reporting close-calls, enables early interventions and provides leading indicators to reduce workplace fatalities.

WHAT’S THE DANGER?

IMPORTANCE OF NEAR MISS REPORTING

Without a near miss reporting system, the learning begins only when an accident occurs and there is severe loss or injury to human life and property. The notion of reporting close-calls when there’s no damage done seems a futile effort, especially if the odds keep falling in our favor and there are no legal obligations to do so. Writing off a near miss as “no harm no foul” can prove detrimental in the long run. At some point the chain breaks and the luck finally run out, leading to a catastrophic event that gets everyone’s undivided attention to a prevailing hazard. Near miss reporting is the only recognized incident management structure that accurately identifies and reports near misses, effectively communicates risk tolerance measures to employees, eradicates the root cause of the hazard and prevents future accidents or injuries from taking place.

Common Causes of Near Misses

  • Unsafe conditions
  • Unsafe work practices
  • Unsafe procedures
  • Human error
  • Lack of training
  • Lack of safety awareness
  • Employees that cut corners
  • Lack of communication
  • Unsafe tools
  • No standardized procedure to report near misses

HOW TO PROTECT YOURSELF

REPORTING NEAR MISSES

  • Establish a policy and set of procedures that are clearly presented to and understood by all employees. This policy and procedure should be backed by your senior management.
  • Uphold and celebrate a culture of near miss reporting. Support your employees, managers, and supervisors.
  • Continually educate your employees about near miss reporting and why it is key. Let them know that they are an important part of making workplaces everywhere much safer.
  • Be sure that your policy and procedures are easy to comprehend and employ regularly.
  • Don’t let the message die. Keep preaching the importance of this type of reporting. Encourage this type of participation.
  • Let the near miss reports lead you to a safer work environment. Act and always seek to improve.
  • You should let your workers know that near miss reporting is non-punitive. Many of them may hold back for that very reason.
  • Think about what incentives might get your employees on board. Your mission is to celebrate the fact that you’re growing safer in your company every day.
  • Consider incentives that acknowledge the participation of your employees – the recognition and reporting of near misses and potential hazards they notice. Reporting will become second nature if you do it the right way. It’s all about safety in performance as well as risk reduction.
  • Avoid incentives that recognize supervisors and management, solely based on their performance and outcome of OSHA recordable rates. You don’t want the plan to backfire and suppress reporting and hinder your safety efforts.
  • Include this near miss training for all new employees as a part of their orientation.
  • Find a way to celebrate the successes of the near miss reporting. Take the time to notice the value and praise your employees for their efforts.

How to improve near miss reporting?

Ease the reporting culture:

Provide employees with a system that is easy to use, understand and communicate reports instantly to concerned personnel.

Fill reports effortlessly:

Empower employees to fill incident details in reports accurately without generating additional work.

Anonymous reporting:

Report at-risk behavior of close aides without disclosing your identity to avoid the fear of being blamed.

Generate curiosity:

To encourage proactive participation, employees need to know all the specifics of the importance of near miss reporting systems and how to use it.

Holistic Participation:

Active engagement from the managerial team can have a ripple effect to encourage employees to prioritize reporting incidents.

Swift hazard resolutions:

Set rapid action teams to investigate and resolve incidents with minimal loss to work-time.

Learn from data:

Analyze trends and record new findings to integrate into other safety systems like behavior-based system (BBS) to check incident prone tendencies.

Encourage open communication:

Highlight recorded hazards and lessons learnt during toolbox talks, bulletin boards, employee orientation programs, etc – creating awareness across your enterprise.

Avoid the Blame Game

A very important part of the near-miss system is learning how to encourage employees to report a near miss without feeling that they will get into trouble.

The key is not to look at it as, ‘Who is to blame?’ Ask what system flaws exists. You have to have a blame-free environment. Very few people are going to report a near miss if there is going to be a negative consequence to them.

People should not be punished for reporting near-miss incidents; instead, supervisors need to encourage their employees to feel comfortable coming forward to achieve a workforce that anticipates and identifies hazards before anyone gets hurt.

FINAL WORD

Near misses and resulting inspections may help prevent an injury or even a fatality, but an investigation cannot take place if the near miss is not reported accurately. Therefore, setting up a successful safety management program to ensure near misses are reported and investigated is an important step in reducing occurrences of serious incidents.


Towing

Towing

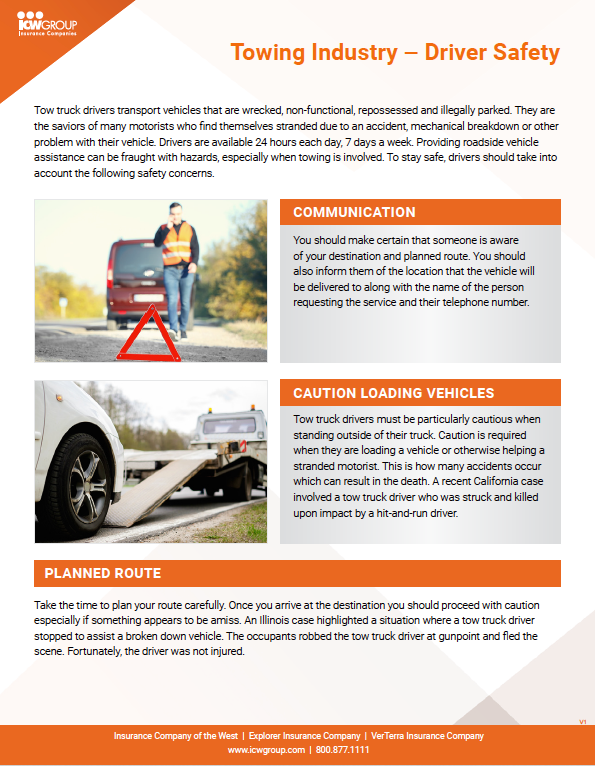
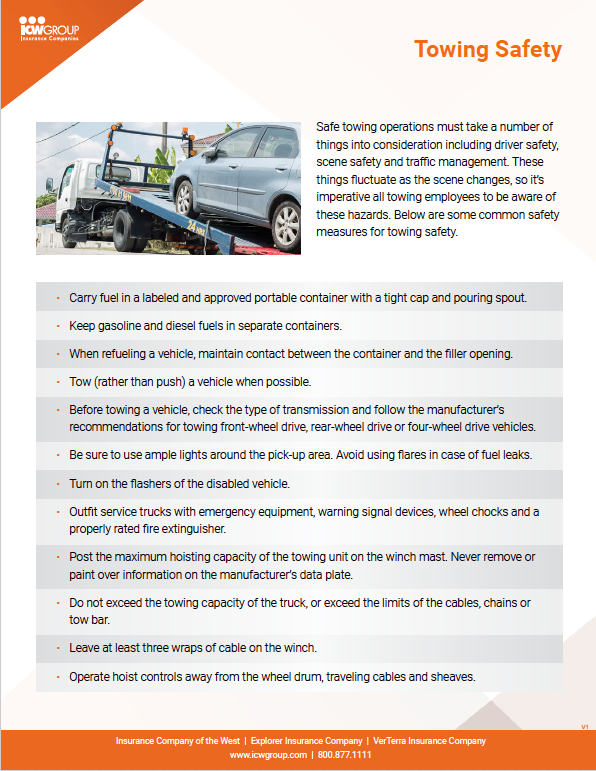
Towing services primarily consist of consent and nonconsent towing. Consent towing usually involves towing a consumer’s inoperable vehicle to a designated location, such as a repair facility. In consent towing situations the consumer orders and pays for the towing. Nonconsent towing generally is ordered by law enforcement or private property owners and is paid for by the vehicle’s owner. Vehicles are usually subject to nonconsent towing if parked in clearly marked tow-away zones, or after an accident.  Nonconsent towing can also involve additional services such as vehicle storage or cleaning up debris after an accident

Risk Management Safety Bulletin – Towing Driver Safety

Risk Management Safety Bulletins – Towing-Safety

Click the links below to access additional resources on towing.

In the News: Vehicle Towing Industry Injury & Fatality Rate Higher Than Other Emergency Responders English OSHA: Driver Safety Overview eLearning Course  English Tow Truck Driver Hit by Passing Car Fatality Report English
Check Your Following Distance Toolbox Talk  English


Forklifts Pallet Jacks – Spanish

Hay por lo menos 8 maneras en que los supervisores pueden determinar el método más seguro para realizar cualquier tarea, incluyendo el movimiento de gatos de paletas.

  1. Mirar la tarea completa

Pida voluntarios – preferentemente entre los trabajadores que usan gatos de paletas en el trabajo – para que le ayuden a evaluar la tarea y ver si se pueden hacer mejoras en la seguridad. Hacer que los trabajadores demuestren sus técnicas debería permitirle identificar las áreas problemáticas y reforzar la seguridad, sin mencionar la eficiencia general.

  1. Realice una identificación de riesgos en grupo

Pensamos en el análisis de riesgos como una tarea individual. Pero no tiene por qué ser así. Que el grupo haga un análisis de peligros de la tarea e identifique todos los peligros y riesgos que detecten. Durante el análisis, haga que sus trabajadores consideren:

¿Hasta dónde fue movido el material?

¿Cuál fue el peso del material movido?

¿En qué tipo de superficie se movieron los materiales?

Los esfuerzos de espalda no son el único peligro asociado con el uso del gato de paleta. ¿Qué pasa si los trabajadores que usan gatos de paleta se resbalan y caen? ¿Podría el gato para paletas chocar con ellos? ¿Y si el palet se queda atrapado en algo? ¿Podría causar una tensión o sacar el hombro del trabajador de su lugar de trabajo? Le sorprenderá la cantidad de otros peligros que el grupo puede identificar.

  1. Realice una gestión de riesgos en grupo

Continúe la conversación de grupo y llévela del análisis de peligros a la gestión de riesgos. Discuta las opciones disponibles para eliminar cada peligro que el grupo identificó y cómo cada paso del trabajo puede realizarse con seguridad.

  1. Lea las instrucciones

Si el grupo está de acuerdo en que un gato de paletas es la herramienta preferida, asegúrese de revisar las instrucciones y recomendaciones del fabricante sobre el uso adecuado del gato de paletas. Hay muchos estilos y podría ser diferente para cada uno.

  1. Desarrollar una “mejor práctica”, no un procedimiento

La mejor práctica recomendada que desarrolles es un comienzo. Te ayudará a establecer y mantener el control sobre el asunto. Pero no debe ser un procedimiento inflexible o inalterable. Anime a los trabajadores a seguir identificando los riesgos y a buscar formas de mejorar la mejor práctica.

  1. Realizar la capacitación

Ahora es el momento de compartir los hallazgos del grupo con todos los afectados. Si es necesario, proporcionar formación como parte del seguimiento. Al compartir con todos, se crea la expectativa de que esta es la forma preferida de manejar los gatos de paleta.

  1. Realice una auditoría

Audite sus expectativas. Como has compartido tus expectativas con todos, pueden ayudarte a auditar cuando pasen por la zona. Usando un poco de diplomacia, todos, desde la gerencia hasta la hora, pueden tener el valor de intervenir y ayudar a reducir el riesgo de una lesión si observan un comportamiento inseguro.

  1. Revisar regularmente

Basándose en sus auditorías y en la retroalimentación, continúe buscando correcciones o mejoras adicionales.

Conclusión

Puede que sea información que ya conozca, pero me ha funcionado bien en el pasado. Y es un proceso que puedes aplicar a casi cualquier tarea en el lugar de trabajo.


Guardrails – Spanish

En esta sección se abordan cuestiones generales relativas a las barandillas en el lugar de trabajo.

Directrices de la barandilla

Las barandillas se utilizan en varias industrias para ayudar a proteger a los empleados de varios peligros en el lugar de trabajo, por ejemplo, una caída o un pozo. Los siguientes son los requisitos mínimos. Una o varias barandillas deben ser balaustradas verticales o barandillas que no estén separadas por más de 4 pies, con la baranda superior de no menos de 42″ de altura y barandillas entre 34″ y 38″ por encima de los descansos. Todas las barandillas deben ser revisadas rutinariamente para asegurar la integridad de la(s) estructura(s).

Si se descubre que una estructura presenta alguna cualidad insegura o deficiente, se debe buscar inmediatamente atención y reparación. Seguir estas pautas reducirá en gran medida la exposición de los empleados a las caídas.

Protección contra caídas

Todas las aberturas en el suelo que midan 12 pulgadas o más en su dimensión más pequeña (menor) en un piso, plataforma, pavimento o patio a través de las cuales un individuo pueda caer, deben estar protegidas por barandillas, pantallas o rodapiés fijos o desmontables.

Cada abertura de piso o plataforma en forma de escalera debe estar protegida por una barandilla estándar con un rodapié estándar en todos los lados expuestos (excepto en la entrada de la abertura. Cada pared, pared de ventana y abertura de la pared del vertedero desde la que haya una caída de más de 4 pies debe ser protegida por una barandilla, rodillo, valla de piquete, media puerta o barrera equivalente.


Presenteeism – Spanish

La abrumadora mayoría de las pérdidas de productividad relacionadas con la salud se producen en el trabajo debido a la reducción del rendimiento de los empleados que se presentan a trabajar sin sentirse bien. Esto se conoce comúnmente como presentismo.

El presentismo y la importancia de los programas de bienestar

Las implicaciones y los costos del presentismo son enormes y pueden ser muy perturbadores. Integrar estrategias de bienestar en un programa de seguridad puede ayudar a combatir los efectos. Veamos un ejemplo de 4 pasos de la Asociación Canadiense de Salud Mental, División de Manitoba (Modelo de Manitoba).

4  pasos a seguir

  1. Obtener la opinión de los trabajadores

Haga que los trabajadores llenen un cuestionario para determinar las percepciones sobre su salud, bienestar y lo que causa el estrés relacionado con el trabajo. Los encuestados deben permanecer en el anonimato, para que den respuestas sinceras. (Haga clic aquí para ver el modelo de cuestionario que puede adaptar).

  1. Evaluar la retroalimentación

A continuación, evalúe los resultados para identificar los problemas que deben abordarse. Por ejemplo, los cuestionarios podrían revelar que cierto proceso es inusualmente estresante o fatigoso.

  1. Intervención

Prioriza los problemas y decide cuándo y cómo abordarlos. Hagan saber a los trabajadores cuando se tomen medidas para resolver los problemas.

  1. Cuestionarios de reedición

El primer conjunto de cuestionarios sirve como línea de base. Una vez que se han procesado los resultados y se han realizado las intervenciones, el ciclo comienza de nuevo (cada 1 y 3 años, según los autores del Modelo de Manitoba).

Conclusión

Para ser justos, el Modelo de Manitoba es una estrategia para implementar un programa de bienestar controlado por la gerencia a través de toda una organización, no un mero programa de seguridad. Aun así, es un enfoque efectivo que puede usar para introducir e integrar elementos de bienestar en su programa general de salud y seguridad.


Hand and Power Tools – Spanish

Tema: Herramientas manuales y eléctricas

Resumen de la norma OSHA

Las herramientas manuales y eléctricas forman parte de nuestra vida cotidiana y nos ayudan a realizar fácilmente tareas que de otro modo serían difíciles o imposibles. Sin embargo, estas sencillas herramientas pueden ser peligrosas, y tienen el potencial de causar lesiones graves cuando se usan o mantienen de forma inadecuada. Es necesario prestar especial atención a la seguridad de las herramientas manuales y eléctricas para reducir o eliminar estos peligros. Los empleados que utilizan herramientas manuales y eléctricas están expuestos a riesgos de caídas, saltos, materiales abrasivos o salpicaduras, así como a polvos, humos, nieblas, vapores o gases nocivos. Los trabajadores deben disponer de equipos de protección personal adecuados para evitar lesiones. Todas las conexiones eléctricas de las herramientas deben ser adecuadas al tipo de herramienta y a las condiciones de trabajo (por ejemplo, humedad, polvo, vapores inflamables). Los empleados deben recibir capacitación en el uso adecuado de todas las herramientas. Los trabajadores deben ser capaces de reconocer los peligros asociados con los diferentes tipos de herramientas y las precauciones de seguridad necesarias.

Paso 1: Planificar la lección

  • Material didáctico.
    • Presentación en PowerPoint.
    • Notas del instructor.
    • Otros materiales.
  • Objetivos de la enseñanza.
  1. Completa los temas requeridos para el curso de 10 horas de OSHA.
  2. Complete los siguientes temas opcionales:   a.          b.           c.
  3. Presente las herramientas manuales y eléctricas a [número] participantes.
  4. Incorporar la participación activa en cada lección.
  5. Proporcionar un examen o una breve evaluación al final del curso.
  6. Asegurar la retroalimentación de los participantes en varios puntos del entrenamiento.
  • Oradores/presentadores invitados y temas/responsabilidades.

Paso 2: Presentar la lección

  • Introducción a la lección.

Observaciones introductorias o transición de la lección anterior.

  • Objetivos y resultados del aprendizaje.

Una vez terminada la lección, los participantes serán capaces de..:

  1. Enumera al menos tres reglas básicas de seguridad para las herramientas manuales y eléctricas.

Posibles respuestas.

  • Inspeccionar la herramienta antes de usarla
  • Usar la herramienta adecuada para el trabajo…
  • Operar las herramientas de acuerdo con las instrucciones de los fabricantes
  • Usar los protectores adecuados
  • Utilizar el equipo de protección personal adecuado
  • Realizar el mantenimiento de las herramientas con regularidad
  1. Identificar al menos dos precauciones que son esenciales para el uso seguro de:

a. Herramientas de manuales

Posibles respuestas.

  • No usar llaves si las mandíbulas están suspendidas.
  • No usar cinceles o cuñas si las cabezas se han multiplicado.
  • No utilizar herramientas con mangos sueltos, agrietados, astillados o pegados con cinta adhesiva
  • Mantener las herramientas de corte afiladas
  • Usar la herramienta adecuada para su trabajo.
  • Usar gafas y guantes de seguridad
  • Mantener la superficie del suelo libre de escombros y peligros de tropiezos

b. Herramientas eléctricas

Posibles respuestas.

  • Desconectar las herramientas cuando no se utilizan
  • Retirar las herramientas dañadas y etiquétarlas como “no usar”.
  • No llevar las herramientas eléctricas por el cable de alimentación
  • No operar en lugares húmedos
  • Usar un cable con un enchufe de tres puntas y una clavija de conexión a tierra
  • Asegurarse de que los cables no sean un peligro de tropiezo

c. Ruedas y herramientas abrasivas

Posibles respuestas.

  • Cubrir el extremo del eje, la tuerca y las proyecciones de la brida
  • Mantener la alineación adecuada con la rueda
  • Usar protección para los ojos y/o la cara
  • Realizar una prueba de “anillo” para asegurar que la rueda está libre de grietas y defectos

d. Herramientas neumáticas

Posibles respuestas.

  • Usar las mismas precauciones con las mangueras de aire que con los cables eléctricos
    • Mantenerse alejado de objetos afilados, aceite, etc.
    • Cuidado con el peligro de tropezar
    • No llevar la herramienta por la manguera de aire
  • Asegurarse de que la manguera de aire esté bien sujeta al conector
  • Colocar un dispositivo de seguridad en el bozal
  • Usar protección ocular y/o auditiva
  • No usar aire comprimido para la limpieza a menos que se reduzca a menos de 30 p.s.i.

e. Herramientas para combustible líquido

Posibles respuestas.

  • Utilizar sólo recipientes aprobados para combustible líquido
  • Apagar el motor antes de repostar
  • Dejar que el motor se enfríe antes de repostar
  • Evitar respirar los vapores del combustible
  • No hay llamas abiertas o chispas eléctricas cerca de los vapores

f. Herramientas hidráulicas

Posibles respuestas.

  • Asegurarse de que las clavijas estén bien colocadas y no se desplacen
  • Usar la gata con la capacidad de peso correcta para el trabajo
  • Lubricar e inspeccione las gatas regularmente
  • No exceder el límite de parada para las gatas

g. Herramientas accionadas por pólvora

  • Limitar el número de personas en el área de trabajo a las que están directamente involucradas en el trabajo
  • Usar protección adecuada para los ojos, los oídos y la cara
  • Seleccionar un polvo que haga el trabajo sin fuerza excesiva
  • Probar la herramienta cada día para asegurarse de que los dispositivos de seguridad funcionan
  • Evitar el uso de herramientas accionadas por pólvora en materiales de fácil penetración
  1. Nombre al menos dos técnicas o principios de protección que se apliquen a las herramientas manuales y eléctricas.

Posibles respuestas.

  • Proteger una rueda abrasiva para que quede expuesta la mínima cantidad de la rueda, y asegurarse de que la protección esté correctamente alineada con la rueda
  • Proteger las partes móviles de las herramientas eléctricas
  • Nunca quitar un protector cuando una herramienta está en uso
  • Los protectores de la máquina deben proteger al operador y a los demás de los puntos de operación, los puntos de corte, las piezas giratorias o las astillas y las chispas que vuelan.
  • Protectores de las Sierras para evitar el contacto con la hoja
  • Actividades planificadas, debate o interacción con los participantes

Paso 3: Evaluar el aprendizaje y la instrucción de los estudiantes

  • Evaluación de la lección y comentarios.


Hand and Power Tools – Safety Checklist – Spanish

Directrices: Esta lista de verificación se aplica a las herramientas y equipos eléctricos manuales y portátiles, incluidas las herramientas eléctricas neumáticas.


Guardrails

This section addresses general issues concerning guardrails in the workplace.

Guardrail Guidelines

Guardrails are used in several industries to assist in protecting employees from several workplace hazards i.e., a drop off or pit. The following are minimum requirements. A guardrail(s) ought to be vertical balusters or rails that are no greater than 4 feet apart with the top rail no less than 42” high and handrails between 34” and 38” above landings. All guardrails should be routinely checked to ensure the structure(s) integrity.

If a structure is found to present any unsafe or deficient qualities- attention and repair work should be sought immediately. Following these guidelines will greatly reduce employee exposure to falls.

Fall Protection

All floor openings measuring 12 inches or greater in their smallest (least) dimension in a floor, platform, pavement, or yard through which an individual may fall, must be guarded by fixed or removable railings, screens, or toe boards.

Every ladder way floor opening or platform must be guarded by a standard railing with standard toe board on all exposed sides (except at the entrance to the opening. Every wall, window wall, and chute wall opening from which there is a drop of greater than 4 feet must be guarded by a rail, roller, picket fence, half door, or equivalent barrier.


Newsletter – January 2021

  • Team Building Quiz;
  • Supervisor Tip – How to Deal with Coronavirus Burnout and Pandemic Fatigue;
  • Getting Employees to Report Near Misses;
  • Gloves Infographic;
  • Ladder Safety Checklist;
  • Managing Music in Your Workplace;
  • Safety Talks on PPE Hand Protection, Substance Abuse, Incident Reporting, and Ladder Safety;
  • and more…


Trailer Safety Talk

WHAT’S AT STAKE?

Trailer safety plays an integral part in today’s working environment. Towing trailers, caravans or mobile plant demands hazard awareness, safe practice, driving competence and knowledge of the trailer law.

All operatives and people who need to tow trailers, mobile plants, exhibition units, hospitality units, catering trailers for their work include e.g. Council and utilities personnel, civil engineers, landscape contractors, builders or exhibition demonstrators.

WHAT’S THE DANGER?

To pull a trailer behind another vehicle, a driver needs to develop a whole new set of skills. Just the process of hitching and unhitching a trailer from a tow vehicle requires know-how and numerous steps, and forgetting even one crucial element in the process could compromise safety.

Hooking up a trailer to your car or truck is an easy way to increase the storage capacity of your vehicle. However, failing to attach your trailer correctly can lead to damage to your own car, the trailer, and other vehicles around you as you drive. By securing the coupler to the hitch ball on your vehicle, making sure that it’s locked in properly, and wiring up the lights, you can hook up a trailer safely and easily.

HOW TO PROTECT YOURSELF

PRE-TRIP PLANNING:

  1. Ensure staff has received appropriate training
  2. Ensure the vehicle, hitch and trailer are sized properly and compatible.
  3. Inspect the trailer to ensure it is safe to use
  4. Inspect the tow vehicle
  5. Properly load the trailer.

HOOKING UP THE TRAILER:

  1. When assisted in hooking up and un-hooking a trailer ensure that the assistant can be seen at all times by the driver
  2. Attach safety chains to the diagonally opposite point on the hitch.
  3. Ensure all trailer lights work and that they are sufficiently bright.
  4. Remove tires blocks after the trailer is hooked to the tow vehicle.

DRIVING TECHNIQUES:

  1. When towing a trailer, you must be fully aware of the restrictions on manoeuvrability, visibility and acceleration. You should also know that the way your vehicle brakes changes considerably with the added weight of a trailer.
  2. Trailer fishtailing, with the resulting loss of steering control, is a major cause of trailer accidents.
  3. If your trailer is fishtailing, slow down immediately and pull over when it is safe to do so. Stop your vehicle, assess the problem and take corrective measures.

Parking and Un-hooking the Trailer:

  1. Ensure the ground or surface where the trailer will rest is firm and is not on an unreasonable incline.
  2. Ensure both trailer tires are blocked front and back to prevent movement.
  3. Ensure there is a solid surface on which the tongue support can rest.

KEY DRIVING TIPS FOR SAFE TOWING

Make wider turns at curves and corners. Because your trailer’s wheels will end up closer to the inside of a turn than the wheels of your tow vehicle, the trailer tires are more likely to hit or ride up over curbs.

Allow for longer stopping distances. Stopping distances will increase from what your tow vehicle can normally achieve on its own, because of the added weight of the trailer.

Drive in the right lane on highways. Drive in the right lane as much as possible, so you can use the extra stopping room of the right shoulder of the road in case you need to brake suddenly.

Adjust trailer brakes according to load. Many trailers have electric brakes, and the power level can be adjusted by the driver if the truck is fitted with an optional in-vehicle trailer brake controller system.

Don’t ride your truck’s brakes on long downhills. Shift the truck’s transmission to a lower gear to help slow the vehicle and take some strain off of the brakes.

Practice driving with a trailer. Before hitting the road, it’s a good idea to practice accelerating, backing up, braking, making wide turns, and using your sideview mirrors. This is especially important if you are a new employee to the art of towing a trailer behind a vehicle.

Check your route ahead of time. Some roads don’t allow trailers on them, and certain roads also have weight, height, and width limits. Planning your route ahead of time will save you from the hassle of having to backtrack to find roads that allow your rig.

READY FOR TOWING

  • Check those trailer tires. Check the tire pressures on the trailer. Inspect the trailer tires for dry rot and cracking, especially if the trailer is stored outside and hasn’t been used for months.
  • Make sure your tow vehicle’s maintenance is up to date. Towing puts additional stress on the tow vehicle, so before heading out on a towing road trip, be sure your truck has recently had an oil and filter change, the brake pads have plenty of life remaining, the engine coolant is filled to the proper level in the reservoir, and the transmission fluid is topped off.
  • Match the hitch ball to the trailer. Ensure the ball on your tow hitch is the same size as the coupler on your trailer. Hitch balls typically come in three sizes: 1⅞ inches, 2 inches, and 2 5⁄16 inches.
  • Don’t get stuck on the side of the road. Ensure you have at least one spare tire for your trailer.
  • Use trailer safety chains. Ensure trailers have safety chains that hook up to the hitch. Always cross the trailer’s safety chains, don’t just run them straight.
  • Check trailer lights. Before hitting the road, double check to make sure the trailer’s electrical wiring system is properly connected to the tow vehicle.
  • Use wheel chocks. When unhooking the trailer from the tow vehicle, place wheel chocks (sturdy, wedge-shaped blocks) in front of and behind the trailer’s tires to ensure the trailer doesn’t roll away when it is released from the tow vehicle.

FINAL WORD

Driving or towing a load and reading the load for towing are two functions or operations that are fundamentally different. The success or failure in either one will for certain affect the outcome or result of the work.


Transferring a Trailer (Hand Work)

WHAT’S AT STAKE?

Transfer trailers are routinely used to ship 20-ton loads of Municipal Solid Waste to distant disposal sites. Like other commercial vehicles, tractor-trailers are subject to a number of DOT regulations including the Federal Motor Vehicle Carrier Safety Act, which requires commercial drivers to inspect vehicles at the beginning and end of each day in an effort to make sure trucks are safe to operate. A thorough inspection of the vehicle is fairly simple and takes 10 to 15 minutes to complete. Importantly, drivers should be properly trained and instructed on the pre-trip and post-trip inspection process including the requirements for paperwork to document the condition of vehicle.

WHAT’S THE DANGER?

DAWGS

Over the past few years, a few incidents have occurred where a transfer trailer box has slid out of the dump-truck box when it is being raised.  This occurs when the “Dawgs” or hooks that hold the transfer trailer in place unhook themselves from the dump-truck’s box, allowing the transfer trailer to slide out the back end.

This could pose a serious safety concern if a worker was behind the transfer trailer when it was to slide out of the dump-truck’s box.  Therefore, to prevent a serious injury from occurring, the following safe work procedure is to be adhered to if handwork must be completed with a transfer trailer.

MANUAL TARPING

If the transfer station does not have a tarping station, the driver may need to climb on the trailer to cover the load. In these cases, the driver must have proper training and use fall protection to minimize the risk of a fall. Many slips and trips that result in falls can be traced back to three root causes:

Using an extendable reach stick allows the driver to adjust and secure the tarp without having to climb onto the trailer and risk a fall.

  1. Improper footwear: Good quality work-type safety shoes with slip-resistant soles and heels will help keep employees safe. Good footwear is especially important in transfer stations, landfills and recycling centers where the walking surface may be slippery.
  2. Inattention: The best defense against tripping and slipping is to be alert. Drivers need to watch where they are walking and stay alert to their surroundings.
  3. Not practicing “three points” of contact: Drivers should be reminded of the “three points” of contact rule—always have two feet and at least one hand or both hands and at least one foot in contact with a vehicle or structure.

HOW TO PROTECT YOURSELF

TRANSFER STATIONS

Drivers of tractor-trailers need to take precautions at transfer stations, as their vehicles are longer and make wide turns that can make it tricky to get on and off a scale. Once positioned for loading, the driver should stay with his or her trailer while it is being loaded. If the driver needs to exit the cab of the truck, he or she should first look around to get the lay of the land and recognize any potentially hazardous situations. A quick scan of the tip floor or loading area may mean the difference between a safe day and an unexpected incident. Drivers should always use proper Personal Protective Equipment (PPE) including a high visibility safety vest, hardhat, gloves and eye protection.

TARPING PROCEDURES

The driver should be alert at all times especially for other vehicles that may be entering or exiting the transfer station. Drivers must also be careful when walking around their vehicles as tip floors and loading areas can be cluttered with waste, slippery and uneven.

Once the trailer is loaded to the proper weight, the load will need to be covered. During the tarping process, the driver will need to take precautions, as falls are dangerous to workers who work on elevated platforms and on top of trucks and trailers. Some transfer stations and landfills have tarping stations that allows drivers to safely tarp and un-tarp loads. Most tarping stations provide a level surface for workers to stand with adequate guardrails to keep employees safe while a tarp is being placed on or removed from a trailer. It is important to keep tarping stations clear of ice and snow during the winter months. Additionally, tarping stations should have adequate lights to allow drivers to have good visibility.

Under No Circumstances Should A Worker Stand Behind A Dump-Truck (With Transfer Box) While the Box Is Being Raised or Lowered, Or While It Is in The Raised Position.

  1. Ensure the transfer box is securely attached to the dump-truck. (Dawgs hooked in position, chains)
  2. Ensure that no workers enter the “danger zone” behind the dump-truck while the box is being raised or lowered, or while it is in the raised position.
  3. The dump-truck must dump the material on the ground, with the spreader chains attached, and then lower its box before workers begin working with the material.

SAFETY OVER THE ROAD

Precautions

The load that is being carried, along with road and weather conditions, can dramatically alter the handling, stability, steering, braking and acceleration of a tractor-trailer. Drivers can eliminate rollover accidents if they take these precautions:

  • Pay attention to surface conditions. Soft surfaces and un-level surfaces may potentially cause a rollover.
  • Be alert for road shoulder conditions. Soft shoulders or no shoulders may cause a truck to tip and possibly roll or flip.
  • Check tires and maintain correct tire pressure.
  • Be aware of the truck’s center of gravity and realize that it changes depending on the load in the trailer.
  • Make sure the load is stable and secure.
  • Slow down before entering curves and on highway exit and entrance ramps. Remember, posted speed limits are for cars. Tractor-trailer drivers should take extra precautions and slowly execute turns.

 When making a turn:

Many rollover accidents occur because the driver of the transfer trailer is traveling too fast and fails to properly negotiate a curve or turn resulting in the truck leaving the roadway. During safety training, remind drivers to slow down around curves, and that the posted speed limits for curves are meant for automobiles, not tractor-trailers with 20-ton loads.

Safety When Unloading

Another risk of an accident occurs when the trailer is being unloaded especially with trailers that unload by raising one end of the trailer and waiting for the material to slide out the back end. Unloading a transfer trailer will raise the center of gravity resulting in less stability. Stuck loads or frozen loads that will not slide out of the trailer or container can increase the risk of rollover.

Landfill

At the landfill, the driver must position the trailer on level ground as even a slight slope can increase the chance of a rollover. The driver must make certain that the tailgate is unlocked before the unloading process begins. The stability of the surface is another important consideration. A mushy or soft surface may result in the truck tipping especially as the weight of the load is transferred to the rear wheels during the unloading process. High winds can be a problem especially at a landfill when tip trailers are raised in the air during the unloading process.

Danger

If a truck or trailer does roll, the driver and everyone around the vehicle is in danger. For this reason, drivers should maintain a safe space between vehicles. Equipment operators including compactor and dozer operators need to be especially careful when working around trucks and trailers that are unloading.

SAFETY CONCERNS

A number of other safety concerns can be reviewed with drivers of transfer trailers. Getting sufficient rest is critical as driver fatigue is a contributing factor in many accidents involving over-the-road vehicles. Drivers should always obey size and weight limits and posted speed limits. Avoiding distractions especially texting is another critical safety rule. As the saying goes, “it can wait.” Finally, drivers should never jump from the truck or trailer. While these may seem like obvious precautions, the reality is that countless injuries occur each year because basic safety rules are not followed. Taking precautions and exercising good judgement will help keep tractor-trailers safely rolling down the highway.

FINAL WORD

Transfer trailer operations not only include and affect safety before getting on the road but also the operational safety procedures while transporting the load on our public roadways and highways.


Winter Driving Tips

WHAT’S AT STAKE?

Winter Driving can be hazardous, especially in northern regions that get a lot of snow and ice. Additional preparations can help make a trip safer, or help motorists.

Although employers cannot control roadway conditions, they can promote safe driving behavior by ensuring workers: recognize the hazards of winter weather driving, for example, driving on snow/ice covered roads; are properly trained for driving in winter weather conditions; and are licensed (as applicable) for the vehicles they operate.

WHAT’S THE DANGER?

Statistics

Winter storms, bad weather and sloppy road conditions are a factor in nearly half a million crashes and more than 2,000 road deaths every winter, according to research by the AAA Foundation for Traffic Safety.

FOUR DANGERS

The following four situational “zones” depict the importance for workers to heed the affects of driving in the winter.

  1. Work Zone Traffic Safety
  2. Stranded
  3. Frostbite
  4. Lack of fluids

HOW TO PROTECT YOURSELF

WINTER DRIVING RULES

  • SLOW DOWN! – posted speed limits are for ideal travel conditions. Driving at reduced speeds is the best precautionary measure against any misfortune while driving on slippery roads. “Black ice” is invisible.
  • Be alert. Black ice will make a road look like shiny new asphalt. Pavement should look grey-white in winter.
  • Reduce your speed while approaching intersections covered with ice or snow.
  • Allow for extra travelling time or delay a trip if the weather is inclement.
  • Lengthen your following distance behind the vehicle ahead of you. Stopping distance on an icy road is double that of stopping on a dry one. For example, from around 45 metres (140 ft) at the speed of 60 km/h, to 80 metres (over 260 ft) on an icy road surface.
  • Be aware and slow down when you see a sign warning that you are approaching a bridge. Steel and concrete bridges are likely to be icy even when there is no ice on the ground surface, (because bridges over open air cool down faster than roads which tend to be insulated somewhat by solid ground.)
  • Keep a safe distance back from snow plows, and salt/sand/anti-icing trucks. Never pass a snow plow due to the whiteout conditions and ridge of snow created by the plow.
  • Keep at least half a tank of fuel in your vehicle at all times.
  • Never warm up a vehicle in an enclosed area, such as a garage.

Prepare for Winter Driving

  • Avoid driving when fatigued.
  • Check weather conditions for your travel route (and time) before you begin driving.
  • Plan your arrival time at a destination by taking into account any delays due to slower traffic, reduced visibility, roadblocks, abandoned automobiles, collisions, etc.
  • Inform someone of your route and planned arrival time.
  • Warm up your vehicle BEFORE driving off. It reduces moisture condensing on the inside of the windows.
  • Remove snow and ice from your vehicle. It helps to see and, equally important, to be seen.

VEHICLES

Prepare Vehicles for Driving in Winter

To prepare your vehicle for winter driving give it a complete checkup. Look for the following:

  • Battery – recharge or replace if the battery is weak. Also have the charging system checked.
  • Ignition – check for damaged ignition wires and cracks in the distributor cap.
  • Lights – check all lights (headlights, side lights, emergency flashers, directional lights, taillights, brake lights and parking lights) for proper functioning.
  • Use four snow tires that are of the same type, size, speed rating, and load index for better handling, control and stability.
  • Where permitted, use chains or studded tires on all four wheels when you expect severe snow and icy roads.
  • Check tire pressure and if necessary restore it to levels recommended by the vehicle manufacturer. The pressure drops about 1 psi for every 5°C (9°F) drop in temperature.
  • Check the wear of the tires. Tires have tread wear indicators or bars that are inside the grooves of the tires. When the tread is close to (within 1.5mm) or the same level as the wear indicator, replace the tire as it no longer provides effective traction.
  • Check tire balance and correct if necessary.
  • Check wheel alignment and correct if necessary.
  • Check the exhaust system for leaks. A properly sealed exhaust system reduces the risk for carbon monoxide poisoning.
  • Check the radiator and hoses for leaks.
  • Ensure that your vehicle always has a sufficient amount of antifreeze rated for the coldest weather.
  • Check the defrosters (front and back) to make sure they are working efficiently.
  • Ensure that windshield wipers function efficiently. Replace them if they are old or worn.
  • Fill up the fuel tank before you leave on your trip. Do not let the fuel level get too low – the driving time to the next gas station may take much longer than you ever expected, and if you get stuck, the car engine will be your only source of heat.

The Winter Driving Kit

A well-stocked winter driving kit helps to handle any emergency. It should include:

  • Properly fitting tire chains.
  • Bag of sand or salt (or kitty litter).
  • Tow rope.
  • Traction mats.
  • Snow shovel.
  • Snow brush.
  • Ice scraper.
  • Booster cables.
  • Warning devices such as flares or emergency lights.
  • Fuel line de-icer (methanol, also called methyl alcohol or methyl hydrate).
  • Extra windshield wiper fluid appropriate for sub-freezing temperatures.
  • Roll of paper towels.
  • Flashlight
  • Blanket
  • Extra clothing
  • First aid kit.
  • Snack bars or other “emergency” food and water.
  • Matches and emergency candles – only use with a window opened to prevent build-up of carbon monoxide.
  • Road maps.

Stuck or Stranded in The Snow

  • Avoid over-exertion and over-exposure to the cold. Cold weather can put extra stress on the heart and contribute to the hazards of over-exertion. Sweaty clothes next to the skin are not good insulators against the cold and can increase how cold you feel. Change into dry clothes where possible.
  • Stay in the car if you cannot shovel your car out of the snow.
  • Stay in the car in blizzard conditions – Do not leave the car for assistance unless help is very close and it is safe to walk. It is easy to get disoriented in a blizzard.
  • Turn on flashing lights or set up flares. A brightly coloured cloth on the radio antenna may make your vehicle more visible in daylight.
  • Run the car engine occasionally (about 10 minutes every hour) to provide heat (and to conserve fuel). Ensure that the tail exhaust pipe is free of snow and keep the window opened slightly (on the side shielded from the wind) to prevent the build up of carbon monoxide when the engine is running.
  • Bundle up in a blanket. If there is more than one person in the car, share – two people sharing blankets will be warmer than either person alone in a blanket.
  • Wear a hat and scarf – the head and neck are major sources of heat loss from the body.
  • Monitor for any signs of frostbite and hypothermia.
  • Do not fall asleep. If there is more than one person in the car, take turns sleeping.
  • Do not stay in one position too long. Do some exercises to help the circulation – move arms and legs, clap your hands, etc.
  • Watch for traffic or emergency vehicles.

FINAL WORD

Employers cannot control the weather which impact the condition of our roadways. But employers can promote and encourage safe driving protocols and practices by ensuring workers recognize the hazards of winter weather driving.


Working With A Transfer Trailer

WHAT’S AT STAKE?

Transfer trailers are routinely used to ship 20-ton loads of MSW to distant disposal sites. Like other commercial vehicles, tractor-trailers are subject to a number of DOT regulations including the Federal Motor Vehicle Carrier Safety Act, which requires commercial drivers to inspect vehicles at the beginning and end of each day in an effort to make sure trucks are safe to operate.

WHAT’S THE DANGER?

AVOID SLIPS AND TRIPS

If the transfer station does not have a tarping station, the driver may need to climb on the trailer to cover the load. In these cases, the driver must have proper training and use fall protection to minimize the risk of a fall. Many slips and trips that result in falls can be traced back to three root causes:

  1. Improper footwear: Good quality work-type safety shoes with slip-resistant soles and heels will help keep employees safe. Good footwear is especially important in transfer stations, landfills and recycling centers where the walking surface may be slippery.
  2. Inattention: The best defense against tripping and slipping is to be alert. Drivers need to watch where they are walking and stay alert to their surroundings.
  3. Not practicing “three points” of contact: Drivers should be reminded of the “three points” of contact rule—always have two feet and at least one hand or both hands and at least one foot in contact with a vehicle or structure.

SAFETY WHEN UNLOADING

Another risk of an accident occurs when the trailer is being unloaded especially with trailers that unload by raising one end of the trailer and waiting for the material to slide out the back end. Unloading a transfer trailer will raise the center of gravity resulting in less stability. Stuck loads or frozen loads that will not slide out of the trailer or container can increase the risk of rollover.

At the landfill, the driver must position the trailer on level ground as even a slight slope can increase the chance of a rollover. The driver must make certain that the tailgate is unlocked before the unloading process begins. The stability of the surface is another important consideration. A mushy or soft surface may result in the truck tipping especially as the weight of the load is transferred to the rear wheels during the unloading process. High winds can be a problem especially at a landfill when tip trailers are raised in the air during the unloading process.

If a truck or trailer does roll, the driver and everyone around the vehicle is in danger. For this reason, drivers should maintain a safe space between vehicles. Equipment operators including compactor and dozer operators need to be especially careful when working around trucks and trailers that are unloading.

Serious Safety Concerns

Incidents have occurred where a transfer trailer box has slid out of the dump-truck box while it is raised.  This occurs when the “dawgs” or hooks that hold the transfer trailer in place unhook themselves from the dump-truck’s box, allowing the transfer trailer to slide out the back end.

There is a possibility for a devastating safety concern in such an incident if a worker were behind the transfer trailer when it was to slide out of the dump-truck’s box. The worker could potentially be crushed by the force and weight of the box.

HOW TO PROTECT YOURSELF

INSPECTIONS

A thorough inspection of the vehicle is fairly simple and takes 10 to 15 minutes to complete. Importantly, drivers should be properly trained and instructed on the pre-trip and post-trip inspection process including the requirements for paperwork to document the condition of vehicle.

CHECKLISTS

Different companies may have different processes for conducting pre-trip and post-trip inspections. However, in all cases, the driver must be familiar with the mechanical components and operation of the vehicle. A checklist is a useful tool to aid the driver in conducting an inspection without forgetting anything. Skipping any items during the inspection process will only increase the chances of an accident or breakdown. Done correctly, pre-trip and post trip inspections will comply with the law and give the driver.

SAFETY AT THE TRANSFER STATION

Drivers of tractor-trailers need to take precautions at transfer stations, as their vehicles are longer and make wide turns that can make it tricky to get on and off a scale. Once positioned for loading, the driver should stay with his or her trailer while it is being loaded. If the driver needs to exit the cab of the truck, he or she should first look around to get the lay of the land and recognize any potentially hazardous situations. A quick scan of the tip floor or loading area may mean the difference between a safe day and an unexpected incident. Drivers should always use proper Personal Protective Equipment (PPE) including a high visibility safety vest, hardhat, gloves and eye protection.

The driver should be alert at all times especially for other vehicles that may be entering or exiting the transfer station. Drivers must also be careful when walking around their vehicles as tip floors and loading areas can be cluttered with waste, slippery and uneven.

Once the trailer is loaded to the proper weight, the load will need to be covered. During the tarping process, the driver will need to take precautions, as falls are dangerous to workers who work on elevated platforms and on top of trucks and trailers. Some transfer stations and landfills have tarping stations that allows drivers to safely tarp and un-tarp loads. Most tarping stations provide a level surface for workers to stand with adequate guardrails to keep employees safe while a tarp is being placed on or removed from a trailer. It is important to keep tarping stations clear of ice and snow during the winter months. Additionally, tarping stations should have adequate lights to allow drivers to have good visibility.

IMPORTANT SAFETY CONCERN

Under No Circumstances Should A Worker Stand Behind A Dump-Truck (With Transfer Box) While the Box Is Being Raised or Lowered, Or While It Is in The Raised Position.

  • Ensure the transfer box is securely attached to the dump-truck. (Dawgs hooked in position, chains)
  • Ensure that no workers enter the “danger zone” behind the dump-truck while the box is being raised or lowered, or while it is in the raised position.
  • The dump-truck must dump the material on the ground, with the spreader chains attached, and then lower its box before workers begin working with the material.

Other Safety Concerns

Getting sufficient rest is critical as driver fatigue is a contributing factor in many accidents involving over-the-road vehicles. Drivers should always obey size and weight limits and posted speed limits. Avoiding distractions especially texting is another critical safety rule. As the saying goes, “it can wait.” Finally, drivers should never jump from the truck or trailer. While these may seem like obvious precautions, the reality is that countless injuries occur each year because basic safety rules are not followed.

Avoid

  • Do not overload.
  • Do not allow anyone to ride on the tongue of a wagon or trailer.
  • Do not allow anyone to be in between the tractor and wagon or trailer when in motion.
  • Do not travel faster than 25 km/h.
  • Do not tow wagons or trailers weighing more than the tractor unless the trailer or wagon are equipped with brakes that are appropriate for the weight and speed of travel.

FINAL WORD

When working with transfer trailer equipment, always stand clear and not be forgetful of the heavy machinery that you are working near. Never become complacent. Never assume that nothing bad will happen as you have been working that way without injury or incident for a long time.


Traffic Control – When is a TCP Required

WHAT’S AT STAKE?

Regulation establishes that traffic control arrangements for a workplace may use a traffic control person (TCP) only when the use of signs, devices and/or procedures is not sufficient to provide effective traffic control.

WHAT’S THE DANGER?

HAZARDS/DANGERS

Dust Control

If traffic causes airborne dust to the extent visibility is reduced and interferes with effective traffic control or creates a hazard to workers, the employer must control the dust by the periodic application of water or other acceptable material to the grade surface to suppress dust.

Long Periods of Delay

If traffic control operations will result in long periods of traffic delay, appropriate signs or other effective means must be used to inform the traffic of the situation.

Towing and Recovery Operations

If the recovery of a disabled or damaged vehicle prevents the safe passage of other vehicles or if a passing vehicle is a danger to the workers engaged in the recovery operation, the person in charge must

  1. warn traffic of the recovery operation by displaying appropriate signs and a 360° flashing light,
  2. ensure that workers wear appropriate personal protective equipment, and
  3. ensure that any other procedures required by the Traffic Control Manual are followed if the activity exceeds the limits for emergency or brief duration work.

Construction, maintenance, utilities workers, landscaping, emergency workers, and all other occupations who may conduct activities on or along the road are exposed to hazards such as:

  • collision with traffic or work vehicle, especially at high speeds
  • weather conditions
  • exposure to vehicle exhaust
  • moving machinery and equipment
  • angry motorists

Fatalities/Causes

Approximately 20,000 workers are injured as a direct result of road construction each year due to traffic-related accidents and hazards within the construction activity area. In 2016 alone, 25,713 crashes occurred in Texas work zones. These collisions resulted in 181 fatalities. Although the number of accidents has decreased over the past years, injuries and deaths have increased by over 27 percent.

The primary causes of roadside worker fatalities are:

  • Runover and backover injuries (48%).Almost half of worker fatalities are a direct result of a worker being run over or backed over by vehicles or mobile equipment. Nearly 25% of these incidents are caused by construction vehicles.
  • Vehicle collisions (19%).The second most common cause of worker fatalities is a collision between construction equipment and traffic. When traffic fails to slow down or remain in their lane, the driver of the construction machinery may be left with little to no maneuverability, thus increasing the risk for a collision.
  • Miscellaneous construction hazards (17%).The third most dangerous aspect of roadside construction is the project site itself. Grounds can collapse, equipment can fail or lose control, and changing weather can all pose a significant threat to workers.
  • Caught in between or struck by an object accident (16%):The fourth most common cause of worker fatalities occur when workers get caught between construction equipment and other objects (mounds of dirt or medians), or when they’re struck by construction equipment or other vehicles.

HOW TO PROTECT YOURSELF

ROLE OF TRAFFIC CONTROL PERSON

  1. A traffic control person may be used only
    1. if the use of signs and other traffic control devices and procedures alone cannot provide effective traffic control, or
    2. during emergency or brief duration work if it is not practicable to control traffic with signs and other devices and procedures.
  2. One or more traffic control persons must be used if
  3. it is necessary to institute a one-way traffic system by or through a work zone and the circumstances do not allow self-regulating single lane traffic controlled by signs and other devices as specified in the Traffic Control Manual, and a traffic signal system is not used,
  4. work-related traffic cannot safely self-regulate to move in or out of the work area or safely coordinate with other traffic,
  5. an existing traffic control system, or an existing traffic signal light system, is not adequate to regulate traffic,
  6. the work encroaches into an intersection so as to interfere with regular traffic movement,
  7. traffic speed or volume is a hazard to workers while setting up or removing other traffic control devices, or
  8. other traffic control devices are not available in an emergency situation.
Traffic control person to remain on duty

The employer must ensure that a traffic control person is on duty at the assigned station whenever a traffic control person is required as part of the traffic control plan for the work.

A traffic control person must:

  1. stand in a safe position, preferably on the driver’s side of the lane under the TCP’s control, be clearly visible, and have an unobstructed view of approaching traffic, and
  2. be positioned at least 25 m (80 ft) away from the work area unless circumstances or space requirements, such as working at or near an intersection, dictate otherwise.

FINAL WORD

Motorist, employers, workers and general public must appreciate work zones on public roads is fraught with danger. The work and service of TCP is recognized as one of the main bulwarks protecting these groups in dangerous circumstances.


Check Your Following Distance Safety Talk

WHAT’S AT STAKE?

Driving for work may include drivers of company or personal vehicles, those travelling from site to site, driving to an off-site meeting, picking up office supplies, etc. There are many individuals who drive as a major portion of their occupation – first response crews, surveyors, road repair and maintenance workers, sales, home care, trades, taxis, bus/van, public transit, school buses, tow trucks, and transports. Driving is a task that may be a part of many occupations.

Drivers must operate vehicles safely at all times. They may or may not be delivering goods or passengers. Drivers are often responsible for doing pre-trip inspections, route planning, and scheduling.

WHAT’S THE DANGER?

Every 12 minutes someone dies in a motor vehicle crash, every 10 seconds an injury occurs and every 5 seconds a crash occurs. Many of these incidents occur during the workday or during the commute to and from work. Employers bear the cost for injuries that occur both on and off the job. Whether you manage a fleet of vehicles, oversee a mobile sales force or simply employ commuters, by implementing a driver safety program in the workplace you can greatly reduce the risks faced by your employees and their families

HOW TO PROTECT YOURSELF

CRASH AVOIDANCE SPACE

To reduce the risk of driving into the rear of a vehicle, the three-second crash avoidance space is essential, as the vehicle in front has the potential to stop very quickly if it collides with another vehicle or stationary object. The three second gap will change depending on your speed.

Potential for something to move into the crash avoidance space

  • The three-second gap can also be used for situations where there is potential for something to move into your crash avoidance space; for example a car in an adjacent street could fail to give way and pull out in front of you.
  • A safe low risk driver maintains a crash avoidance space completely around the vehicle. The crash avoidance space is managed by adjusting the vehicle’s speed and road position.

To determine the crash avoidance space to the front of the vehicle you need to take into account two key factors – Reaction Time and Response Time.

Reaction Time is the time the driver needs to:

  • See the information.
  • Perceive what it means.
  • Decide on a response.
  • Instigate that response.

A driver who is fit, concentrating, alert and not affected by alcohol, drugs, fatigue or a distraction, will still require about one and a half seconds to react to a hazard.

Response Time is the time required to take action. Generally, a minimum of one and a half seconds is needed to respond. In many situations braking may be the only possible response. Swerving is rarely appropriate and can result in a more severe crash, for example a head-on collision.

A total of three seconds crash avoidance space is needed to react and respond to a situation in front of you. You may need even longer in poor conditions such as in rain or darkness.

Following Another Vehicle

To calculate a three-second crash avoidance space when following another vehicle use this basic technique. As the rear of the vehicle in front of you passes an object at the side of the road such as a power pole, tree or sign, start a three-second count ‘one thousand and one, one thousand and two, one thousand and three’.

If your car passes the object you picked before you finish the three-second count, you are following too closely. Your crash avoidance space is not large enough. Slow down, and repeat the count again until the three-second crash avoidance space is achieved.

In poor driving conditions, such as rain, night and gravel roads, it may be necessary to increase your crash avoidance space to four or more seconds.

The only way to accurately check your following distance is by using the ‘Time Interval Formula’ which works by picking a fixed landmark, like a sign or some other stationary object, and counting seconds as the vehicle in front of you passes it. The number of seconds that you count is your time interval.

Under the best conditions, the minimum number of seconds needs to be 2 or more as conditions change or deteriorate.

The Importance

Stopping distance is a combination of reaction distance and braking distance. Reaction distance is the distance that your vehicle travels from the time you see a reason to apply brakes to when you actually move your foot to the brake pedal and begin to slow down. If you are too close to the vehicle in front, you will hit them NO MATTER HOW GOOD A DRIVER YOU ARE because you can only get to the brake as fast as a human can move and by the time you get there, if the guy in front is already breaking hard, you don’t have a chance.

Conditions which require an increase in following distance

  • Weather conditions; like rain, snow or other weather problems
  • Road condition; such as gravel or broken up pavement or other problems with the road. In slippery conditions, such as snow, ice or on wet pavement, much more space is advisable.
  • Lighting condition; at night or if you are looking into reflected sun or glare, you need more space because you will not see things as easily.
  • Traffic conditions; as traffic gets heavier, you need to stay aware of much more than in light traffic, this occupies your attention so more space in front buys you more time to react.
  • YOUR condition; if you are tired or otherwise not 100%, leave more space because your reactions may not be as quick.

FINAL WORD

Employers have the power and opportunity to improve the safety vehicle performance of their employees. The first step is the implementation and enforcement of a Company sponsored driver safety program. The next step is to hire capable drivers, only allow eligible drivers to drive on company business, train them, supervise them, and maintain company vehicles properly.


Deal with Irate and Frustrated Motorist

WHAT’S AT STAKE?

Road rage is a driver’s aggressive or angry behavior. Road rage may include rude gestures, verbal insults, physical threats or dangerous driving that is directed towards another driver.

Road rage is not just limited to motorists, but also to cyclists. In today’s society, cyclists occupy a large part of roadway traffic from commercial to recreational and sports cycling. This increasing sector is the object of scorn and dislike from some motorists.

Road rage has resulted in physical harm and even death.

Unfortunately, road rage is becoming a serious threat to Canadian drivers. You can do your part by exercising common sense and patience when you’re driving. The most important thing is that you and your passengers arrive safely.

WHAT’S THE DANGER?

According to a 2015 online survey a third of Canadians are victims of road rage at least once a month. Victims of road rage feel helpless, terrified – or angry, which can make a bad situation even worse.

While it can be hard to do, it’s important to stay calm and control your own anger when confronted with an aggressive driver.

HOW TO PROTECT YOURSELF

Following these tips can help keep you and your passengers safe.

  • Lock your doors. If you sense that another driver is threatening you, make sure that all your car doors are locked.
  • Do not react to aggressive drivers. If a driver cuts you off, tailgates, or drives aggressively, you may be inclined to honk your horn, gesture to the driver or otherwise engage with him/her. It is best to ignore the situation entirely.
  • Avoid escalation. If the other driver yells at you, or gestures rudely out the window, don’t shout or gesture back. An angry person can’t be in an altercation if another isn’t willing to join in. Keep your cool and carry on.
  • Get out of the way. Put your turn signal on, and move over as soon as it is safe to do so to allow the other vehicle to pass. Put as much distance as possible between your vehicle and the angry driver’s vehicle.
  • Find a safe place to stop. Don’t pull over the side of the road. The other car may follow you, and you could get into an altercation. Instead, drive to a safe place such as a police station, convenience store, shopping centre or even a hospital. If the angry driver follows, use your horn to attract attention. This will usually discourage an aggressor. Do not get out of your car.
  • Do not go home– You may be followed. Continue to drive until you lose the other car, or can pull into a safe place where there are other people.
  • Avoid eye contact. For drivers who express anger and frustration through their driving, eye contact can further upset them. Keep your eyes on the road, and try not to make eye contact with the enraged driver.
  • When stuck in traffic, leave lots of room between your vehicle and the one ahead. Traffic jams can make even the most patient drivers frustrated. If you’re stuck in traffic, you may be inclined to creep up close to the vehicle in front of you. Instead, leave lots of room. If an aggressive driver confronts you, you want to be able to change lanes and get out of the way.
  • Remember that it’s not personal. Even though it may feel very personal, the angry driver doesn’t know you at all. He or she is angry at the situation and looking for an outlet for their rage.
  • Grab vehicle information. If you are able, get the driver’s license plate number, make, and model of the vehicle in case the situation escalates and there is damage to your vehicle.
  • Use your cell phone if absolutely necessary. Your mobile phone can be your best friend if your safety is threatened. If you’re being followed or you feel an encounter is unavoidable, call 911 for help. They will send a police car to help, or advise you on what to do.
  • Don’t offend other drivers. Often you don’t realize it, but you may have engaged in driving behaviour that sends a driver over the edge. Common road rage triggers are tailgating, using a cell phone while driving, being cut off, taking up two parking spots, and driving with pets on a lap.

WHAT TO DO SITUATIONS

Passenger in a Car with Enraged Driver

You are in the car with an angry driver and you feel like a hostage.

Step1: try to calm the driver down.

Step2: admit to driver you are scared.

Step3: try to change the driver’s focus.

Step4: talk about the destination.

Step5: Find a new radio station.

CYCLING PREVENTION TECHNIQUES

Situation: “Get Off the Road”

Is the driver exhibiting aggression or is there a possibility you will be hit? Then do what he says and get off the road—for your safety and not to acquiesce to him. Then get out a pen and paper, make note of the vehicle and driver’s identifying features, and prepare to report it to the police.

Do not shout back. Do not gesture at the driver in any way. Breathe, think, and ride away in one piece. If this person is (as you’re likely thinking) an absolute idiot, don’t you want them further way from you? If they’re continuing to drive, they’re answering your wish—let them continue on their way.

What is the Goal?

When we choose to respond to someone who has affronted us, it’s important to think through just what it is we are hoping to accomplish. Do we want to pass along important information? Do we want to vent our frustrations? (hint: this is what the motorist just did, and how well did that go over with us?). Do we want to retaliate and cause the same amount of hurt/fear/irritation we went through? Do we want to be able to continue on our way safely, and get back to the riding we were doing before the altercation took place?

Each desired action will require a very different approach, and each has a widely varying likelihood of success. Think about it.

There are times when a motorist expresses an intent to harass or injure a cyclist. When this happens, just get off the road. Do you really want to call their bluff? Cyclists have been hit, and when that happens, it is often after the motorist has given some kind of clue as to their intent. Take that clue at face value and take yourself out of the range of conflict.

FINAL WORD

There are no winners in confrontations with enraged drivers who exhibit the road rage characteristics. It is always the best strategy to employ tactics that de-escalate irrational behavior to ensure safety of all parties.


Defensive Driving – When to be Cautious

WHAT’S AT STAKE?

The most dangerous part of an employee’s workday is when they’re on the road. Just one work-related motor vehicle collision could affect your organization’s productivity and finances, but more importantly, the health and future of your employees.

Getting behind the wheel of your car may seem like a commonplace event, but it is likely to be the most dangerous thing you will do all day long. In the U.S., car accidents are the fifth leading cause of death.

Although you can’t control the actions of other motorists, you have a great deal of control over how you operate your vehicle. That means you can increase your chances for a safe trip by taking necessary precautions.

WHAT’S THE DANGER?

Motor vehicle accidents are the major cause of occupational deaths. Most vehicle accidents are the result of driver error or poor operating practices. Drivers assume responsibility for their own safety and that of others on the roadways.

In the United Sates, motor vehicle accidents are the number one cause of death among all workers. Distracted driving and defensive driving are two ways a driver can make significant changes in driving habits. Distracted driving is defined as any non-driving activity a driver engages in that has the potential to distract them from the primary act of driving and increases the risk of crashing. While defensive driving is “…driving to save lives, time, and money, in spite of the conditions around you and the actions of others…” as defined by the National Safety Council.

The leading cause of occupational fatalities is vehicle-related crashes. NSC has been actively working to reduce motor vehicle collisions for more than five decades.

Employers pay significant costs associated with motor vehicle crashes. When employees are involved in traffic incidents, companies are exposed to liability risks and legal expenses, not to mention lost time, decreased productivity and increased insurance and workers’ compensation rates.

REVEALING STATS

  • Motor vehicle accidents are the most common cause of accidental death in the United States. They are also the most common cause of workplace deaths, representing about one in four fatal work injuries.
  • Every 12 minutes someone dies in a motor vehicle crash, every 10 seconds an injury occurs, and every 5 seconds a crash occurs. And many of these accidents occur during the workday or during the commute to and from work.
  • Motor vehicle crashes cost employers $60 billion annually. The average crash costs $16,500, and when a worker has an on-the-job crash that results in an injury, the cost can go as high as $74,000.  When a worker dies in a traffic accident, costs can exceed $500,000.

HOW TO PROTECT YOURSELF

OSHA SAFE DRIVING TIPS FOR EMPLOYEES

As an employer, it is in your best interest that your employees drive safely. Here are some tips from OSHA to help your drivers keep themselves and others safe while on the road.

  • Use a seat belt at all times—driver and passenger(s).
  • Be well-rested before driving.
  • Avoid taking medications that make you drowsy.
  • Set a realistic goal for the number of miles that you can drive safely each day.
  • If you are impaired by alcohol or any drug, do not drive.
  • Avoid distractions, such as adjusting the radio or other controls, eating or drinking, and talking on the phone.
  • Continually search the roadway to be alert to situations requiring quick action.
  • Stop about every 2 hours for a break. Get out of the vehicle to stretch, take a walk, and get refreshed.
  • Avoid aggressive driving by keeping your cool in traffic.
  • Be patient and courteous to other drivers.
  • Do not take other drivers’ actions personally.
  • Reduce your stress by planning your route ahead of time (bring the maps and directions), allowing plenty of travel time, and avoiding crowded roadways and busy driving times.

Defensive Driving Tips

When you think of safety hazards and injuries, you probably focus on what goes on during work.  But one of the greatest threats to worker safety is in the parking lot.  Whether we drive on the job or commute to work by car, defensive driving is a must for all employees at all levels in our company.  Here are some basic rules of defensive driving that you remember and practice:

  • Buckle up for safety.
  • Follow traffic rules, signs, and signals.
  • Keep your eyes on the road, your hands on the wheel, and your attention on traffic.
  • Check your rearview and side mirrors frequently.
  • Adjust your speed and driving to changing weather and traffic conditions. Increase your distance between you and the vehicle in front of you.
  • Expect the unexpected and be especially alert in heavy traffic for sudden stops, vehicles passing or moving in and out of lanes, road debris, and work zones.
  • Keep cool, yield right of way, and don’t get into disputes with other drivers.
  • Pull over into a safe area to make or receive phone calls.
  • Don’t drink or take drugs and drive.
  • Be extra cautious when your vehicle is in reverse.
  • Look ahead at least 10 seconds, 1/4 mile, or to the next intersection or curve.
  • Scan any traffic behind you frequently.
  • When necessary, reduce your speed.
  • Have caution when nearing intersections.
  • Be aware of what other drivers do.
  • Notify other drivers of what you plan to do.
  • Prevent sudden changes in speed or direction.
  • Lightly brake when trying to stop on a slippery surface and do not pump ABS brakes. – Do not use cruise control on slippery or icy roads.
  • Patiently adjust to the flow of traffic.
  • Scan your blind spot before changing lanes.
  • Be cognizant of other vehicles changing lanes.
  • Have a safe following distance, which should range between 2 and 4 seconds depending on weather and other driving conditions. When analyzing this safe distance, watch the vehicle ahead of you pass a specific mark. Proceed to count “one-thousand-one, one-thousand-two., etc.” up to 4.

DRIVING IN THE DARK

It is no surprise that there is a greater risk of accidents at night.  In addition, night crashes tend to be more severe.  To help keep yourself on the roads when it’s dark out, remember these safety tips:

  • Start taking precautions as soon as the sun goes down. Dusk is one of the most dangerous times of day on the road.
  • Slow down and increase your following distance. Darkness makes judging distances harder.
  • Don’t overdrive your headlights. You need to be able to slow and stop safely when necessary.  If you are driving to fast or your headlights are dim, you may not see obstacles in time to stop or avoid them.
  • Take precautions not to be blinded by oncoming headlights. Slow down and shift your eyes momentarily to the right side of road and use the white lines to guide your steering.

THE BENEFITS OF DRIVER SAFETY PROGRAM

Employers have a significant role in reducing vehicle crashes. Through workplace policies and education, employers can help protect their workforce, protect their organizations and, in turn, protect employees’ own families and communities.

Implementing a driver safety program, will help your organization keep employees safer and can potentially:

  • Decrease risk of motor vehicle collisions and traffic violations
  • Minimize exposure to liability risks and legal costs
  • Reduce insurance premiums and workers’ compensation claims
  • Lower vehicle repair bills and replacement expenses
  • Protect business operations and brand identity
  • Every 7 seconds, someone is injured in a car crash
  • Every 15 minutes, someone is killed
  • Many of the crashes occur during the work day or the daily commute
  • Employers absorb costs associated with these crashes, whether they occur on or off the job
  • Motor vehicle crashes are the #1 cause of workplace death

FINAL WORD

Whether you’re driving to your local supplier or on a long road trip interstate, your safety must be a priority. Defensive driving skills take account of road conditions and the actions of others to help you avoid potential hazards. By employing these techniques, starting before you get into your vehicle, you’ll minimize your risk on the road. While you can’t plan for every situation you’ll encounter, the following tips will the minimize risks you face.


Keys to Electrical Safety

WHAT’S AT STAKE?

Working with electricity can be dangerous. The key is that not all electrical hazards are created equal. Although each use of electricity creates a potential exposure to a hazard, the dangers vary.

WHAT’S THE DANGER?

Engineers, electricians, and other professionals work with electricity directly, including working on overhead lines, cable harnesses, and circuit assemblies. Others, such as office workers and sales people, work with electricity indirectly and may also be exposed to electrical hazards.

There are four main types of electrical injuries:

  • Electrocution (fatal)
  • Electric shock
  • Burns
  • Falls caused as a result of contact with electrical energy

Wherever you work, electricity is probably present – and presents a hazard.

Perilous Power Lines

According to ESFI, 36% of all fatal work-related electrical injuries recorded between 2011 and 2017 involved overhead power lines. Workers situated near power lines need to be constantly cognizant of the present hazard. Consider all power lines to be live and dangerous, the organization advises. Instruct co-workers to stay away from downed lines as well as any vehicles or objects in contact with them.

Common Mis-Steps

The following are common mis-steps and sometimes deadly consequences have occurred in the following situations with workers.

  1. Failure to use electrical lockout devices
  2. Overloading circuits
  3. Careless employees
  4. Outlets too close to conductors
  5. Torn or frayed cords and wires

ARC FLASH

An electrical arc flash is a potentially deadly event where electrical current leaves the intended path and travels through the air. It goes from the electrical cable it was supposed to travel on to another or to a nearby ground. The result is quite violent and can destroy even large objects or throw them significant distances. If a person is in the area, he is at risk of serious injury caused by the energy released.

An arc flash can result in very serious injury and damage to the facility. Serious arc flash explosions commonly result in the following:

  • Severe Burns
  • Fire
  • Flying Objects
  • Molten Metal
  • Blast Pressure
  • Sound

HOW TO PROTECT YOURSELF

GENERAL

Most electrical accidents result from one of the following three factors:

  • Unsafe equipment or installation
  • Unsafe environment or
  • Unsafe work practices

PREVENTION

Accidents can be prevented with the use and implementation of the following:

1. Safe Equipment

All electrical workplace conductors and equipment must be deemed “acceptable” by OSHA. To be deemed acceptable, equipment must be marked as tested by a Nationally Recognized Testing Laboratory (NRTL), such as Underwriters Laboratory (UL) or Factory Mutual (FM). OSHA will look for these markings on the equipment to deem it safe. The equipment must be installed and used within its labeled capacity so as to not exceed the limitations of the equipment (e.g., putting the wrong switch for too much load, causing it to overheat).

Examples:

  • Watertight devices
  • Ground fault circuit interrupters (GFCIs)
  • Temporary power devices
  • Modular power devices
  • Motor control devices
  • Wire management: strain relief, conduit, tubing
  • Arc flash devices
  • Lockout devices: plug locks, switch locks
  • Cable protection systems

2. Guarding

Guarding involves locating or enclosing electrical equipment to make sure people don’t accidentally come into contact with its live parts. Effective guarding requires equipment with exposed parts operating at 50 volts or more to be placed where it is accessible only to authorized people qualified to work on it.

3. Grounding

Grounding intentionally creates a low-resistance path that connects to the earth. This will prevent the buildup of voltages that could cause an electrical accident that could result from a worker being in the ground path. A properly designed grounding system creates a low-resistance path away from workers. When designed correctly, grounding substantially reduces the risk of an electrical accident if combined with safe work practices.

4. Circuit Protection Devices

These devices limit or stop the flow of current automatically in the event of a ground fault, overload, or short circuit in the wiring system. Common examples include fuses, circuit breakers and GFCIs.

Fuses and circuit breakers open or break the circuit automatically when too much current flows through them, and will melt or trip to open the circuit. These are slow acting devices that are used primarily for protection of conductors and equipment. They typically do not open fast enough to prevent shock or further injury. They prevent overheating situations from occurring that result in damage to the conductors or equipment.

GFCIs are used typically in wet locations, construction sites, factory maintenance, and other high-risk areas to protect the equipment user. These devices react much faster than fuses and circuit breakers to interrupt the flow of current before shock and injury results.

5. Lockout/Tagout

Lack of lockout/tagout procedures and use of proper isolation equipment is a leading cause of unsafe work practices. The first step before beginning any inspection, repair or maintenance of any equipment is to follow the written procedure to isolate all energy sources to prevent accidental startup of the equipment.

FINAL WORD

Electricity can be a friend or foe. At all times, electricity must be treated with respect. Electricity has changed the world with its many applications in every aspect of our lives.


Housekeeping Safety Talk

WHAT’S AT STAKE?

Good housekeeping not only results in a cleaner workplace, but makes it safer as well. Good housekeeping reduces illnesses and injuries and promotes positive behaviors, habits, and attitudes. Employers are responsible for assessing each workplace before work begins to identify the potential hazards present, and determine ways to eliminate the hazards. An effective housekeeping program is an important element in workplace safety and health management systems.

WHAT’S THE DANGER?

EFFECTS OF POOR HOUSEKEEPING

Housekeeping at work is as important as it is at home, especially if you want a safe workplace. People who must function every day in a messy, disorderly work environment have lower morale, although they may not be aware of the cause. But the safety ramifications of poor housekeeping in the workplace are even more important.

Poor housekeeping may result in employee injuries or even death, citations by the Occupational Safety and Health Administration (OSHA) (or another regulatory agency) and even difficulty in securing future work. How can such a seemingly “minor” issue such as housekeeping have such serious consequences?

TYPES OF HAZARDS RESULTING FROM POOR HOUSEKEEPING

The injuries that result from poor work area conditions simply do not have to occur. These types of injuries are 100% preventable. Take time to evaluate your work areas today. Look for these three common hazard types. Take action to eliminate them so they do not have the chance to injure you or a coworker.

THE HAZARDS

  1. Slip, trip, and fall hazards- One of the most common type of hazards created by poor housekeeping are slip, trip, and fall hazards. When objects, materials, tools, and equipment are not properly stored workers are bound to trip over them. Slippery conditions are created when water, moisture, oils, grease, etc. are left on the floor in work areas. Fall hazards are created when employees have to stand on make shift surfaces to reach items stored at higher levels.
  2. Strain and sprain hazards- Sprain and strain injuries can result from slip, trip, and fall incidents. They also can occur when heavy items are not properly put away. When heavy or awkward objects are placed on the floor and need to be picked up by a worker it creates a risk for injury. Too often items have to be moved when there is poor housekeeping in a work area just for the sake of getting them out of the way. Because of unnecessary lifting, sprains and strains can occur.
  3. Laceration hazards- Whether you are working in a construction or a manufacturing setting, there are plenty of sharp objects that can cut your hand or body. When items are not properly stored this creates a huge risk for laceration injuries. Sharp tools, jagged metal, sharp edged material, etc. can all easily cut through a glove or clothing and injure a worker

HOW TO PROTECT YOURSELF

WHAT ARE THE ELEMENTS OF AN EFFECTIVE HOUSEKEEPING PROGRAM?

Maintenance

The maintenance of buildings and equipment may be the most important element of good housekeeping. Maintenance involves keeping buildings, equipment and machinery in safe, efficient working order and in good repair.

Dust and Dirt Removal

Enclosures and exhaust ventilation systems may fail to collect dust, dirt and chips adequately. Vacuum cleaners are suitable for removing light dust and dirt that is not otherwise hazardous. Special-purpose vacuums are useful for removing hazardous products.

Employee Facilities

Employee facilities need to be adequate, clean and well maintained. Lockers may be necessary for storing employees’ personal belongings. Washroom facilities require cleaning once or more each shift. They also need to have a good supply of soap, towels plus disinfectants, if needed.

Surfaces

Floors: Poor floor conditions are a leading cause of incidents so cleaning up spilled oil and other liquids at once is important.

Walls: Light-coloured walls reflect light while dirty or dark-coloured walls absorb light. Contrasting colours warn of physical hazards and mark obstructions such as pillars.

Maintain Light Fixtures

Dirty light fixtures reduce essential light levels. Clean light fixtures can improve lighting efficiency significantly.

Aisles and Stairways

Aisles should be wide enough to accommodate people and vehicles comfortably and safely. Aisle space allows for the movement of people, products and materials. Warning signs and mirrors can improve sight-lines in blind corners. Arranging aisles properly encourages people to use them so that they do not take shortcuts through hazardous areas.

Spill Control

The best way to control spills is to stop them before they happen. Regularly cleaning and maintaining machines and equipment is one way. When spills do occur, it is important to clean them up immediately.

Tools and Equipment

Tool housekeeping is very important, whether in the tool room, on the rack, in the yard, or on the bench. Tools require suitable fixtures with marked locations to provide an orderly arrangement.

Waste Disposal

The regular collection, grading and sorting of scrap contribute to good housekeeping practices. It also makes it possible to separate materials that can be recycled from those going to waste disposal facilities.

Storage

Good organization of stored materials is essential for overcoming material storage problems whether on a temporary or permanent basis. There will also be fewer strain injuries if the amount of handling is reduced, especially if less manual material handling is required.

Stacking cartons and drums on a firm foundation and cross tying them, where necessary, reduces the chance of their movement. All storage areas should be clearly marked.

Flammable, combustible, toxic and other hazardous materials should be stored in approved containers in designated areas that are appropriate for the different hazards that they pose.

FINAL WORD

Housekeeping is important in ensuring safety and productivity in the workplace.  By keeping your workplace clean, you will be able to work easier and you will not have to deal with the frustrations of tripping over tools, equipment, or wasting time searching for something that was not put away in its proper place. Everyone must do their part if this is to succeed, so remember to help out and keep things clean.


Be Wary of Warehouse Hazards

WHAT’S AT STAKE?

There are thousands of warehouses across North America, employing more than 100 000 people, and these workers face a host of potential hazards. In fact, the fatal injury rate for the warehousing industry is one of the highest of all industries.

WHAT’S THE DANGER?

It shouldn’t be a surprise that warehouse workers are at risk of musculoskeletal diseases, often related to improper lifting or overexertion. However, a warehouse also has other dangers, ranging from possible exposure to chemicals, forklift accidents, explosions, fires and falling materials.

Example

A man working in an electronics store warehouse fell six feet/two meters to his death, as he attempted to retrieve boxes from a forklift. The man was standing on a wooden pallet raised by the forklift, despite written warnings on the forklift stating it was not to be used to lift people. The victim was not wearing fall protection and neither the forklift nor the wooden pallet was equipped with a guardrail to prevent a fall.

The man was found bleeding from the back of his head. His pulse was faint, and his breathing was irregular. Coworkers began CPR and called 911. However, their efforts to save him were not successful. He died from blunt force trauma to the head.

HOW TO PROTECT YOURSELF

Learning about the hazards in your warehouse and how to avoid them will result in a safer work environment for you and for coworkers.

Remember these safety guidelines in warehouse and all storage areas:

  • Personal Protective Equipment will be required in many circumstances. Hardhats, leather gloves, safety-toed footwear and safety eyewear will be needed for many warehouse jobs.
  • Be aware of all the precautions for materials you are handling. If you’re moving containers of chemicals, you will need certain protective clothing. Consult the chemical’s safety data sheet to learn about the chemical’s hazards and how to protect yourself.
  • Learn to lift safely, using the strength in your legs rather than your back. Get help when lifting heavy or awkward loads. Use lifting and moving equipment such as jacks and carts to save your back from injury.
  • Stack materials safely. Use appropriate shelving, racks or pallets. Strap or interlock items for security. Put heavier items on the bottom.
  • Emergency exits and equipment must always be kept clear. When stacking materials, maintain proper clearances under overhead sprinklers and leave aisles wide enough for firefighters and first aid crews to work.
  • Keep aisles and traffic areas free of obstacles, which can cause tripping accidents.
  • Barricade and report any spills on the floor so they can be cleaned up before someone slips and falls.
  • Good lighting is required for warehouse safety. Report burned out light fixtures so they can be replaced.
  • Stay alert around plant vehicles. Pedestrians are often the victims in forklift accidents, so stay clear of mobile machinery.
  • Operate a forklift only if you have the training and authorization to do so.

FINAL WORD

Always keep your warehouse work area safe by reporting hazards and following safe work practices.


Making Safe Work Zones

WHAT’S AT STAKE?

Each year, many construction workers are killed in work zones. Their deaths could have been prevented. They were run over by motorists, backed over by construction vehicles and electrocuted by overhead power lines.

Roadway work zones are some of the busiest, and potentially most hazardous, work environments you can find, as workers perform tasks in close proximity to vehicles that are often traveling at high speeds.

WHAT’S THE DANGER?

According to the Federal Highway Administration, 799 work zone fatalities took place in the U.S. in 2017, a two percent increase over 2016.

According to ASSE, transportation accidents have been the leading cause of on-the-job deaths in the United States every year since 1992. In 2007 alone, 835 deaths resulted from motor vehicle crashes in U.S. road construction work zones.

From distracted driving to a lack of awareness of the work being performed, to motorists traveling at excessive speeds, work zone incidents are caused by a variety of reasons. With all of this in mind, contractors, safety professionals, workers and others can take several steps to help prevent work zone incidents. In addition, emerging technologies can notify workers when a workplace intrusion has occurred.

HOW TO PROTECT YOURSELF

Work Zone Safety Tips

Designate team leaders. Hold a pre-job team meeting with the entire team, and use this time to determine who will lead communication on behalf of the traffic control team, the contractor and the controlling agency. This will ensure that all teams are on the same page before the project begins.

Establish good relationships with the controlling public agency. A strong relationship means you’re communicating and everything works better, which makes it safer. You would want to get on the road to set up as soon as you can, and the flexibility to start early begins with a good agency relationship. Set up “pre-warning signs” or “advanced warning signs” without breaking any regulations.

Pre-marking the work zone. This is especially valuable when setting up highway work zones. Have a job supervisor visit the work zone ahead of time and mark where signs and devices should be placed. This will make the setup process quicker and safer, leaving less room for error.

Manage time – before, during and after the project. Allow enough time to safely deploy and remove required lane closure equipment. Traffic control setup can, unfortunately, sometimes be an afterthought, and work is typically being done under a tight deadline. Setting up traffic control equipment takes time and planning, and while pre-marking the work zone will increase efficiency, this is still a time-intensive task that workers should not rush through. Mistakes can put workers and drivers in high risk for injury or death.

Use communication devices. Having the proper communication devices is critical because most work zones are noisy and workers may be setting up closures for several miles. Use radio devices that allow supervisors to provide the full traffic control team with instructions at the same time, despite outside noise and distance. Project managers can dial into the channel as well, and this will allow them to stay apprised of progress.

There are THREE WAYS to help prevent workplace intrusions in the context of making a safe work zone.

1. Traffic Control Plan

Protecting workers and motorists on roadways of any size requires an understanding of the regular traffic flow on a particular roadway and how construction activities will disrupt that flow. This forms the basis of the plan for how you will control traffic over the course of a construction project.

The project constructor should establish a traffic control plan for the entire work zone that addresses four key areas:

  • The advance warning area: This is the section of the highway where road users are informed about the upcoming work zone or incident area.
  • The transition area: In this section, road users are directed out of their normal path.
  • The activity area: This area is where work activity occurs. It is made up of the work space, the traffic space and the buffer space.
  • The termination area: In this area, users return to their normal path.

2. Implement Protective Safety Measures

Creating a protective barrier between motorists and workers is an essential step. This enables workers to perform their tasks safely while motorists move about the roadway. Based on the established traffic control plan, decision-makers must determine which barriers will best protect motorists and workers.

Positive protection measures need to be considered for each of these working conditions:

  • Working zones that provide no means of escape (e.g., tunnels, bridges) from external motorized traffic intruding into the workspace
  • Long duration work zones (e.g., two weeks or more) resulting in substantial employee exposure to motorized traffic
  • Projects with high anticipated operating speeds (e.g., at least 45 mph or 72 km/h), especially when combined with high traffic volumes (more than 20,000 vehicles per day)
  • Work operations that place employees within one-lane-width of travel lanes open to traffic
  • Roadside hazards, such as drop-offs or unfinished bridge decks, that will remain in place overnight or longer

Protective measures take many forms, from electronic signage and arrow panels to rumble strips and pavement markings. Depending on the project, one or a combination of these methods may help improve safety. Safety professionals working with these hazards and exposures should determine the most appropriate controls for a particular project based on site-specific circumstances.

3. Improve Worker Visibility

For motorists to operate safely around workers on the roadway, they must be aware of their presence. A10.47 states that all workers, including emergency responders, within the right-of-way who are exposed either to traffic (vehicles using the highway for purposes of travel) or to work vehicles and construction equipment within the work zone wear high-visibility safety apparel that meets the Performance Class 2 or 3 performance requirements of ANSI/ISEA 207.

This type of apparel takes on added importance in any nighttime construction work when overall visibility is diminished. A10.47 also explains illumination requirements to develop an illumination plan for night work so that workers are clearly visible, and to help control glare in such working situations.

Along with PPE, flaggers often play a major role in alerting motorists to the presence of workers, as well as controlling traffic flow through the use of hand signals, signs or automated devices. A10.47 provides guidance on how to best employ and position flaggers as well as how to ensure they are visible and have an escape path should an intrusion occur.

FINAL WORD

Most states have instituted new laws regarding work zones; penalties for speeding in these areas are double that of the normal penalties for speeding in a non-work zone stretch of road.


Operator Visibility Around Heavy Equipment

WHAT’S AT STAKE?

In some cases, it is nearly impossible for an operator to see a person standing next to the equipment. An operator must always remain patient and cautious. Never proceed or use reverse to back into an area without knowing what is there.

The heavy equipment workplace is fraught with danger without the implementation and execution of well-thought out safety protocols and practices.

WHAT’S THE DANGER?

HAZARDS WHEN WORKING WITH CONSTRUCTION EQUIPMENT

There are three potential hazards on a construction site: access, mechanical and non-mechanical. When operators, ground workers and project managers are situationally aware, it can decrease the effects of the fatal four from reaching your sites.

Access Dangers

An access hazard is when there is unsafe entry to machinery on a job site. Workers can become trapped or exposed to hazards that are both mechanical and non-mechanical. If you conduct proper planning, put safeguards in place and boost your workers’ awareness, you can help them avoid getting stuck between objects or caught in other severe situations.

The best way to diminish access hazards is to communicate information regarding each type of danger around heavy machines and where particular people have access.

Mechanical Dangers

Because construction equipment can harbor enormous amounts of power, capable of destroying buildings and uprooting the Earth, imagine its effects on a human being. While it may not be the best picture to imagine, it’s a concern you must think about as a manager.

Mechanical hazards that can affect workers include colliding surfaces, sharp edges, rotating shafts, scissor actions, crushing, cutting, severing and puncturing. Slips and falls can even occur if someone is attempting to dodge a moving part.

Non-Mechanical Dangers

Hazards can also result from non-moving components. Machines have stored energy in the form of pressurized gasses and fluids, along with hot surfaces and electrical charges. A non-mechanical danger can involve harmful substances like chemicals and emissions. Engines also put off loud noises that can damage hearing. Operators and mechanics should assess their machines for non-mechanical hazards before and after each usage.

Common non-mechanical dangers on a construction site include:

  • High-intensity lights like welding flashes and lasers
  • Flammable substances
  • Lead, cadmium and mercury
  • Steam
  • Conducted or radiated heat
  • Radiation like X-rays and microwaves
  • Dust

From these various hazards, people can suffer from lung damage, burns, blindness, hearing impairments and even an increased risk of cancer-related illnesses.

HOW TO PROTECT YOURSELF

SPOTTERS

Blind spots can be a significant operator issue. A spotter, trained in hand signals, can help provide safety guidance and communication between the operator, workers and nearby pedestrians to compensate for blind spots.

Spotters should wear high-visibility clothing and stand clear of equipment at all times.

GROUND-WORKER AWARENESS AND SAFE WORK PRACTICES

Ground workers also play an important role to help minimize the risk of heavy equipment-related injury.

  • Wear high-visibility clothing when working around heavy mobile equipment.
  • Avoid positioning themselves in a blind spot or riding on moving equipment.
  • Avoid setting up their work area near heavy mobile equipment. The operator may not see them if they are bending over to work or grab a tool.
  • Avoid walking or working under a suspended load.
  • Make eye contact with and alert the operator—and ensure the operator sees you—before approaching a vehicle.
  • Ride only in approved seats and wear a seat belt.

Construction workers are around heavy equipment every day, and they can become accustomed to the presence of heavy equipment, not giving much thought to the risks. Taking some time to understand and follow safety rules—and staying alert while on the job—can help construction workers stay safe.

OPERATOR SAFE WORK PRACTICES

In addition to being trained and familiar with the equipment being operated, operators can help reduce the risk of injury or fatality associated with heavy equipment through safe practices.

  • Be familiar with the equipment and the operator’s manual.
  • Inspect the equipment at the start of each shift, including the brake system, headlights, taillights, brake lights, windshield wipers and audible warning devices, such as the horn and the back-up alarm.
  • Adjust all side and back mirrors to help compensate for blind spots.
  • Ensure workers are clear of equipment before operating.
  • Acknowledge and allow safe passage to workers who alert you that they are approaching.
  • Avoid operating equipment parallel to slopes or embankments.
  • Turn off the engine and engage brakes before leaving equipment.
  • Face the equipment, maintaining three points of contact, while getting on and off the equipment.
  • Always wear the seat belt.
  • Avoid overloading vehicles.
  • Top loading vehicles must have cab shields and canopy protection.
  • NO RIDERS! Only equipment that is designed to carry multiple persons shall have more than one occupant!
  • Wear high visibility clothing and Personal Protective Equipment
  • Never work under a suspended or overhead load
  • Watch for shifting or unstable loads and working surfaces
  • The use of cell phones is prohibited except for job-related or emergency situations
  • Always stay alert

Many times, when workers think the can be seen by the operators of heavy equipment they can’t. You may be in a blind spot or the operator has been driving in a designated travel path for a period of time and the only thing that has changed is you! Make eye contact with operators!

FINAL WORD

One of the best things a manager/supervisor can do is to introduce a culture that puts worker safety first. When the company does not give a full throated commitment to worker safety, the entire crew is at risk.


Shiftwork Safety Talk

WHAT’S AT STAKE?

A lot of people think of “work hours” as the daylight hours from 8 or so in the morning until 5 or so in the afternoon. But For many people, their workday either starts in the afternoon and ends late at night, or begins around midnight and ends in the early morning. Be aware that your safety is just as critical as the day crew, but that conditions and hazards may be different.

WHAT’S THE DANGER?

CIRCADIAN CLOCK

For employees who work rotating or night shifts, remaining alert can be especially challenging when the body’s clock is compromised – that is, the body is active when it believes it should be resting.

The Impact of Shiftwork on Safety & Company Performance

Shiftworkers face considerable challenges. Their morale is often low. Their family and social lives may suffer because of their irregular hours, which contributes to their stress. The quantity and quality of shift workers’ sleep is also typically low. So it’s no surprise that sleep disorders, such as obstructive sleep apnea, are commonplace among shiftworkers. Shiftwork has also been associated with an increased risk of:

  • Cardiovascular disease;
  • Gastrointestinal disorders;
  • Obesity; and
  • Diabetes.

The increased prevalence of such health problems often results in shiftworkers’ increased use of medication, which can adversely affect their job performance.

CHALLENGES / DANGERS ASSOCIATED WITH SHIFTWORK

The potential for accidents and injuries tends to be significantly higher on night shifts than during the day.

  • The type of work may be different. Some companies schedule inherently heavy or more hazardous work at night when fewer people are around. This reduces the risk for the many, but not necessarily for those on a graveyard or swing shift.
  • It’s more difficult to see in the dark. Artificial light can’t illuminate every surface, which can result in more trips and falls. This also makes night driving more hazardous.
  • Shift work may result in psychological problems for shift workers who fail to eat, rest and sleep adequately. Research indicates that shift workers may suffer depression, increased alcohol use, and even symptoms of physical illness.
  • The potential for criminal behavior may increase the need for security by both the company and employees, since the cover of darkness is often used to help people commit crimes.
  • Night workers who lack seniority for day shift assignments may be less experienced and less aware of safe work practices. This can make them more hazardous to themselves and others.

HOW TO PROTECT YOURSELF

FATIGUE PREVENTION

Shiftwork and shift workers are necessary and instrumental in keeping so many vital operations goings 24 hours a day, seven days a week. This could mean working nights or alternating days, nights and afternoons, or other irregular shifts.

Shift work comes with inherent risks/dangers. The following are safety practices to assist in mitigating the dangers of shift work.

Require Daytime Managers to Periodically Work at Night

Managers who’ve experienced the challenges of working at 4 A.M. are more likely to think of practical ways to improve the safety and wellness of their shift workers than managers who’ve never experienced a night shift.

Evaluate your Work Environment

Conduct a comprehensive review of your workplace to identify factors that contribute to fatigue – such as dim lighting, poor airflow, and warm temperatures (i.e. over 70 degrees).

Put Shiftwork Safety on the Agenda

Make sure that overnight safety is a mandated discussion point at safety committee meetings and that night workers have a seat at the table.

Teach Workers about Sleep and Napping

Getting enough off-duty sleep is the most effective way to maintain alertness. You can’t force workers to sleep, but you can ensure that they are given sufficient shiftwork lifestyle training to educate them on the fundamental importance of sleep, getting quality daytime sleep, and making the most of pre-work naps.

Permit Several Short Breaks

Many shiftwork jobs involve doing the same task for long stretches of time. This monotony can induce microsleeps and other lapses in alertness – especially on the night shift. In addition to a 25- to 35-minute break per shift, workers on the night shift benefit from a 10- to 15-minute break every two or three hours.

Assess your Schedule

No shiftwork schedule is perfect, but some are particularly difficult. Schedules that require workers to rotate backward (i.e., to go from nights to evenings to days) or work five or more consecutive 12-hour shifts can exacerbate fatigue levels.

Monitor Overtime

People are more likely to make mistakes when they’ve accumulated a sleep debt from several days of insufficient sleep — which may result from excess overtime. Keep an eye on overall overtime levels (including a breakdown of day vs. night OT hours) and identify individual “overtime hogs” who accrue large amounts of extra work hours.

Standardize Shift Change Procedures

A large proportion of accidents occur during shift changes because of the additional movement around the plant and the increased need for communication among workers. Make sure you have procedures in place that ensure a smooth transition between shifts.

Watch Out For “The Wall”

Due to the dip in circadian rhythms, the hours between 4 and 6 A.M. are generally the hardest — and riskiest — hours of the night shift to work. Exercise has been shown to boost alertness, making an exercise bike or treadmill available for interested workers may minimize the risk of “hitting the wall”.

Don’t Forget the Drive Home

Due to the increased risk of falling asleep at the wheel, the post-shift commute home is often a dangerous part of a shift worker’s day. Provide workers with a quiet room to nap in before heading home.

Provide Shiftwork Lifestyle Training

Whether it’s handing out relevant literature, providing training online, or holding in-person seminars – it’s always a wise idea to educate workers on the health and safety challenges of shiftwork. Providing shiftwork lifestyle training is also a great way to show workers that you recognize the unique challenges they face – which can improve employee morale.

FINAL WORD

Studies show that if a company can improve the quality of life of its shiftworkers and help them better manage the challenges posed by shiftwork, it can reduce absenteeism, turnover, safety incidents and workers’ compensation claims. Management that invests in a lifestyle training program for shiftwork will pay off in big dividends for all in the future.


Silica – The Dangers of Silica

WHAT’S AT STAKE?

Many common construction work tasks generate harmful levels of crystalline silica dust if proper controls are not followed. When silica dust builds up in your lungs, you are at risk of developing a serious lung disease called silicosis, which can lead to death. Silicosis is not curable, but it is preventable.

WHAT’S THE DANGER?

What is Silica?

Silica is the basic component of sand and rock. Some common silica-containing materials include:

  • Concrete, concrete block, cement and mortar
  • Masonry and tiles
  • Brick, refractory brick
  • Composite products such as Hardiplank
  • Granite, sand, fill dirt, top soil
  • Asphalt containing rock or stone
  • Abrasive used for blasting

You may be exposed to silica when working with or around these materials.

EXPOSURE RISKS

The cutting, breaking, crushing, drilling, grinding, or abrasive blasting of these materials without proper controls will produce fine silica dust. You can’t see dust particles but that does not mean there isn’t silica in the air. Silica particles can hang around for an entire work shift without being visible to the naked eye.

If you do one of the following activities, you are at risk of breathing silica dust:

  • Chipping, sawing, grinding, hammering, and drilling of rock, concrete, or masonry
  • Crushing, loading, hauling, and dumping of rock
  • Sawing, hammering, drilling, grinding, and chipping of concrete or masonry
  • structures
  • Demolition of concrete or masonry structures
  • Power cutting or dressing stone
  • Abrasive blasting and hydro blasting of concrete
  • Clean-up activities such as dry sweeping or pressurized air blowing of
  • concrete or sand dust
  • Tunneling, excavation, and earth moving of soils with high silica content

What Happens When Someone Breathes in Silica Dust?

Silicosis is a type of lung disease that occurs when silica dust is inhaled. The dust contains tiny shrapnel like particles of crystallized silica that cause tiny tears in your lung tissue, resulting in patches of scar tissue when the tear is repaired by your body. Some who have been exposed to silica in high concentrations experience symptoms in a few weeks, or gradually get symptoms with smaller exposures over 4-10 years.

HOW TO PROTECT YOURSELF

The employer has the fundamental obligation to provide a safe work environment.

Identify Materials That May Contain Silica

For some materials, the employer can look at a Safety Data Sheet (SDS) or contact the manufacturer to determine if a product contains silica. For other materials such as rock,  soil and concrete there may not be an SDS. When that’s the case assume that the material contains silica unless testing shows otherwise.

Identify Activities That Create Dust

Review your operation to determine where employee exposures to silica dust may be occurring. Be sure to include cleaning and maintenance activities. These tasks, even if they take less time or are done less frequently, often expose employees to large amounts of dust.

Provide Protective Clothing and Hygiene Facilities

Protective clothing and proper hygiene not only protects employees on the job, they also prevent workers from bringing home toxic materials. To protect workers and their families, employers should:

  • Provide washing facilities at the worksite
  • Ensure workers wash before eating, drinking, or smoking and before leaving the workplace.
  • Prohibit food, drink, and tobacco products in areas where silica dust is present.
  • Provide disposable or washable work clothes.
  • Ensure that workers change into clean clothes before leaving the worksite.

Ensure Proper Housekeeping

Proper housekeeping practices include the following:

  • Use HEPA-filtered vacuum cleaners or water for cleaning up equipment or surfaces.
  • Prohibit the use of compressed air for cleaning equipment, surfaces, and clothing.
  • Prohibit dry sweeping and shoveling.

Control Exposures

Exposures to silica dust can be eliminated or reduced using one or more of the following methods:

Substitution: The best way to eliminate exposure to silica is to use an alternative, less toxic substance.

Engineering and Work Practice Controls: In many cases, it is impossible to eliminate or find a substitute for silica. The next best solution is the use of engineering and work practice controls. Examples of these control methods include:

  • Enclose the process
  • Enclose the worker
  • Use wet methods
  • Use local exhaust ventilation
  • Institute procedures and work practices that minimize the amount of dust produced

Respiratory Protection

Occupational health and safety professionals (and Cal/OSHA) consider respirators a control method of last resort, rather than a preferred means of protecting employees. However, sometimes respiratory protection is appropriate, as in the following circumstances:

  • During the time needed to implement engineering and work practice controls.
  • If engineering and work practice controls do not reduce exposures sufficiently.
  • For operations where engineering and work practice controls are not feasible, such as some maintenance and repair activities.

Written Respiratory Protection Program

When respirators are used to prevent overexposures, a written Respiratory Protection Program is needed. The elements of this program include:

    • Appropriate respirator selection
    • Medical evaluation to determine the ability of a worker to use a respirator
    • Annual face seal fit-testing
    • Procedures for routine and emergency use
    • Respirator inspection, cleaning, disinfecting, maintenance, storage, and repair
  • Air quality for supplied-air devices
  • Annual employee training
  • Periodic program evaluation

Monitor the Air Employees Breathe

How do you know if your workers are breathing too much silica dust? Air monitoring by a trained professional, such as an industrial hygienist, can determine the level of silica exposure in your workplace. By knowing if and where employees are overexposed, you can allocate your resources wisely and put control measures in place where they are needed.

FINAL WORD

Common methods and best practices for eliminating or reducing exposure are a combination of dust suppression, erecting barriers, and PPE. Some of the controls come in forms of continuous water spray, HEPA vacuums, dust caps, tape barriers, and full enclosure systems sometimes including negative air units. PPE could include tyvek suits, eye and hand protection and respirators. PPE should be your last line of defense in protecting yourself.